

Your pressure cooker sits cold and silent while dinner plans unravel. Instead of hearing that reassuring hiss as steam builds, you’re left with lukewarm water and raw ingredients after 30 minutes. This exact failure happens daily to pressure cooker owners—whether you use an Instant Pot, Ninja Foodi, or classic stovetop model. The good news? 95% of pressure cooker not pressurizing issues resolve with simple fixes you can complete in under five minutes. This guide cuts through the confusion with targeted solutions for your specific model.
Most failures stem from preventable issues in four key areas: liquid volume errors, sealing ring problems, user setting mistakes, or overlooked maintenance. We’ll start with the fastest checks first—no tools required—so you can get back to cooking before your family notices dinner’s delayed. By the end, you’ll know exactly why your cooker won’t seal and how to fix it permanently.
Add Minimum Liquid Without Stirring
Insufficient liquid causes 60% of pressure cooker not pressurizing failures. Your cooker needs steam generated from pooled liquid at the bottom—not from ingredients—to create pressure. Electric models like Instant Pots require exactly 1 cup (240ml) minimum, while stovetop versions need at least 1 cup (check your manual for specifics).
Why Your Liquid Isn’t Creating Steam
Stirring after adding liquid disperses it into ingredients, preventing the concentrated pool needed for steam generation. This mistake is especially common with thick dishes like chili or bean stews. If you’ve stirred, the liquid isn’t properly circulating. Critical fix: Add ½ cup extra liquid without stirring and restart. For grains or beans, ensure liquid covers ingredients by 1 inch plus the base 1 cup amount.
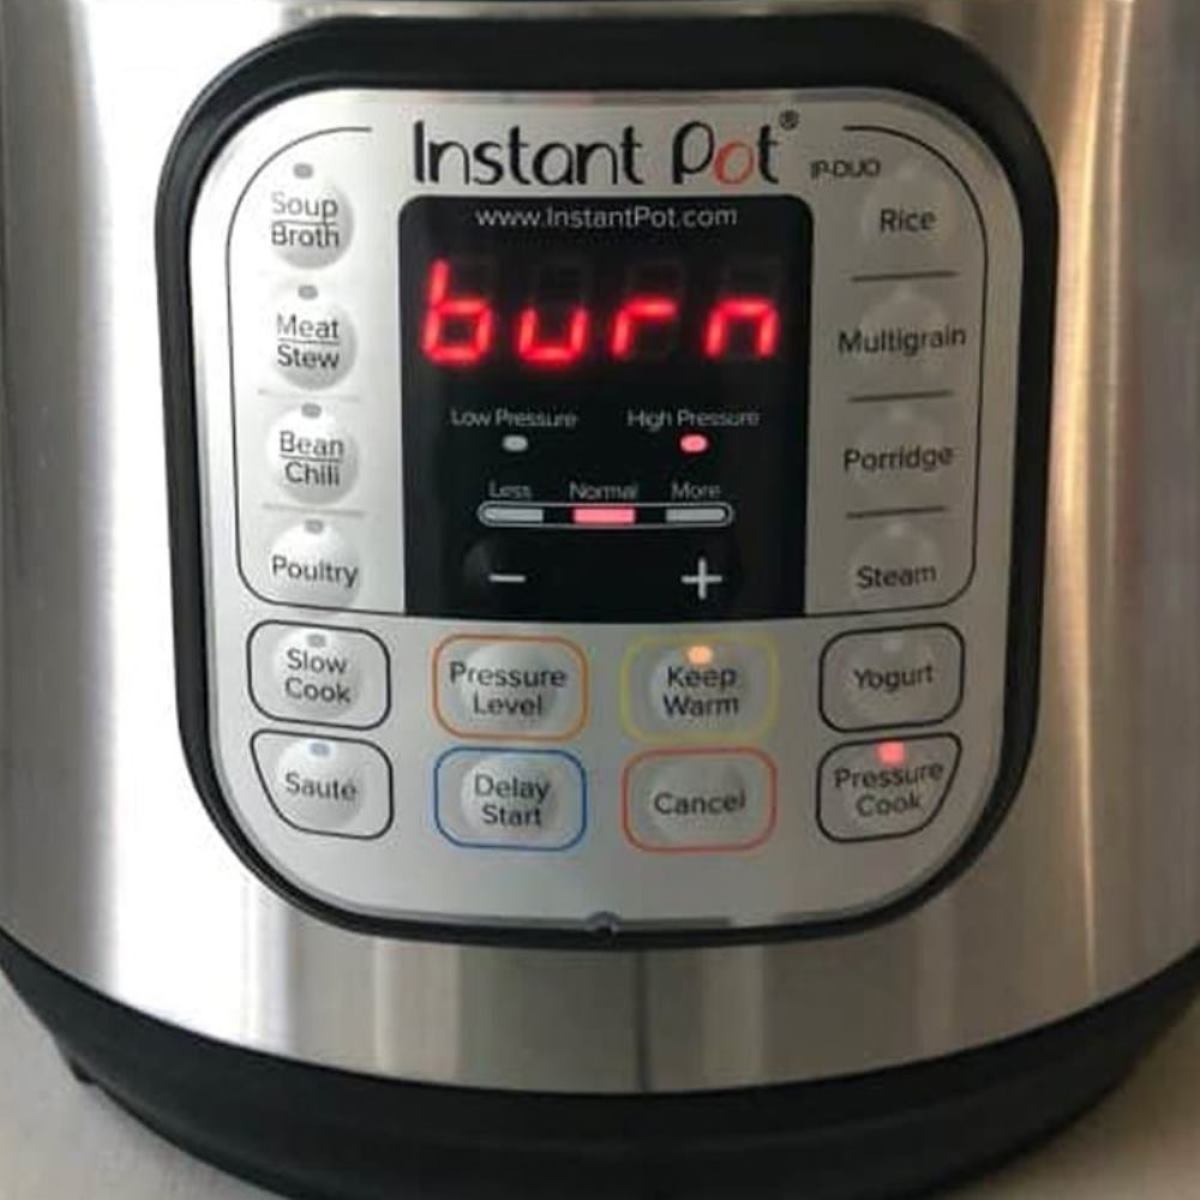
Thick Sauces Blocking Steam Formation
Overly thick sauces (like tomato-based meatball sauce) restrict steam movement, triggering “BURN” errors or endless heating without pressure. Don’t panic—this isn’t a hardware failure. Immediately thin sauces with broth or water before restarting. After cooking, thicken with a cornstarch slurry (equal parts cornstarch and warm water mixed separately) using the sauté function. Never add cornstarch directly to hot liquid—it creates lumps that worsen blockages.
Inspect Sealing Ring and Valve Position
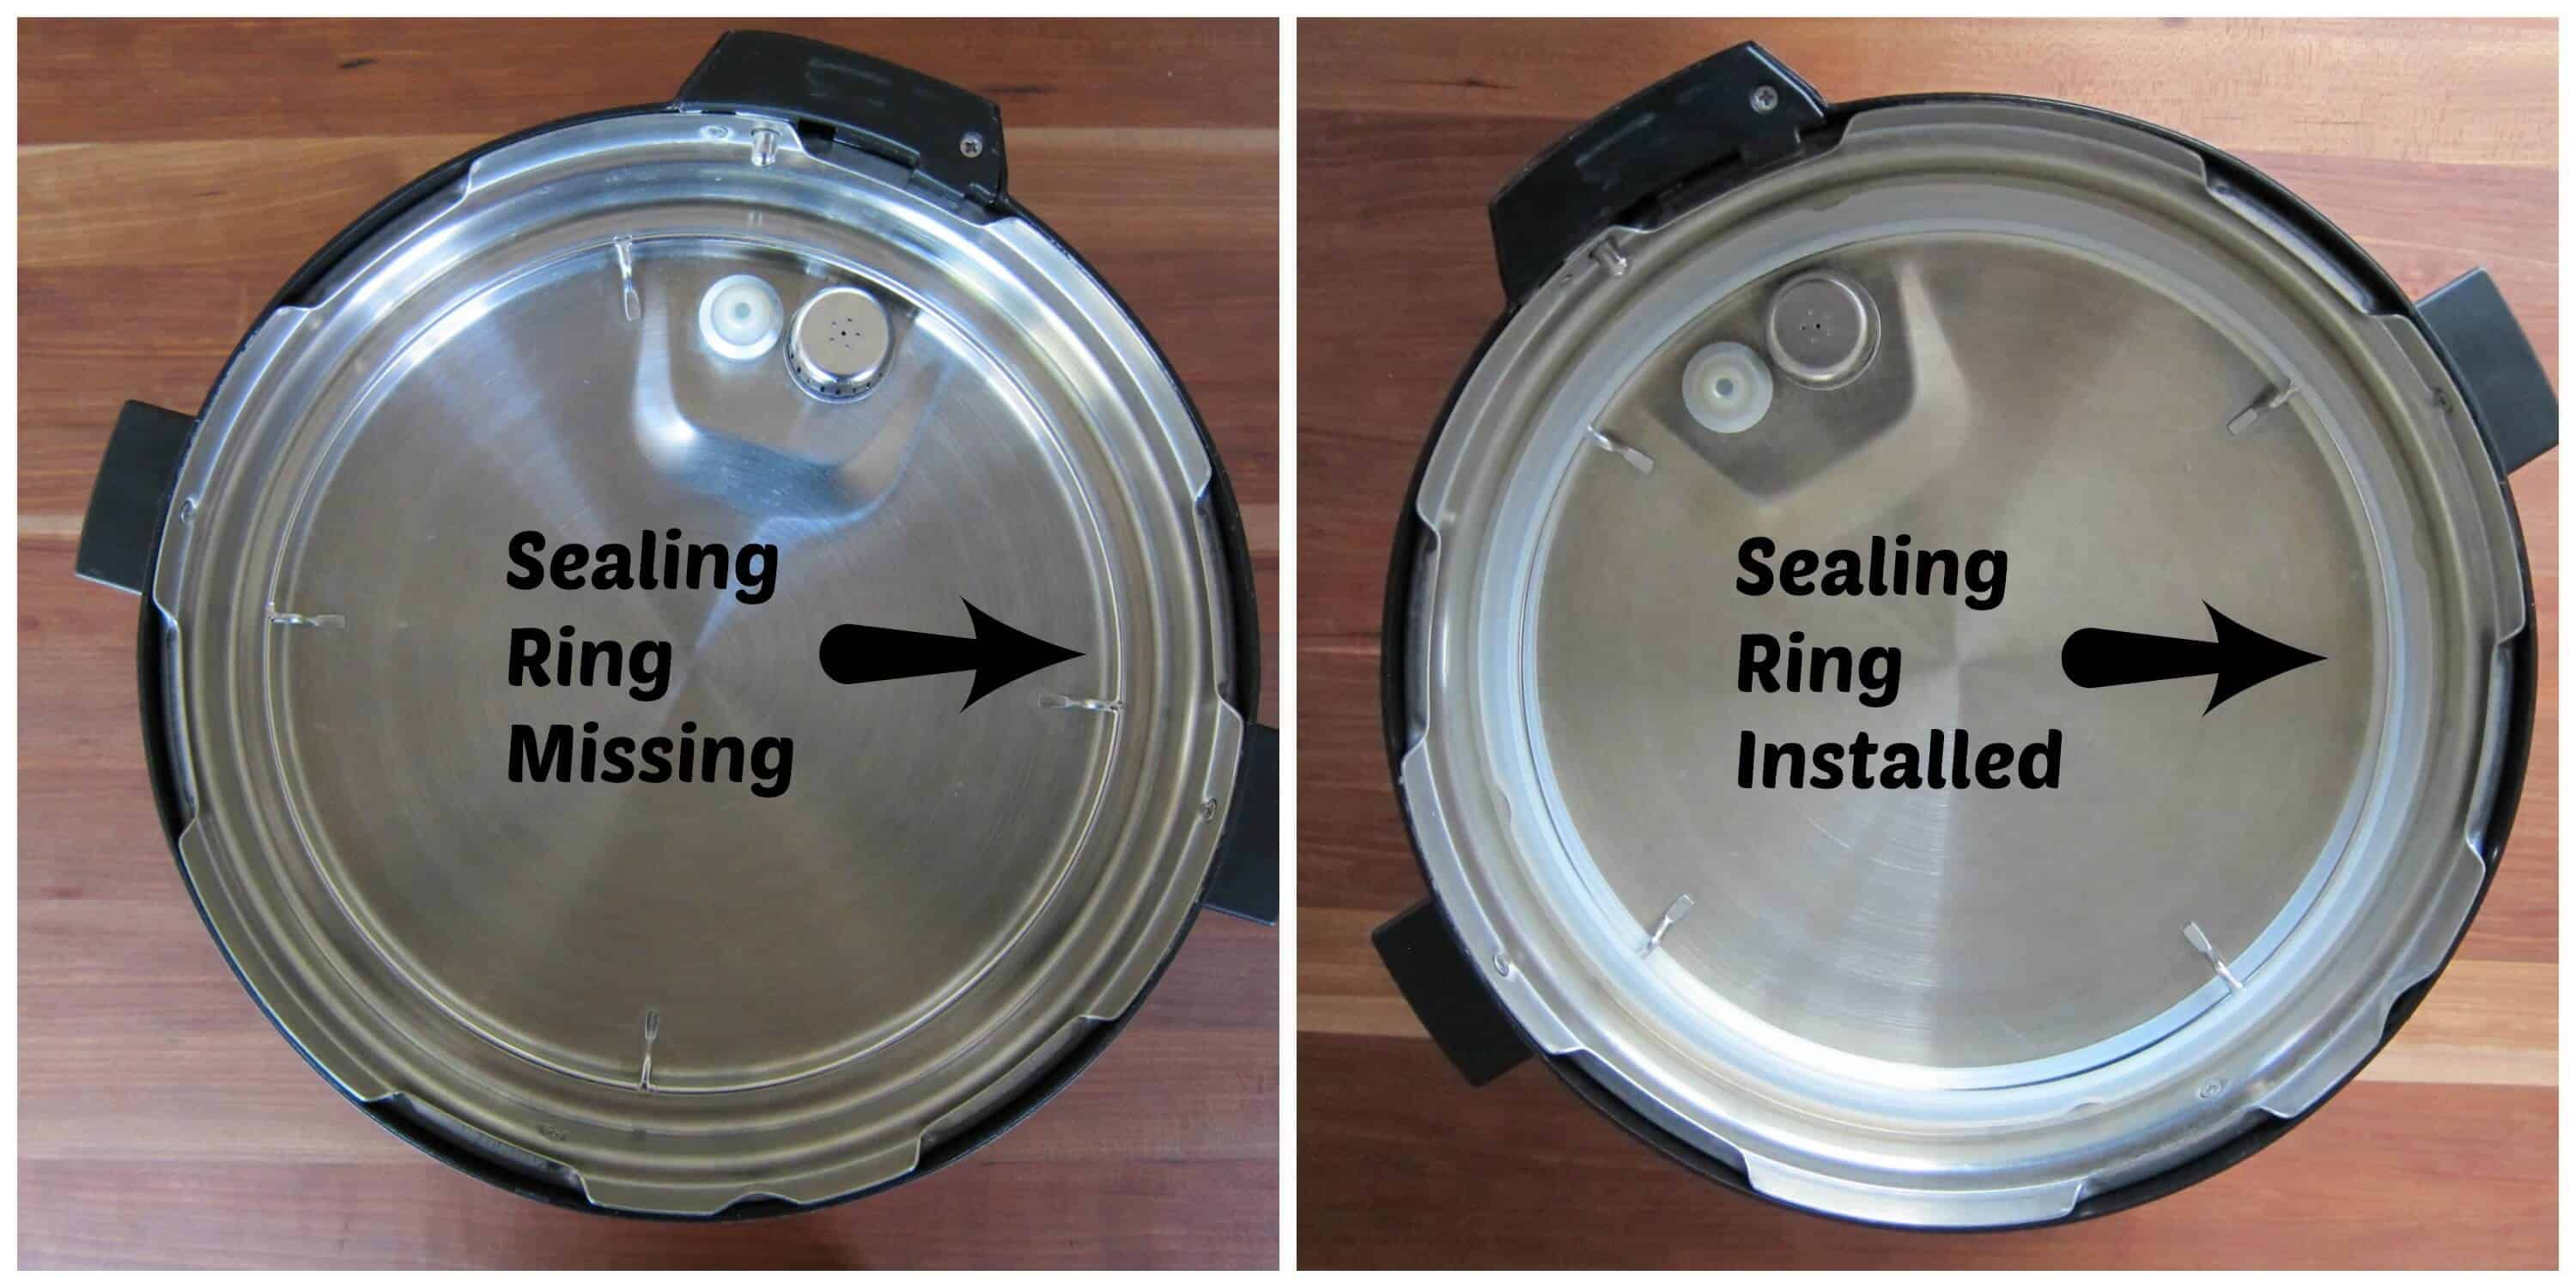
Steam escaping around the lid edges means your sealing system failed—a problem causing 25% of pressurization issues. This isn’t always a broken part; often it’s improper installation or debris you can fix in 60 seconds.
Gasket Damage You’re Missing
Check these three failure points immediately:
– Cracks or warping: Run fingers along the rubber ring’s inner edge
– Food residue: Shine a light into the lid’s groove for hidden particles
– Uneven seating: The ring should sit flush with no gaps visible
Follow this repair sequence:
1. Remove the gasket completely (don’t stretch it)
2. Wash with cold water (hot water degrades rubber)
3. Clean the lid groove with a damp microfiber cloth
4. Reinstall by pressing firmly around the entire circumference
Replace the ring immediately if it shows cracks, permanent dents, or lacks flexibility. Most need replacement every 12-24 months—keep a spare on hand since it’s the #1 failure part.
Pressure Release Valve Critical Checks
For electric models: The valve must point to SEALING, not VENTING. This single oversight causes thousands of unnecessary service calls yearly. Verify both valves:
– Float valve (small metal pin inside lid): Should move freely up/down when pressed
– Pressure release valve (top knob): Clear debris with a dry toothpick—never use water
Pro tip for sticky valves: Gently tap the valve housing with a wooden spoon handle. If it still won’t budge, run a water-only test before assuming hardware failure.
Avoid These 3 Costly User Mistakes

Even perfect equipment fails when these common errors occur. Fix them before assuming your pressure cooker is broken.
Overfilling Traps Steam Flow
Never exceed these fill lines:
– Electric models: ⅔ full maximum (instant pressure failure if overfilled)
– Soups/stews: ½ full only (they expand 30-50% during cooking)
– Minimum requirement: At least 1 cup volume for steam generation
Visual cue: If liquid touches the inner rim of the pot, you’ve overfilled. Remove some before restarting.
Wrong Settings Sabotaging Pressurization
Cold ingredients (like refrigerated chicken breasts) delay heating by 8-12 minutes. Let proteins sit out 15-20 minutes first. Also verify:
– Pressure level matches recipe (HIGH vs LOW)
– “Pressure Cook” mode is selected—not Sauté or Steam
– Lid is fully locked (electric models click audibly)
Critical check: Electric cookers won’t pressurize if the lid isn’t rotated into the locked position. Feel for the physical click.
Diagnose Hardware Failures in 5 Minutes
When liquid, sealing, and settings are correct but your pressure cooker still won’t pressurize, hardware issues may be the culprit. Perform this water test first:
1. Add 1 cup water to empty pot
2. Set to HIGH pressure for 5 minutes
3. Start timer when cooker begins heating
If it fails:
– No heating: Element failure (contact warranty support)
– Erratic shutoffs: Control board malfunction
– No pressure detection: Faulty sensor
Do not attempt DIY repairs on electrical components. Note your model number (e.g., Instant Pot Duo Plus 60) and purchase date before contacting manufacturer support.
Prevent 90% of Failures With Daily Habits
Your sealing ring’s lifespan determines reliability. Follow these non-negotiable routines:
– Remove and wash the gasket after every use (trapped grease degrades rubber)
– Clear valve pathways weekly with a dry toothpick
– Wipe the lid groove clean before storage
– Replace sealing rings annually—or immediately if cracked
Pro cooking adjustments:
– Pre-sauté meats to prevent sticking (deglaze with ¼ cup liquid)
– Cut vegetables uniformly for even steam distribution
– For stovetop models: Start on HIGH heat to reach pressure, then reduce to LOW
– Use 20% less liquid than conventional recipes—pressure cookers retain moisture
Final verification: After any fix, run a 5-minute water test. Your cooker should hiss steadily within 8-10 minutes with the float valve fully raised. If it still won’t pressurize, contact your manufacturer with your model number and water test results—most offer free replacement parts under warranty. Remember: 95% of pressure cooker not pressurizing issues stem from three fixable causes—insufficient unstirred liquid, a misaligned sealing ring, or the valve set to venting. Keep spare gaskets in your kitchen drawer; they cost less than $15 but prevent dinner disasters weekly. Now restart your cooker and reclaim your kitchen confidence.


