
That shiny new Instant Pot on your counter isn’t just another appliance—it’s your passport to restaurant-quality meals in half the time. Whether you’re struggling with tough cuts of meat that never tenderize or wasting hours watching pots boil, mastering how to use Instant Pot pressure cooker functions correctly transforms chaotic weeknights into stress-free dinners. Within minutes, you’ll understand why 10 million households rely on this multi-cooker: it builds intense steam pressure to cook food up to 70% faster while locking in flavors. Forget complicated manuals—we’ll cut straight to the exact steps you need to safely pressure-cook perfect meals starting today.
Most beginners waste months making preventable errors like underfilling liquids or misreading pressure signals. But after this guide, you’ll confidently navigate every beep and steam release. You’ll learn to diagnose why your pot isn’t pressurizing, choose between quick and natural pressure release, and avoid the dreaded “Burn” message. By the end, you’ll not only know how to use Instant Pot pressure cooker essentials but also troubleshoot issues before they ruin dinner. Let’s turn that intimidating gadget into your most reliable kitchen ally.
Identify Every Instant Pot Part Before First Use

Knowing your appliance’s anatomy prevents 90% of beginner errors. Unlike stovetop pressure cookers, Instant Pots have integrated safety features that only work when components are correctly assembled. Your model includes these critical elements regardless of size or series.
Essential Parts Checklist
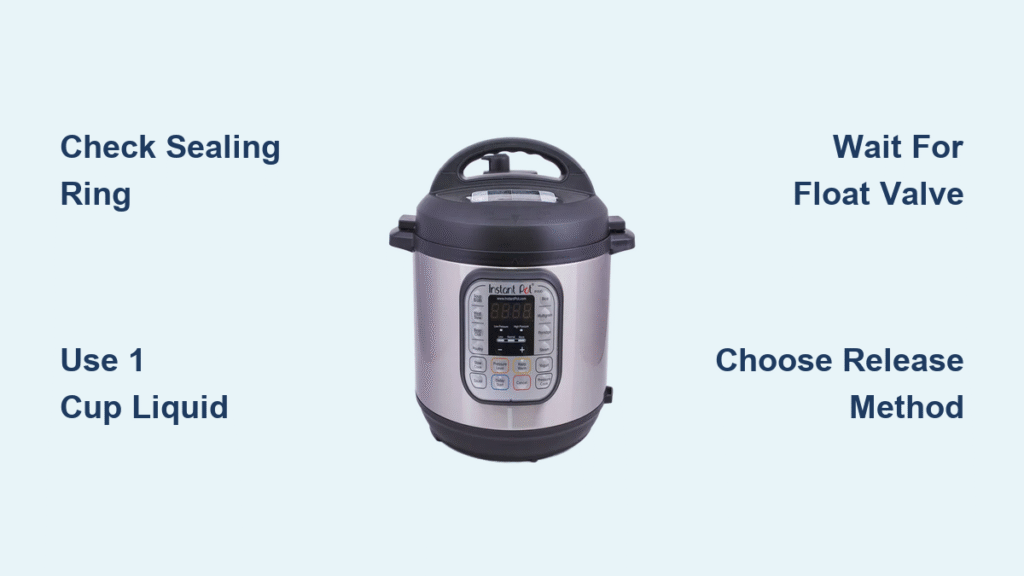
- Stainless steel inner pot: The removable cooking vessel that sits in the base (dishwasher safe). Never operate without it seated properly.
- Silicone sealing ring: Creates an airtight seal inside the lid groove. Replace yearly or if cracked—odors linger in old rings.
- Steam release valve: The rotating dial on the lid that switches between Sealing (for pressure buildup) and Venting (for quick release).
- Float valve: The small metal pin next to the steam valve that pops up when pressurized. Never open the lid until this drops completely.
- Trivet/steam rack: The three-legged metal stand for elevating food above liquid during steaming.
Quick Safety Inspection
Before adding ingredients, spend 30 seconds verifying:
1. The inner pot is clean, dry, and centered in the base unit
2. The sealing ring clicks securely into the lid’s groove with no twists
3. The steam valve moves freely between Sealing and Venting positions
4. The float valve depresses smoothly when pressed (indicates no clogs)
Perform Your First Instant Pot Water Test Correctly
Skipping this 5-minute test causes most early failures. The water test confirms your unit seals properly, teaches you pressure-cooking sounds, and prevents dangerous steam mishaps.
Step-by-Step Water Test
- Add 3 cups cool water to the inner pot (never use less—this creates minimum pressure)
- Place the trivet inside and close the lid clockwise until it clicks
- Turn the steam valve to Sealing (Ultra models auto-seal—skip this step)
- Press Manual or Pressure Cook, then set to 5 minutes using +/- buttons
- Wait for the “On” display: Hissing and clicking for 5-15 minutes means pressure is building
- Listen for the first beep: This signals pressurization complete—timer now counts down from 5
- Initiate quick release: When timer ends, carefully turn valve to Venting using an oven mitt
- Open slowly: Tilt lid away from your face only after the float valve fully drops
If pressure never builds, immediately check that the sealing ring is seated and steam valve is on Sealing. Never force the lid open—wait for the float valve to drop.
Decode Your Instant Pot Control Panel Buttons
![]()
Your Instant Pot’s buttons seem overwhelming, but three controls handle 95% of cooking. Model differences (LUX, DUO, ULTRA) change labels, not core functionality.
Daily-Use Buttons Demystified
- Manual/Pressure Cook: Your essential button for custom recipes (ignore preset buttons like “Soup” for full control)
- +/- Buttons: Adjust time during pressure cooking—tap rapidly for big changes
- Pressure Level: Toggle High (default for meats/stews) or Low (delicate sauces)—LUX models skip this
- Sauté: Brown meats without the lid—use “More” for searing, “Less” for simmering
- Keep Warm/Cancel: Ends cooking or maintains temperature for 10+ hours
Pro Tip: Always deglaze after sautéing. Scrape stuck bits with ½ cup liquid before sealing—this prevents “Burn” errors 100% of the time.
Get Liquid Ratios Right for Instant Pot Success
Liquid isn’t optional—it’s the engine of pressure cooking. Too little causes scorching; too much dilutes flavors. These rules apply to all 6-quart models (scale up 25% for 8-quart).
Liquid Requirements by Food Type
- Absolute minimum: 1 cup water/broth (8 fl oz)—never skip this baseline
- Foods that foam (oatmeal, beans): Fill inner pot no higher than ½ full to prevent clogs
- Soups and stews: Max ⅔ full—excess liquid blocks steam release
- Pasta and rice: Use 1.25x liquid to food ratio (e.g., 1.25 cups water per cup rice)
- Frozen foods: Add ¼ cup extra liquid to compensate for cold ingredients
Choose the Right Pressure Release Method for Your Recipe

Releasing pressure incorrectly turns tender chicken into rubber. Each technique affects texture differently—choose based on food type, not convenience.
Quick vs Natural Release
Quick Release (QR):
– Turn steam valve to Venting immediately after cooking
– Steam shoots out violently—always use a long spoon to avoid burns
– Best for: Vegetables, fish, eggs (stops cooking instantly)
– Time: 1-3 minutes until float valve drops
Natural Release (NR):
– Let pressure drop on its own without touching the valve
– Ideal for: Meats, beans, large roasts (continues gentle cooking)
– Time: 10-20 minutes (up to 30 for full pots)—never open early!
Hybrid Method (Most Reliable):
Wait 10 minutes for natural release, then quick-release remaining pressure. Perfect for shredded chicken or pot roast.
Cook Perfect Hard-Boiled Eggs in 5 Minutes
Eggs are the ultimate beginner test—they’re cheap, fast, and reveal if your pressure timing is accurate. Master this, and you’ve conquered core Instant Pot pressure cooking.
Perfect Eggs in 5 Steps
- Add 1 cup water to the inner pot with trivet placed inside
- Set eggs on trivet (don’t stack—they cook unevenly)
- Close lid, set to Sealing, and press Manual for 5 minutes on High pressure
- Quick-release steam immediately when timer beeps
- Transfer eggs to ice bath for 5 minutes—shells peel cleanly every time
Warning: Older eggs peel easier. Fresh farm eggs often stick—use store-bought for best results.
Avoid These 5 Instant Pot Beginner Mistakes
Even seasoned cooks make these errors when learning how to use Instant Pot pressure cooker functions. Fix these now to save ruined dinners.
Top 5 Instant Pot Errors
- Overfilling beyond ⅔ line: Causes foam overflow into steam valve—stick to fill markers
- Forgetting to set valve to Sealing: Results in “Not Heating” errors—always verify position
- Rushing natural release for meats: Shreds chicken into dry fibers—wait full 10-15 minutes
- Using insufficient liquid: Triggers “Burn” message—never skip the 1-cup minimum
- Opening before float valve drops: Dangerous steam explosion risk—always wait
Daily Cleaning Steps to Extend Your Instant Pot Life
Proper care prevents lingering odors and ensures reliable performance. Never skip these post-cook steps.
Daily Cleaning Protocol
- Remove sealing ring and rinse under warm water—soak in vinegar if odors persist
- Wash steam release valve by pulling straight up and clearing debris with a toothpick
- Hand-wash inner pot and trivet (dishwasher safe but hand-washing preserves non-stick coating)
- Wipe base unit with damp cloth—never submerge in water
- Store lid upside down on the pot to prevent ring compression
Critical: Replace the sealing ring annually. Cracks or permanent food smells mean it’s time for a new one—safety depends on a perfect seal.
Cook Time Cheat Sheet for Instant Pot Newbies
Start with these foolproof settings while learning how to use Instant Pot pressure cooker basics. Always use High pressure unless noted.
| Food | Time | Liquid | Release Method |
|---|---|---|---|
| Chicken breasts | 10-12 min | 1 cup broth | Natural 10 min |
| Brown rice | 22 min | 1:1 ratio | Natural 10 min |
| Whole potatoes | 12-15 min | 1 cup water | Quick release |
| Frozen meatballs | 5 min | ½ cup sauce | Quick release |
| Steel-cut oats | 4 min | 2:1 liquid | Natural 10 min |
Note: Cooking time starts after pressure builds (adds 5-15 minutes to total time).
Unlock Advanced Instant Pot Cooking Techniques
Once you’ve mastered how to use Instant Pot pressure cooker fundamentals, explore these game-changers:
– Pot-in-pot cooking: Place oven-safe dishes on the trivet to cook multiple items simultaneously (e.g., cheesecake while making soup)
– Yogurt making: Use the dedicated button to ferment milk after pasteurizing it via “Yogurt” function
– Batch cooking: Double shredded chicken recipes for meal prep—cook time stays identical
– Deglaze shortcuts: Use wine or broth immediately after sautéing to prevent “Burn” messages
Your Instant Pot journey starts today. By focusing on these core techniques—proper sealing, liquid ratios, and pressure release—you’ll avoid early frustrations and unlock consistent results. Remember: every “failed” cook teaches you more about steam dynamics and timing. Within two weeks of practice, you’ll wonder how you ever managed dinner without this powerhouse appliance. Ready to transform your cooking? Plug in that Instant Pot and start with the water test—you’ve got this.


