
That new pressure cooker sitting on your counter looks intimidating, doesn’t it? You’ve heard how it can cut cooking times by 70% and create incredibly tender meals, but you’re stuck on the most basic question: how to start a pressure cooker properly. The good news is that modern pressure cookers are designed with foolproof safety features that make the starting process straightforward once you understand the six critical steps. This guide cuts through the confusion with precise instructions that transform pressure cooking from a mystery into your most reliable kitchen technique.
Forget those horror stories about exploding pressure cookers from decades ago. Today’s models feature up to 10 built-in safety mechanisms that prevent dangerous pressure buildup. Whether you’ve got an Instant Pot on your counter or a stainless steel stovetop model, mastering how to start a pressure cooker correctly is the gateway to faster, more flavorful meals. By the time you finish this guide, you’ll confidently execute the complete pressure cooking cycle from initial setup to perfect pressure release.
Essential Liquid and Fill Requirements
Minimum Liquid Thresholds for Safe Operation
Pressure cookers require liquid to create the steam that builds cooking pressure—this isn’t optional. You need at least 1 cup of liquid (water, broth, wine, or sauce) for most electric models and ¾ cup for stovetop versions. Using less than this minimum prevents proper pressure buildup and triggers “burn” warnings on electric models.
Critical mistake alert: Never start your pressure cooker with dry ingredients only. The resulting scorching can permanently damage the inner pot and create dangerous pressure imbalances. If adapting a conventional recipe, reduce liquid by 25-50% since pressure cooking preserves nearly all moisture.
Maximum Fill Levels to Prevent Blockages
Overfilling causes the most common beginner failures. Follow these fill limits before starting:
– General foods: Fill no more than ⅔ full (leaves room for expansion)
– Foaming foods (beans, grains, applesauce): Fill no more than ½ full
– Liquids alone (for sterilizing): Fill no more than ½ full
Exceeding these limits allows food particles to clog the pressure release valve during operation—a dangerous situation that prevents proper pressure regulation.
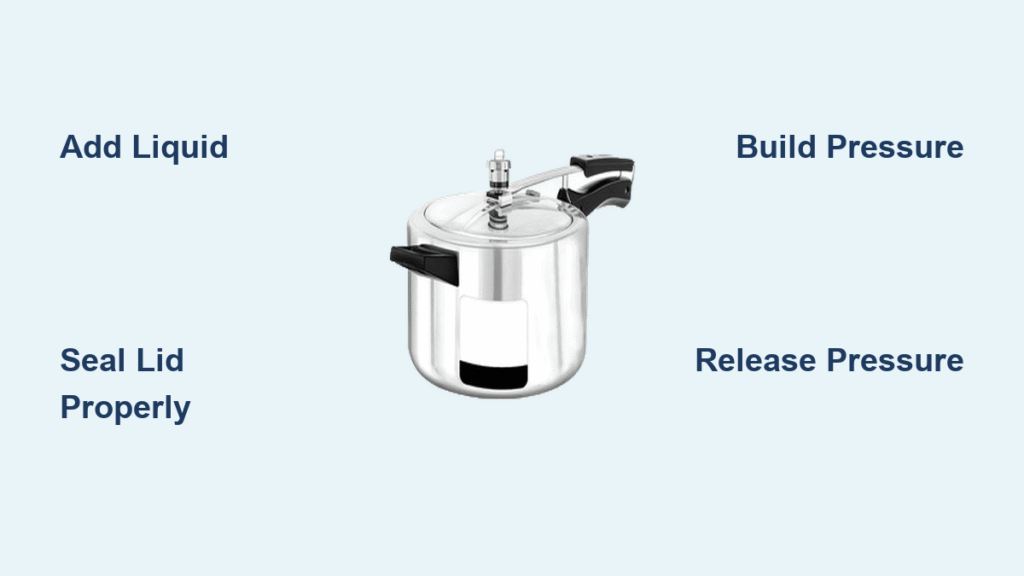
6-Step Pressure Cooker Starting Sequence
Step 1: Ingredient and Liquid Placement Protocol
Place solid ingredients in the pot first, then add your liquid. For meats, pat them completely dry with paper towels before seasoning with salt and pepper—this prevents steaming instead of browning. Always position vegetables like carrots and potatoes beneath meats to protect delicate items from direct heat.
Pro tip: Using hot liquid (simmering broth instead of cold water) reduces pressure build time by 3-5 minutes. This simple adjustment makes how to start a pressure cooker noticeably faster.
Step 2: Lid Sealing Verification System
Close the lid until it clicks or locks into place. For stovetop models, align the handles precisely. For electric models, twist clockwise until the lid indicator shows “locked.” Then perform the critical valve check:
- Electric models: Turn the pressure valve to “Sealing” position (usually a clockwise turn)
- Stovetop models: Ensure the weighted regulator sits correctly on the valve stem
Visual cue: Properly sealed lids won’t move when you try to lift them. If the lid lifts easily, reopen and realign.
Step 3: Heat Source and Pressure Configuration
Electric pressure cookers: Select your cooking program (Manual/Pressure Cook, Meat/Stew, etc.) then set time using +/- buttons. Most recipes use “High Pressure” as default (13-15 psi).
Stovetop pressure cookers: Place on burner over high heat. Set regulator to high pressure (15 psi) unless specified otherwise. Monitor closely until steam begins escaping steadily.
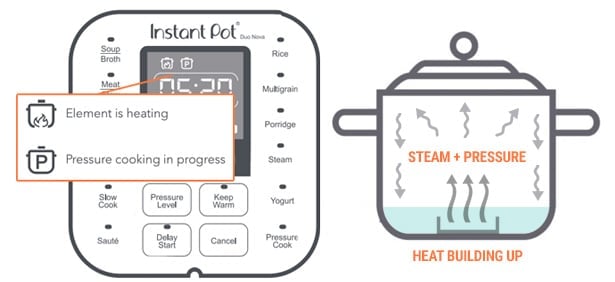
Step 4: Pressure Build-Up Recognition
This takes 5-15 minutes depending on contents. Recognize proper pressure buildup by:
– Electric models: Display shows “On” or “Heating” then switches to countdown
– Stovetop models: Steam escapes continuously for 30-60 seconds, then stops as pressure seals
Warning: Never leave unattended during this phase. Stovetop models require immediate heat reduction once pressure builds.
Step 5: Actual Cooking Time Commencement
Electric: Cooking time begins automatically when pressure is reached (display switches to countdown).
Stovetop: Immediately reduce heat to low/medium-low to maintain pressure once steam stops. Start your timer only after achieving full pressure.
Step 6: Strategic Pressure Release Selection
Choose based on food type:
– Natural release (10-30 min): For meats, beans, dense foods (prevents shredding)
– Quick release: For vegetables, delicate proteins (turn valve to “venting”)
– Cold water release: For stovetop models only (run under cold water)
Electric models won’t open until pressure releases completely—a critical safety feature.
Fix These 3 Common Starting Failures
Pressure Won’t Build: The Triple-Check Protocol
When your pressure cooker won’t reach pressure, systematically check:
1. Liquid level (add ½ cup more if below minimum)
2. Sealing ring position (remove and reinstall if misaligned)
3. Valve setting (ensure it’s in “Sealing” position)
Lid Steam Leaks: The Seal Restoration Process
If steam escapes around the lid during operation:
– Power off electric models or remove stovetop from heat
– Let cool completely before opening
– Clean sealing ring and pot rim thoroughly with vinegar
– Inspect for food debris in the sealing groove
Burn Error Messages: The Deglazing Solution
“Food Burn” warnings occur when food sticks during pressure buildup. Always:
– Deglaze after browning by adding liquid and scraping browned bits
– Ensure at least 1 cup liquid covers pot bottom
– Never start pressure cooking with thick sauces or purees
Browning Protocol for Flavor Maximization
Stovetop Browning Technique
Heat 1-2 tbsp oil uncovered over medium-high heat. Brown meats in small batches (don’t overcrowd), then set aside. Deglaze with ½ cup liquid, scraping browned bits. Return meat before sealing. This 5-minute step creates complex flavors impossible with plain pressure cooking.
Electric Sauté Function Optimization
Use the “Sauté” setting at “More” intensity for proper browning. Add oil after the pot heats (indicated by “Hot” display). Brown in batches, deglaze thoroughly, and cancel Sauté mode before sealing. Never skip this step for meats—it prevents bland, steamed results.
Precision Timing Framework
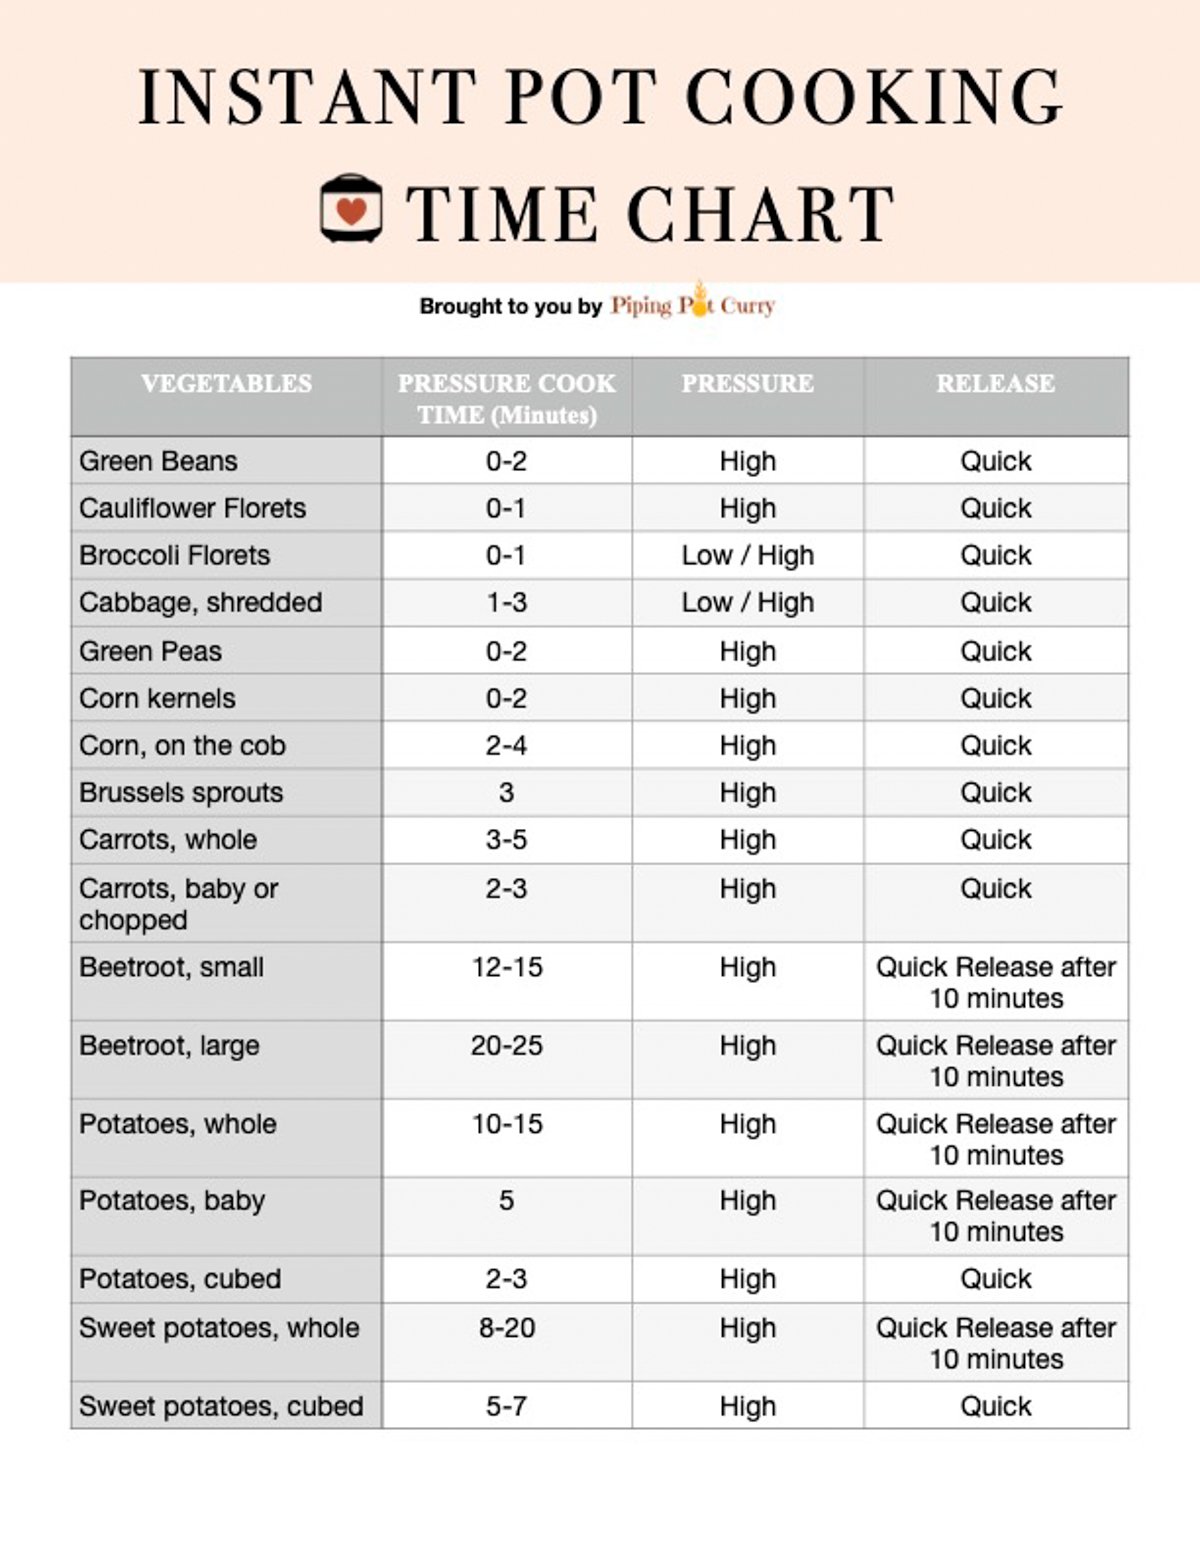
High-Pressure Cooking Benchmarks (After Pressure Builds)
Vegetables:
– Carrots (¼-inch slices): 1-2 minutes
– Potatoes (medium whole): 10-12 minutes
– Broccoli florets: 2-3 minutes
Proteins:
– Chicken pieces: 10-12 minutes
– Beef cubes (1-inch): 15-20 minutes
– Whole chicken: 15-20 minutes
Grains:
– White rice: 5-7 minutes
– Brown rice: 15-20 minutes
– Quinoa: 7 minutes
Golden rule: Always start with minimum times. Undercooked food can be re-pressurized for 2-minute increments; overcooked food is ruined.
Non-Negotiable Safety Practices
Electric Model Electrical Safety
Never submerge the base unit in water. Always unplug before cleaning interior components. Never attempt cold-water release on electric models—it damages electronics and creates steam hazards.
Steam Direction Protocol
Position the pressure release valve away from cabinets, walls, and people during operation. Steam burns at 250°F (121°C)—hotter than boiling water—and can cause severe injuries.
Opening Verification System
Before attempting to open:
– Electric models: Ensure float valve has dropped completely
– Stovetop models: Confirm pressure indicator has lowered
– Both types: Listen for hissing—any sound means pressure remains
First-Week Mastery Plan
Days 1-2: Liquid and Timing Fundamentals
Cook plain white rice (1 cup rice, 1¼ cups water, 5 minutes high pressure, 10-minute natural release). This simple test teaches liquid ratios, pressure buildup time, and natural release.
Days 3-4: Quick Release Technique
Prepare hard-boiled eggs (5 minutes high pressure, 5-minute natural release, then quick release). Perfecting this sequence prevents overcooking while mastering release methods.
Days 5-7: Complete Recipe Execution
Make a simple beef stew (browned meat, vegetables, broth, 35 minutes high pressure, 15-minute natural release). This integrates all starting procedures into one cohesive meal.
Mastering how to start a pressure cooker properly transforms this powerful appliance from intimidating to indispensable. By following these precise steps, you’ll avoid the most common beginner pitfalls and unlock meals that cook in one-third the time of conventional methods. Remember: precision beats intuition when starting your pressure cooker—follow these protocols exactly during your learning phase, then experiment once you’ve mastered the fundamentals. Your first perfectly cooked pressure-cooked meal is just six simple steps away.


