
That stubborn ring of mineral deposits around your pressure cooker’s interior or the smell of last week’s chili clinging to the lid? You’re not alone. Millions of home cooks battle burnt-on rice, chalky hard water stains, and mysterious odors that linger despite regular washing. Ignoring these issues doesn’t just ruin your next meal—it risks safety hazards from clogged valves and warped components. This guide delivers battle-tested methods to restore your stainless steel pressure cooker to like-new condition, using only household items you already own. You’ll learn why your current routine fails and exactly how to deep-clean without scratching surfaces or voiding warranties.
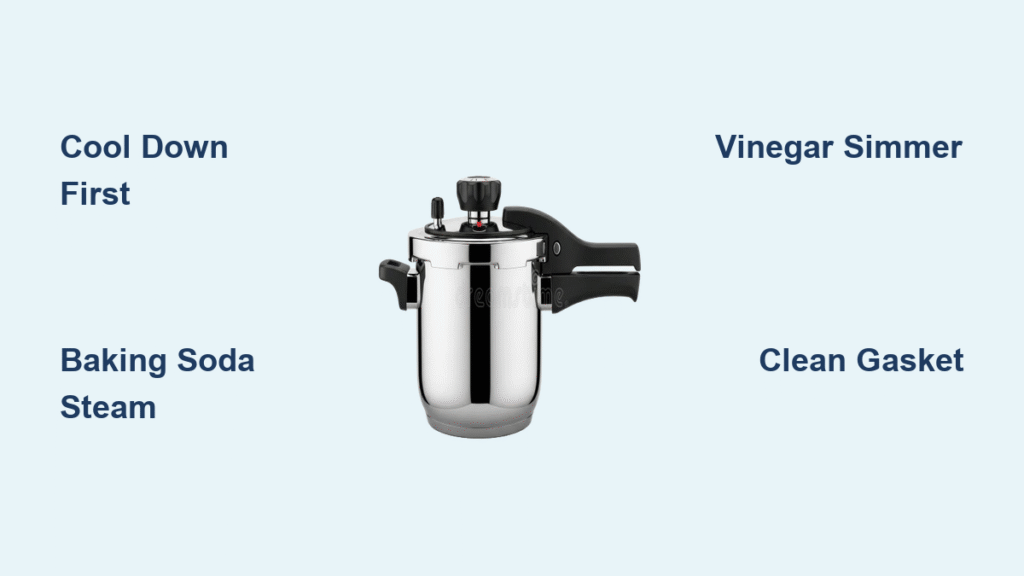
Cool Down Before Cleaning
Immediate Post-Cooking Protocol
Rushing to clean a hot pressure cooker guarantees disaster. Thermal shock from cold water warps stainless steel bases, creating uneven heating that burns future meals. Wait 20-30 minutes after the pressure indicator drops—your cooker should feel warm but not hot to the touch. Never force-cool by running water over the exterior. During this cooldown:
– Remove loose debris with a silicone spatula
– Pour out residual liquid while holding the lid at a 45-degree angle
– Wipe steam vents with a damp cloth to prevent clogs
Safe Disassembly Order
Photograph your lid’s configuration before removing parts—this prevents reassembly errors that cause steam leaks. Work systematically:
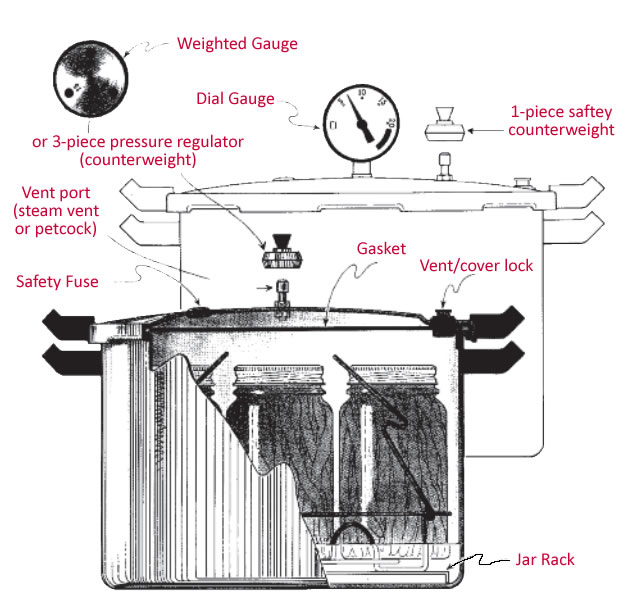
1. Twist and lift the silicone sealing ring from the lid’s groove
2. Pop out the pressure release valve by pressing its base
3. Slide the steam whistle/weight off its pin
4. Lift the pressure indicator pin straight up
Critical: Never submerge electronic components (like digital control panels) unless your manual specifies it.
Remove Burnt-On Food Without Scratches
Baking Soda Pressure Steam Technique
When scrubbing fails on charred beans or caramelized sugar, leverage your cooker’s own power:
1. Add 3 tablespoons baking soda and 4 cups water to the pot
2. Lock the lid and set to high pressure for 5 minutes
3. Allow natural pressure release for 15 minutes
4. Open lid—burnt residue floats freely in sudsy water
Why it works: Steam penetrates stuck food while baking soda loosens bonds. For tri-ply bases, skip scrubbing entirely—gently swirl water to lift debris.
Overnight Soak Formula for Extreme Cases
For overnight rescues, skip harsh chemicals:
– Fill the pot with hot water + 2 drops dish soap
– Add either 2 tablespoons baking soda (for protein stains) or 1 cup white vinegar (for starch burns)
– Cover loosely with a plate—never seal during soaking
– After 6-8 hours, wipe with a non-abrasive sponge
Pro tip: Place a folded paper towel on the burnt spot before adding liquid—it traps heat against the stain for faster breakdown.
Eliminate Chalky Mineral Rings

Vinegar Simmer for Hard Water Areas
White, crusty deposits near the water line signal hard water damage. Vinegar dissolves minerals without abrasives:
– Mix equal parts white vinegar and water
– Fill cooker halfway and simmer gently for 10 minutes (do not boil)
– Cool completely before emptying—sudden temperature changes crack stainless steel
– Rinse twice with plain water to neutralize acidity
Frequency: Repeat monthly if your water hardness exceeds 7 grains per gallon.
Targeted Spot Treatment
For isolated deposits under handles:
1. Soak a cotton ball in undiluted white vinegar
2. Press firmly against the mineral ring for 30 minutes
3. Wipe with a microfiber cloth using circular motions
Warning: Never use lemon juice—it etches stainless steel with prolonged contact.
Erase Lingering Food Odors
Vinegar Steam Neutralization
Garlic or fish smells trapped in silicone gaskets? Neutralize odors chemically:
– Combine 1 cup water + 1 cup white vinegar in the pot
– Bring to a gentle boil for 10 minutes with lid slightly ajar
– Turn off heat and let cool 20 minutes with lid on
– Rinse all parts—odors lift with steam condensation
Expert note: Avoid boiling baking soda—it releases carbon dioxide that worsens metallic tastes.
Baking Soda Paste for Gaskets
For stubborn gasket smells:
– Make a paste with 2 tablespoons baking soda + 1 tsp water
– Rub onto the ring, focusing on grooves
– Wait 15 minutes, then rinse under running water
– Air-dry upside down on a rack (never towel-dry—lint traps odors)
Prevention: Store the gasket separately in a ziplock bag with a pinch of baking soda.
Avoid These 5 Costly Mistakes
Damage-Inducing Habits
Steel wool on stainless surfaces: Creates microscopic scratches where bacteria breed. Use only nylon brushes or non-scratch sponges.
Dishwasher cleaning: High heat deforms silicone gaskets within 3 cycles. Hand-wash all components except the main pot (verify your manual).
Closed-lid storage: Trapped moisture breeds mold in steam vents. Always store with lid upside down on the pot rim.
Bleach solutions: Corrodes pressure valves. Stick to vinegar or baking soda.
Cold water rinses: Causes warping—always use warm water on cooled cookers.
Essential Safety Practices
- Dry valves thoroughly with a pipe cleaner after washing—dampness causes false pressure readings
- Replace gaskets every 6 months even if undamaged (compressed silicone loses sealing ability)
- Check vent holes weekly by holding the lid to light—debris blocks require immediate clearing
Monthly Maintenance Checklist
Gasket Inspection Protocol
Weekly: Remove the ring and stretch it gently. Replace if:
– It doesn’t snap back within 3 seconds
– Shows cracks near the inner edge
– Feels stiff or brittle
Critical: Never oil gaskets—they swell and cause dangerous over-pressurization.
Valve Deep Clean Procedure
- Disassemble valves completely using tweezers
- Soak parts in hot vinegar for 15 minutes
- Clear micro-channels with a pipe cleaner (not toothpicks—they splinter)
- Air-dry face-down on a paper towel for 2 hours
Test: Reassemble and blow through the valve—it should hiss freely.
Troubleshoot Cooking Failures
When Food Tastes Metallic
This signals hidden residue, not cooker defects:
– Step 1: Deep-clean with baking soda paste (focus under handles)
– Step 2: Replace the gasket—old silicone absorbs metallic flavors
– Step 3: Simmer 1 cup vinegar + water for 5 minutes if flavors persist
Never ignore this: Metallic tastes mean surface pitting that accelerates corrosion.
Steam Leaks During Pressurization
90% of leaks stem from cleaning oversights:
– Check: Wipe the lid’s sealing groove with vinegar-soaked cloth
– Fix: Replace gaskets older than 6 months—compressed silicone won’t reseal
– Test: Press the ring between your fingers—it should feel spongy, not hard
Tri-Ply Cooker Special Protocol
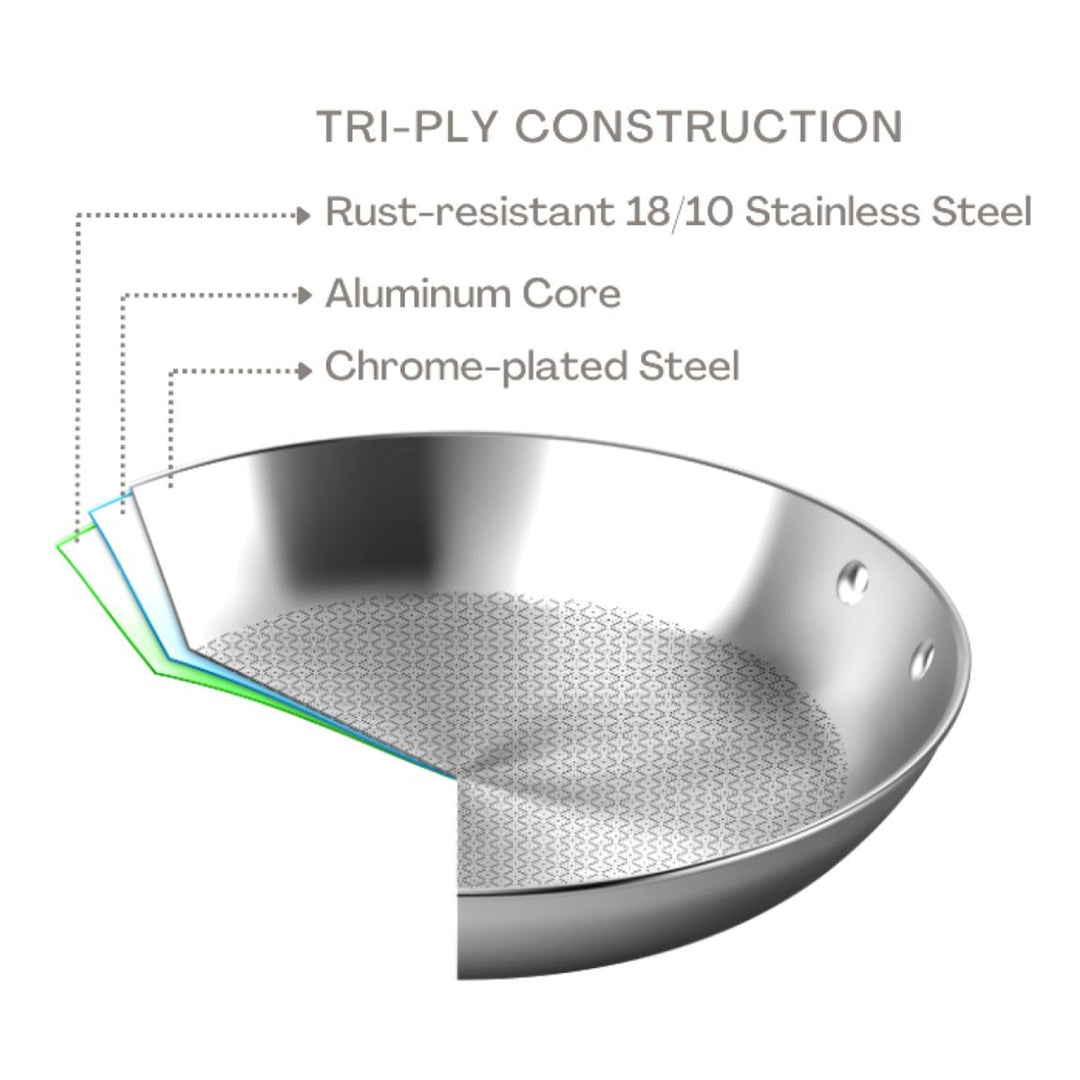
Why Abrasives Destroy Performance
Tri-ply bases (stainless/copper/stainless) conduct heat 3x better but scratch easily. Steel wool removes the top stainless layer, exposing copper that contaminates food. Always:
– Use only soft scrub pads on tri-ply surfaces
– Apply baking soda paste for burnt spots instead of scrubbing
– Rinse immediately after acidic cooking (tomatoes, wine) to prevent etching
2-Minute Daily Clean Method
Leverage tri-ply’s non-stick advantage:
1. While still warm, fill with hot water + 1 drop dish soap
2. Swirl gently for 30 seconds—residue slides off effortlessly
3. Dry with a linen towel (microfiber leaves lint in seams)
Storage That Prevents Damage
Ventilated Storage System
Moisture causes 70% of pressure cooker failures. Store correctly:
– Never stack items inside—traps humidity against walls
– Place a silica gel packet in the pot (recharge monthly in oven)
– Hang the lid on a hook with the sealing groove facing up
– Store whistle separately in a small jar to avoid losing it
Long-Term Vacation Prep
Before 2+ weeks of non-use:
1. Deep-clean all parts
2. Apply rice bran oil (not olive oil—it turns rancid) to gaskets
3. Wrap valves in unbleached parchment paper (no plastic—it traps moisture)
When to Replace vs. Repair
Immediate Replacement Red Flags
Stop using your cooker if:
– Dents near the base seam—causes uneven pressure distribution
– Pressure indicator sticks after cleaning valves
– Metallic tastes persist after 3 deep cleans (indicates pitting corrosion)
– Gasket replacements are discontinued for your model
Cost-Effective Repair Scenarios
Fix these issues:
– Steam leaks from new gaskets ($15 part)
– Clogged vents cleared with pipe cleaners
– Sticky pressure valves cleaned with vinegar
Rule of thumb: Repairs cost under $20; replacement starts at $80.
Final Note: Consistent daily rinsing prevents 90% of deep cleaning emergencies. Your stainless steel pressure cooker rewards 2 minutes of post-cook care with decades of flawless performance. Set a phone reminder for monthly valve checks—your future self will savor perfectly cooked meals without metallic aftertastes or steam leaks. For immediate results, try the baking soda pressure steam method tonight; it transforms burnt disasters into easy wipe-downs in under 30 minutes.


