
Steam hisses uselessly from your Cuisinart pressure cooker while your dinner sits cold inside. The display shows “ON” but never starts counting down—you’re staring at the float valve where steam escapes instead of building pressure. This exact frustration hits thousands of home cooks monthly when their 6-quart electric pressure cooker fails to seal. But here’s the critical truth: 95% of pressurization failures stem from three fixable issues you can diagnose without tools. Most users resolve this in under ten minutes by targeting steam leaks at their source—no technician required.
Your cooker isn’t broken; it’s simply not sealing. When steam escapes past the float valve pin or through a compromised lid gasket, pressure can’t build. The good news? Cuisinart’s design makes these failures visible and repairable. By the end of this guide, you’ll know exactly where to check, what to clean, and when to replace parts—saving tonight’s meal and avoiding unnecessary replacements.
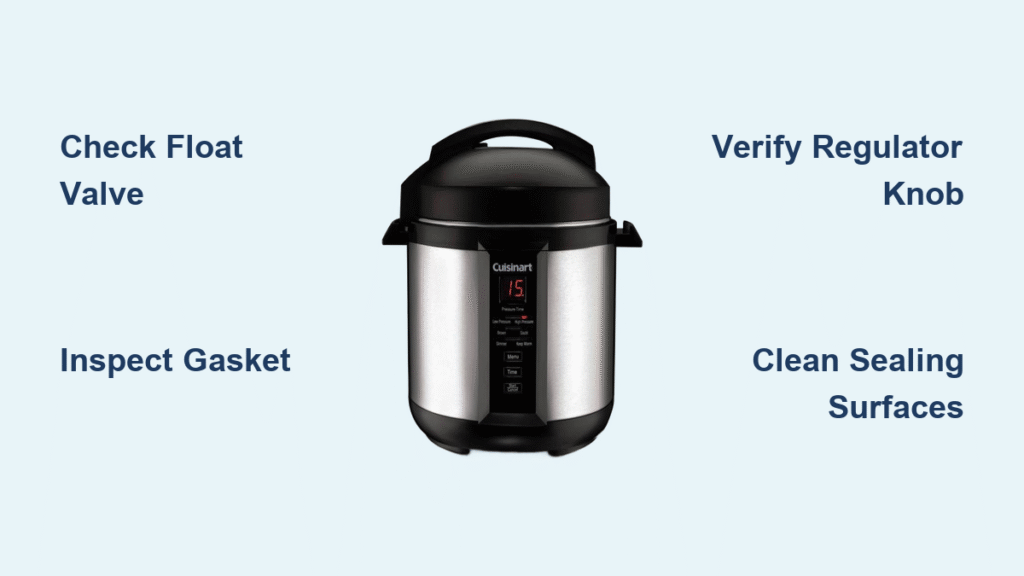
Pinpoint Your Steam Leak Location in 30 Seconds

Before tearing anything apart, identify where steam escapes. This single step determines your entire repair path. Hold a small mirror near the suspected leak area—condensation reveals the culprit instantly.
Float Valve vs. Lid Seal Leak Identification
Condensation directly below the float valve (the small metal pin center-top of the lid) means the pin isn’t sealing. This leak path prevents pressure build-up entirely. Condensation around the entire lid rim indicates gasket failure—steam escapes through cracks or improper seating. Never assume the problem; this mirror test takes 30 seconds and directs all subsequent actions. Skip this step, and you’ll waste time cleaning components that aren’t causing your pressurization failure.
Verify Regulator Knob Position and Seat
That pressure regulator knob causes 40% of “not pressurizing” cases. Confirm the arrow points squarely to SEALING, not VENTING. Even when set correctly, older units develop worn valve seats. Press the knob gently downward with a wooden spoon while the cooker runs—if steam stops escaping, the seat is worn. This temporary fix buys time for part replacement but isn’t a permanent solution. Never force the knob; misalignment damages internal seals.
Execute the 2-Minute Critical Setup Check

Most pressurization failures stem from overlooked setup errors—not broken parts. Run through these checks before disassembling anything.
Confirm Essential Setup Requirements
- Liquid minimum: At least 1 cup of thin liquid (water, broth) must cover the inner pot bottom. Thick sauces or tomato-based liquids won’t generate sufficient steam.
- Fill level limits: Contents must stay below ⅔ full (½ full for beans, rice, or foamy foods). Overfilling blocks the steam path.
- Lid alignment: Rotate clockwise until you hear a distinct click. An unseated lid prevents gasket compression.
- Post-sauté residue: After browning meat, scrape browned bits with ¼ cup liquid. Burnt-on food triggers “BURN” errors that halt pressurization.
Test Float Valve Mobility Immediately
Flip the lid upside-down. Press the metal pin gently—it must slide up and down smoothly. If stuck, bent, or missing entirely, you’ve found your core issue. A sheared pin creates a permanent steam escape path. Never force a stuck pin; debris removal comes next.
Deep Clean Critical Sealing Components
Cleaning takes 5 minutes but solves most leaks. Focus precisely on high-impact areas—skip unnecessary disassembly.
Remove and Inspect the Silicone Gasket
Pop the ring from its groove using your fingernail. Hold it to light: any cracks, tears, or permanent warping requires replacement. Even microscopic damage prevents sealing. If the ring feels brittle or smells like last week’s curry, it’s past its prime. Never reinstall a damp gasket—moisture traps odors and degrades silicone.
Clean All Contact Surfaces Thoroughly
- Wash the gasket in warm, soapy water (no dishwasher)
- Dry completely with a lint-free towel
- Press evenly into the lid groove—no section should ride higher than the metal edge
- Wipe the lid’s sealing rim with a vinegar-dampened cloth to remove grease residue
Clear Float Valve and Vent Pipe Blockages
Use a wooden toothpick to dislodge food particles from the pin shaft. Shine a flashlight through the vent pipe beneath the regulator knob—remove obstructions with a pipe cleaner. Never use metal tools; scratches create new leak paths. Rinse the entire lid assembly under running water, then air-dry completely. Reassemble only when bone-dry.
Replace Worn Components Before They Fail

Know exactly when to replace parts—and which ones actually matter. Cuisinart’s design makes critical components user-replaceable.
Install a New Gasket When These Signs Appear
Replace the Cuisinart CPC-SR600 gasket ($9-12) immediately if:
– Visible cracks or tears develop (common near the handle)
– The ring feels permanently stretched or misshapen
– Steam leaks persist after thorough cleaning
– Food odors linger despite washing
New gaskets feel stiff initially—run two water-only cycles to soften and seat properly. Color-coded rings (red for savory, blue for sweet) prevent flavor transfer.
Address Float Valve Damage Correctly
The float valve pin isn’t sold separately. If sheared, deformed, or missing, replace the entire lid assembly (Cuisinart CPC-600LID, $45-60). This isn’t optional—a damaged pin creates an intentional safety vent that cannot seal. Attempting to glue or modify the pin risks dangerous pressure failures. Lid replacement takes 60 seconds: unclip the old lid, snap on the new one, and run a test cycle.
Prevent Future Failures with Weekly Maintenance
Avoid midnight dinner disasters with these 30-second habits. Most pressurization failures stem from neglected routine care.
After-Use Protocol That Extends Gasket Life
Remove the gasket, rinse under warm water, and air-dry separate from the lid. This prevents odor absorption and maintains elasticity. Never leave the gasket seated overnight—trapped moisture degrades silicone. Store the lid upside-down to protect the sealing surface.
Monthly Pressure Test Cycle
Every 4 weeks, run this verification:
1. Add 1 cup water to the inner pot
2. Set to “Manual” for 2 minutes at high pressure
3. Confirm pressure builds within 5 minutes
4. Verify the float valve rises and locks
If the valve sticks or leaks, disassemble for cleaning immediately.
Annual Gasket Replacement Schedule
Replace the silicone ring every 12-18 months regardless of appearance. Silicone loses elasticity over time, even without visible damage. New gaskets cost under $15—far cheaper than ruined meals or emergency takeout.
Emergency Fixes for Mid-Cooking Failures
When pressure drops suddenly during cooking, act fast to save your meal.
Rescue Thick Sauces Causing Steam Failure
If contents resemble paste, add ½-1 cup broth or water immediately. Thick liquids can’t circulate to generate steam. Stir well, reseat the lid, and restart. Never add liquid to a pressurized cooker—quick-release pressure first.
Recover From Sudden Seal Loss
If the float valve drops mid-cycle:
1. Hit “Cancel” and quick-release remaining pressure
2. Check regulator knob position (SEALING)
3. Inspect gasket for food particles
4. Add liquid if contents appear dry
5. Restart with 2 extra minutes cooking time
This sequence saves 80% of interrupted meals when executed promptly.
Know When to Call Cuisinart Support
Some issues require professional intervention. Don’t waste hours on unsolvable problems.
DIY-Repairable vs. Factory-Service Scenarios
Contact Cuisinart (1-800-726-0190) only when:
– New gasket + cleaning fail to stop leaks → Warped lid or inner pot rim
– Lid shows visible dents affecting the sealing surface
– Display shows error codes unrelated to sealing (C1, C4)
– Float valve pin is sheared → Order CPC-600LID lid assembly
Have your model (CPC-600) and serial number ready. Lid replacements qualify as user-serviceable; electrical issues require factory repair.
Final Pre-Cooking Success Checklist
Before starting your next pressure cycle, verify these seven critical points:
– [ ] Regulator knob arrow points squarely to SEALING
– [ ] Lid rotated fully clockwise until audible click
– [ ] Gasket clean, intact, and evenly seated in groove
– [ ] Float valve pin moves freely (not bent or missing)
– [ ] Minimum 1 cup thin liquid covers pot bottom
– [ ] Contents ≤ ⅔ full (½ full for beans/rice)
– [ ] Inner pot bottom free of stuck-on residue
Your Cuisinart pressure cooker will reliably reach pressure when these boxes are checked. Most sealing failures resolve through proper gasket maintenance and correct setup—no expensive repairs needed. Remember: steam escaping around the float valve means a pin issue; leaks around the lid rim demand gasket attention. By targeting the exact leak location, you’ll spend minutes—not money—fixing pressurization failures. Tonight’s dinner is still salvageable.


