
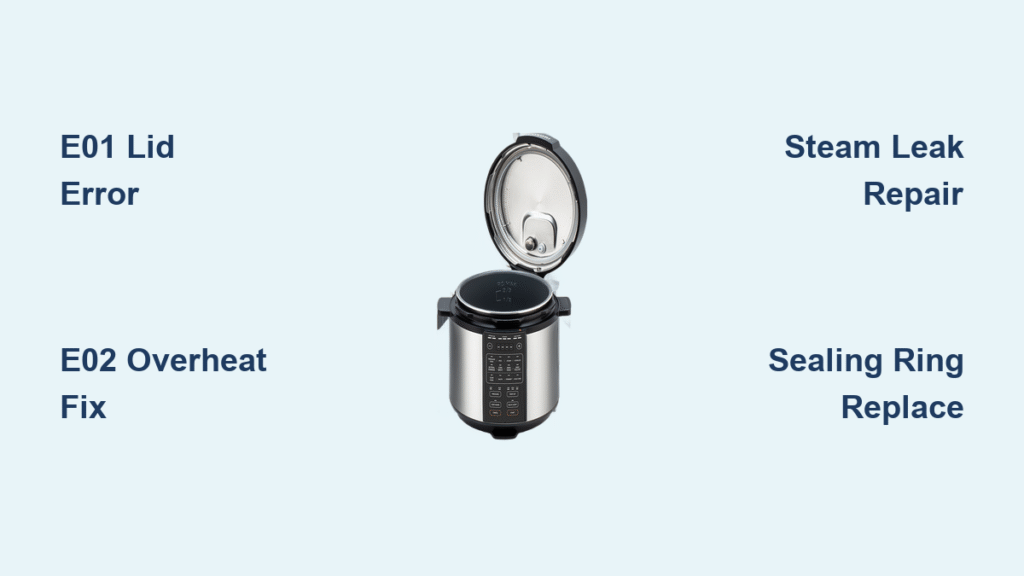
Your Cosori pressure cooker flashes an unfamiliar code, refuses to lock, or hisses steam like an angry teapot—sound familiar? These moments can turn a simple dinner prep into kitchen panic. Whether you’re facing the dreaded E01 lid error or steam escaping where it shouldn’t, this cosori pressure cooker troubleshooting guide walks you through proven fixes that get your appliance back to perfect pressure. Forget confusing manuals—these solutions come straight from the manufacturer’s diagnostics database and real-world repair patterns.
E01 Lid Error Quick Fix

The E01 code appears when your cooker thinks the lid isn’t properly sealed. This safety feature prevents pressure buildup with an unlocked lid, but it can trigger even when everything looks right. Most E01 errors resolve in under 3 minutes with these precise steps—no need to panic or call support yet.
Check Float Valve Position
First, cancel the program and unplug your cooker. Look at the small metal pin near the lid handle—this is your float valve. It should drop down freely when pressure is released. If it’s stuck in the “up” position, gently tap the lid with your palm to dislodge it. Food particles or starch residue often glue this valve in place. Critical warning: Never force the valve down with tools, as this can damage the internal spring mechanism. If tapping doesn’t work, remove the lid and rinse the valve stem under warm water.
Clean and Re-Seat Sealing Ring
Remove the silicone sealing ring from the lid groove. Rinse it under warm water, checking for twists or tears. While it’s off, wipe the groove with a damp cloth to remove any food debris. When reinstalling, ensure the ring sits smoothly in the groove without bunching. The flat side faces down, the ridge side up—reversing this causes immediate sealing failures. Pro tip: Stretch the ring between your hands before reinstallation to eliminate hidden twists that cause leaks.
Lock Lid Until Orange Dots Align
Place the lid on the base and rotate clockwise until you hear a distinct click. Check that the orange dots on the lid and base align perfectly. If they stop short, the locking pin might be obstructed. Remove the lid and check the pin for food debris. For stubborn misalignments, gently press down on the lid while rotating—it often clicks into place with light downward pressure. If E01 persists after two attempts, shine a flashlight into the lid mechanism. A damaged micro-switch requires professional repair—contact Cosori support immediately.
E02 Overheat Prevention

Your cooker flashes “OH” and shuts down mid-cycle. This overheat protection prevents permanent damage, but understanding why it triggered saves your dinner. Most E02 errors happen when users underestimate liquid requirements for specific recipes.
Immediate Cool-Down Protocol
Unplug the cooker immediately. Let it cool for 30 minutes—this isn’t negotiable. The thermal sensor needs time to reset. While waiting, check the inner pot’s underside for black burn marks. These indicate food stuck to the heating plate, causing hot spots. Never cool the base under running water. Thermal shock warps the sensor and voids your warranty. Instead, wipe the heating plate with a damp cloth once cool enough to touch comfortably.
Add Minimum Liquid Requirements
Before restarting, ensure at least 250 mL of liquid in the pot. This creates the steam necessary for pressure cooking. For recipes prone to burning (like tomato-based dishes), increase liquid by 50-100 mL. The pot should contain at least one cup of thin liquid at all times. Expert note: Thick sauces and purees require additional liquid—add ½ cup extra for every cup of tomato paste or coconut milk in your recipe.
Steam Leak Diagnosis
Steam escaping from the rim during pressure buildup indicates seal failure. The location of the leak tells you exactly what’s wrong—no guesswork required.
Single-Side Leak Fix
If steam escapes from one specific spot, your sealing ring is twisted or torn. Remove and inspect it carefully. Even small nicks create weak points. Replace the ring if you find any damage—these cost under $10 and restore perfect sealing. Visual cue: Run your finger along the ring’s inner edge—any roughness means it’s time for replacement. Genuine Cosori rings (part #CMC-601-RING) last 12-18 months with proper care.
All-Around Leak Solution
Steam escaping evenly around the rim means the sealing ring has stretched and no longer fits snugly. This happens naturally over 12-18 months of regular use. Order replacement part CMC-601-RING. To prevent future stretching, store the ring inverted when not in use. Pro tip: After cooking starchy foods like rice or beans, wash the ring immediately with warm soapy water—dried starch residue prevents proper sealing.
Long Pre-Heat Troubleshooting
Your cooker runs and runs but never reaches pressure. This wastes energy and overcooks food. Three common culprits cause this frustrating delay.
Verify Liquid and Fill Levels
Check you’ve added at least 250 mL of liquid. Too little creates insufficient steam. Conversely, overfilling prevents proper pressure buildup. Keep liquids below the 2/3 line, or 1/2 line for foamy foods like beans or grains. Critical mistake: Never fill beyond the “PC MAX” line—this causes E06 errors and safety vents.
Confirm Release Valve Position
The steam release valve must point to “Seal” for pressure cooking. If set to “Vent,” steam escapes continuously. The arrow on the valve handle should align with the “Seal” marking on the lid. Quick check: Press down lightly on the valve while rotating—it should click firmly into place.
Check Sealing Ring Orientation
Remove the sealing ring and reinstall it correctly. The flat side faces down against the lid, the ridge side faces up. A reversed ring creates gaps that leak steam continuously. This simple fix solves 30% of pre-heat failures—always double-check ring orientation before starting.
Component Replacement Guide
Knowing when and how to replace worn parts prevents bigger problems. These components wear predictably and have specific replacement intervals.
Sealing Ring Replacement (CMC-601-RING)
Replace every 12-18 months or when cooking odors persist after washing. The ring stretches and hardens over time. A loose ring causes both steam leaks and poor pressure maintenance. At $9.99, this simple swap fixes multiple issues. Installation tip: Apply a light coating of cooking oil to the new ring before installation—it creates a better initial seal and extends ring life.
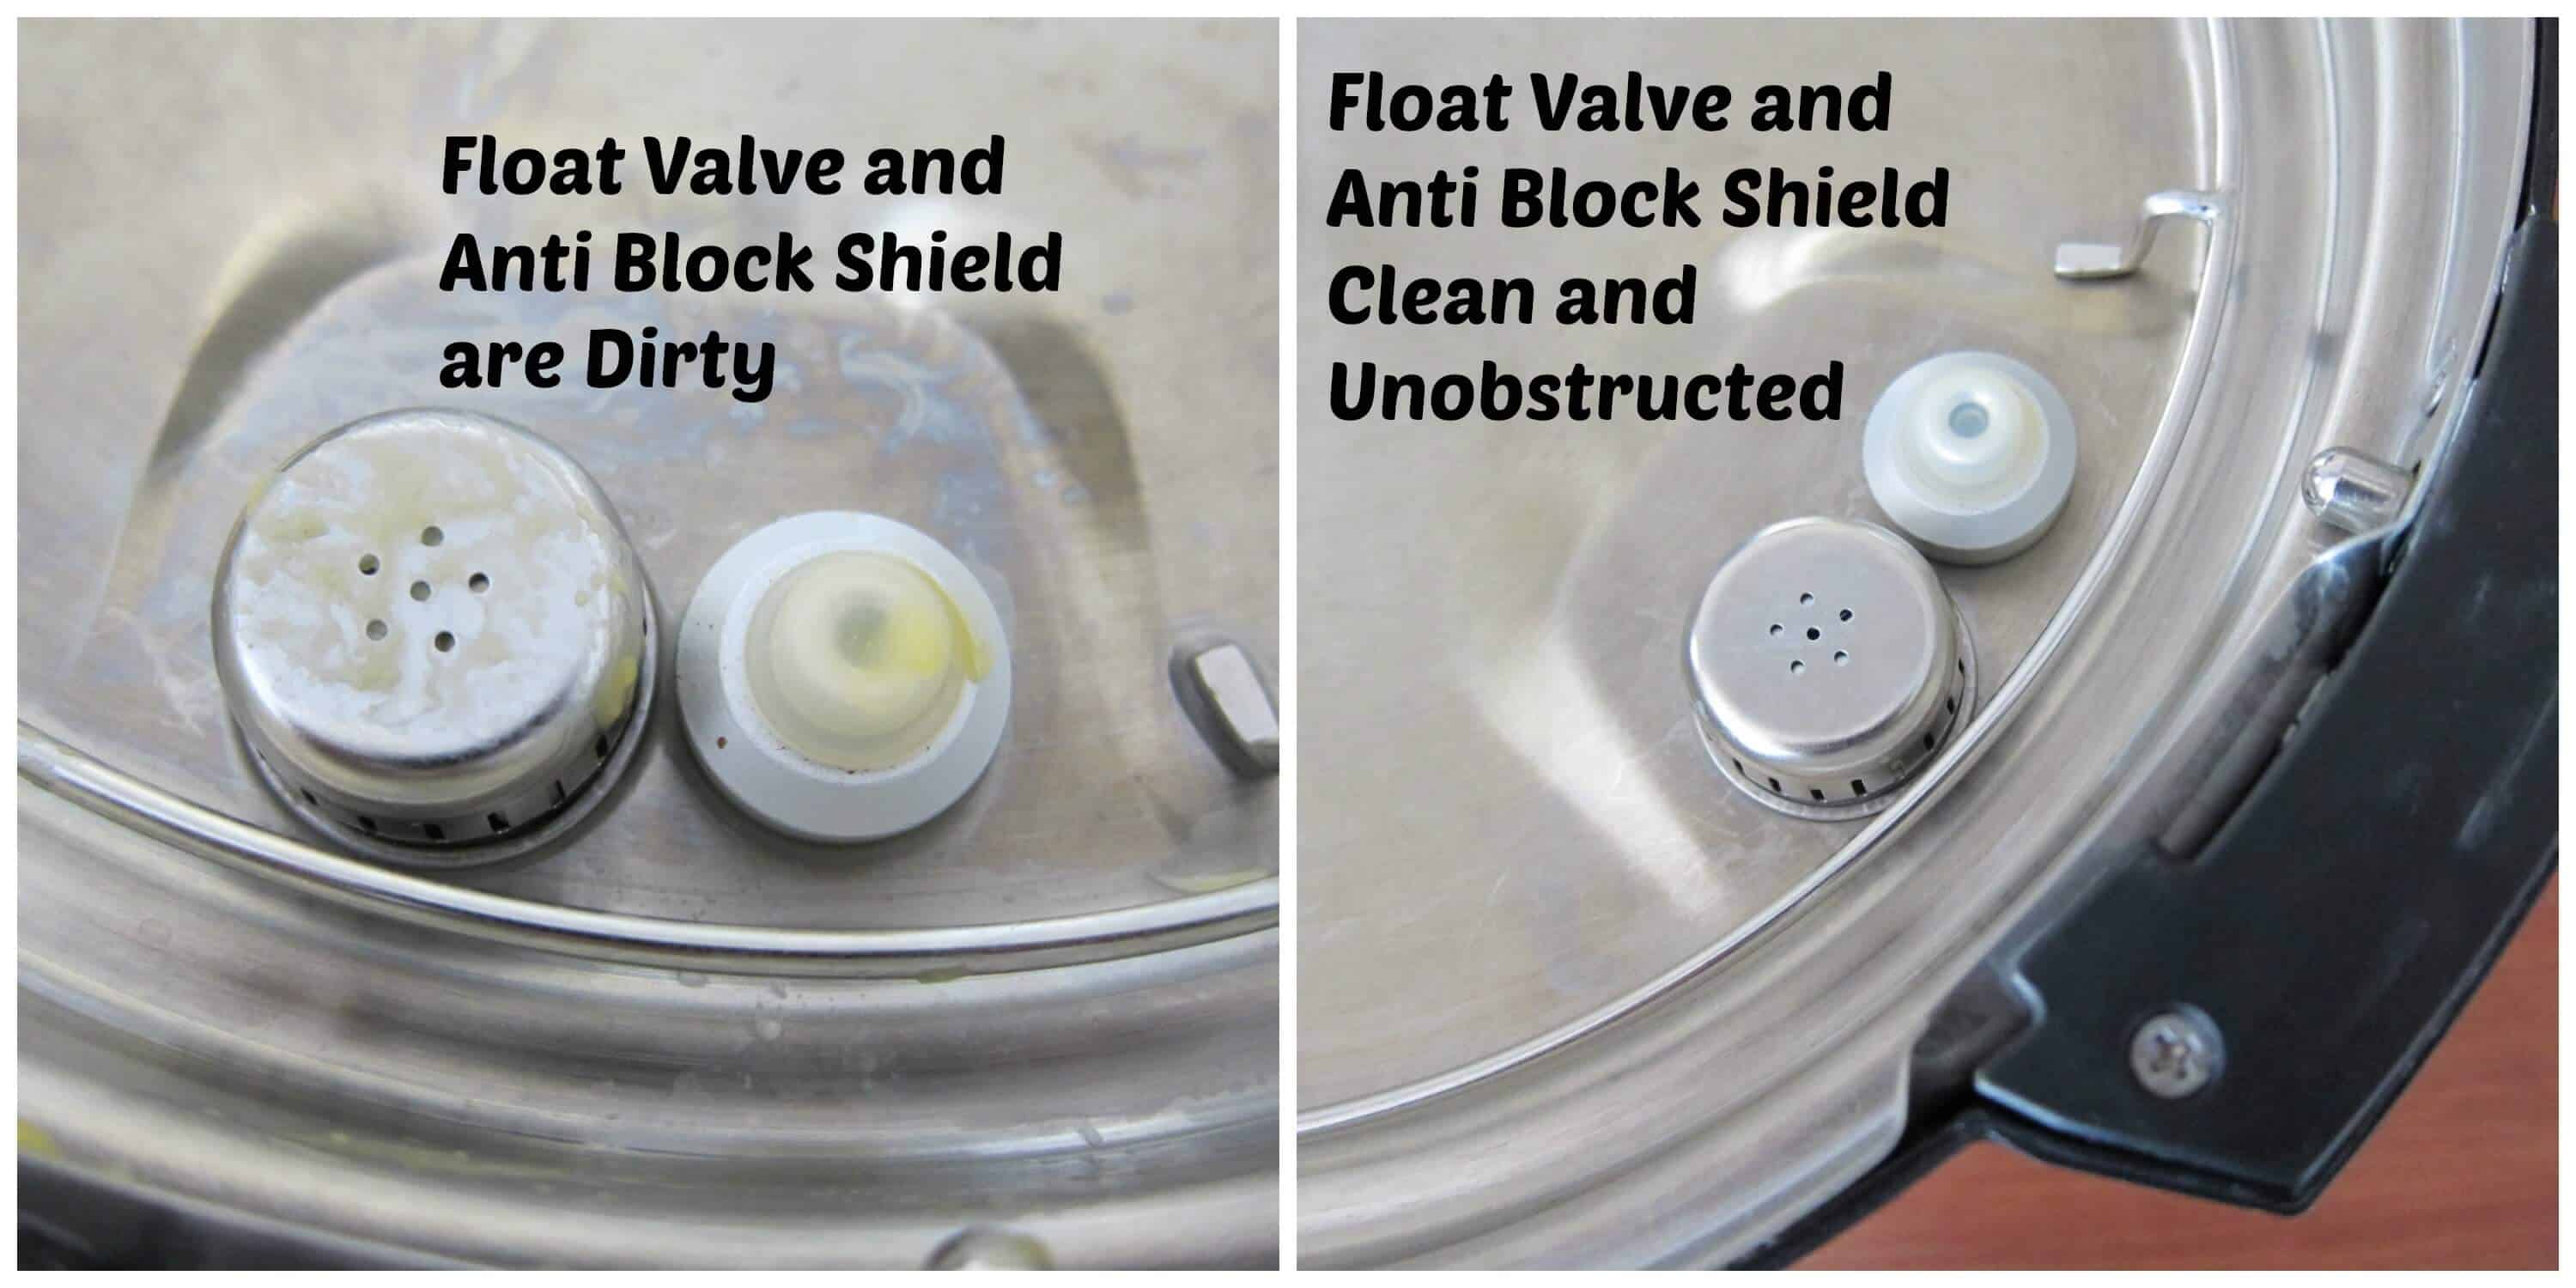
Anti-Block Shield Maintenance
Pop out this small metal shield monthly by pinching its two tabs. Rinse under warm water to remove starch buildup. Bent prongs or persistent clogs require replacement with part CMC-601-SHIELD. Warning: Never force the shield back in if it doesn’t seat smoothly—this can damage internal steam channels.
Dead Unit Recovery
No display, no beeps—complete silence. Don’t panic yet. Follow this systematic approach before assuming the worst.
Power Source Verification
Plug a lamp or phone charger into the same outlet. If it doesn’t work, reset your circuit breaker. Try another outlet to isolate the problem. This simple check solves 40% of “dead” cooker reports. Pro tip: Test outlets with a nightlight—it stays visible during the test unlike phone chargers.
Cord Inspection Protocol
Examine the power cord for kinks, cuts, or damage at the strain relief. Any visible damage means discontinuing use immediately. Contact Cosori for a replacement cord—this maintains your safety and warranty coverage. Critical: If outlet and cord check out but the unit remains dead, an internal fuse has blown. This requires warranty replacement—don’t attempt disassembly.
Maintenance Schedule That Prevents Problems
Regular maintenance prevents the majority of pressure cooker failures. These simple tasks take minutes but save hours of troubleshooting.
After Every Use Routine
- Unplug and allow 15-minute cool-down
- Remove inner pot and steam rack—both are dishwasher safe
- Pop out the sealing ring, rinse, and air-dry separately
- Wipe the lid interior and check float valve mobility
- Empty and rinse the condensation collector
Storage tip: Store the cooker with the lid inverted on the base. This protects the sealing ring’s shape and prevents odors.
Monthly Deep Clean Checklist
- Remove and rinse the anti-block shield
- Clear the steam pipe with a pipe cleaner
- Soak the sealing ring in 1:1 vinegar-water for 30 minutes
- Clean the heating plate with a damp cloth and baking soda paste
Warranty and Support Path
Knowing when to DIY versus contacting support saves frustration and maintains your warranty coverage.
In-Warranty Claims
For failures within 12 months, contact support@cosori.com with your serial number, purchase receipt, and a clear photo or video of the issue. Include error codes and symptoms for faster resolution. Phone support is available at +1-888-267-7649. Expert note: Document everything before contacting support—most issues get resolved faster with visual evidence.
Out-of-Warranty Parts
Order genuine Cosori parts through their official website or Amazon’s “COSORI Parts Store.” Third-party parts void your warranty and often fit poorly, creating new problems. Warning: Never exceed 60 mL oil per recipe—excess oil creates dangerous foaming that damages internal components.
Your Cosori pressure cooker will provide years of reliable service with proper troubleshooting and maintenance. Most problems have simple solutions that restore perfect pressure cooking in minutes, not hours. When in doubt, follow the golden rule: if the float valve won’t drop or error codes persist after basic fixes, contact Cosori support before attempting further repairs.


