
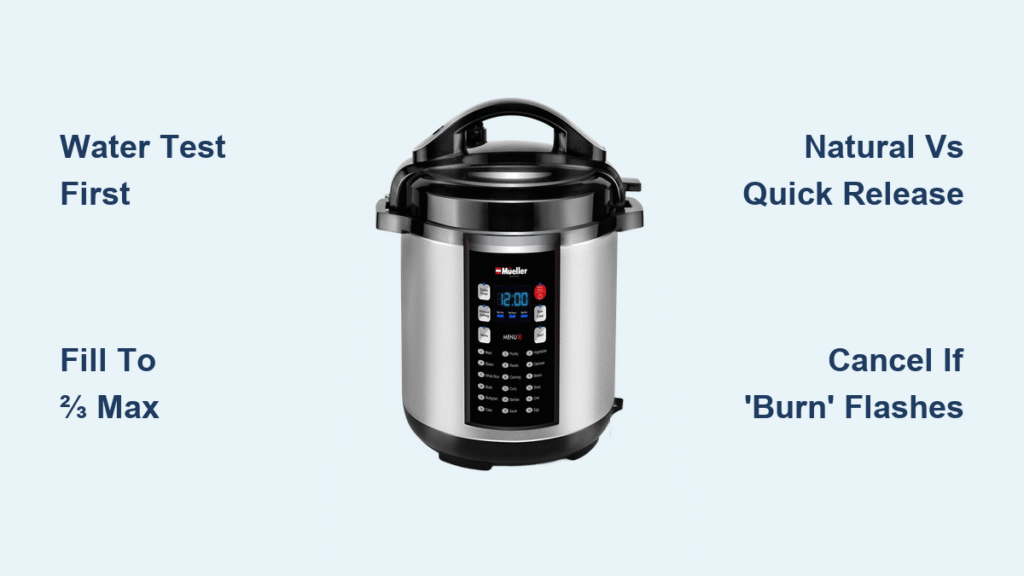
Your Mueller pressure cooker sits unopened on the counter, its digital display flashing mysteriously while dinner plans grow later by the minute. You know pressure cooking saves time, but between the steam valve positions and confusing presets, you’re worried about triggering a kitchen disaster. Learning how to use Mueller pressure cooker properly transforms it from intimidating appliance to your fastest meal solution—no prior experience needed.
This guide cuts through the confusion with precise, step-by-step instructions for every function. You’ll discover exactly when to use natural versus quick pressure release, how to prevent the dreaded “Burn” message, and why your rice comes out perfect in 12 minutes. Whether you’re cooking frozen chicken breasts or making steel-cut oats from scratch, you’ll gain confidence with each use.
Unlock Your Mueller Pressure Cooker’s Full Potential
First Water Test That Prevents Kitchen Disasters
Before adding food, run this critical 5-minute test: Pour exactly 3 cups of water into the inner pot, secure the lid by aligning arrows and twisting clockwise until the lock indicator clicks. Set the steam release valve to “Sealing” (pointing backward) and press “Pressure Cook” for 5 minutes. Watch the display transition from “On” to active countdown—that confirms proper pressure buildup. After cooking ends, let pressure drop naturally for 10 minutes, then carefully turn the valve to “Venting.” If steam releases smoothly without leaks, your safety systems work correctly.
Kitchen Placement That Avoids Steam Damage
Place your Mueller pressure cooker on a heat-resistant surface with 5+ inches of clearance on all sides. Steam shoots vertically 12-18 inches—never position it under cabinets or near wall hangings. Ensure the power cord reaches its outlet without crossing walkways where someone might trip. Keep it away from cold drafts like refrigerator vents, which slow pressure buildup by 30%.
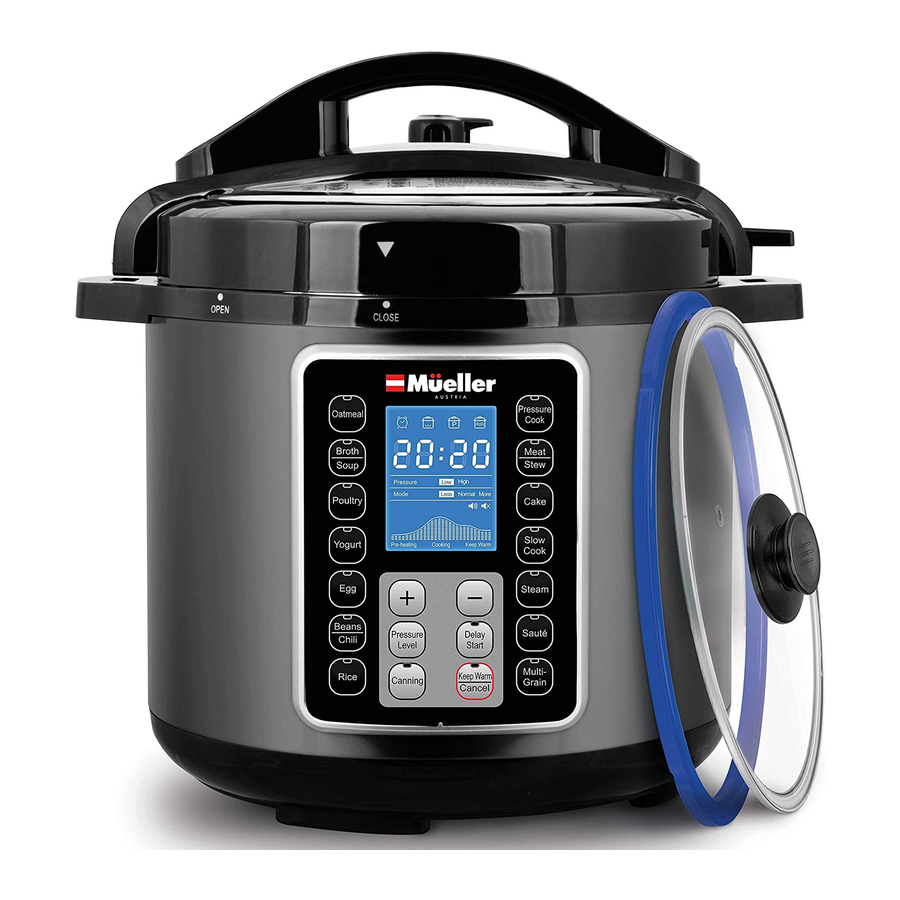
Control Panel Decoded: Stop Guessing Which Button Does What

Preset Programs That Actually Work
Pressure Cook gives full control for 1-120 minutes—ideal for custom recipes. Rice auto-adjusts between white (12 minutes) and brown (22 minutes) with perfect results. Meat/Stew delivers fork-tender beef in 35 minutes with 15 minutes natural release. Steam cooks broccoli florets in 0 minutes (actual steam time) for crisp-tender texture. Sauté offers three heat levels: Low (275°F) for sweating onions, Medium (320°F) for searing chicken, and High (375°F) for reducing sauces.
Display Symbols You Must Recognize
When the screen shows “On,” the unit is heating—expect 10-15 minutes before pressure builds. The “Pressure” icon confirms target pressure is reached, starting your actual cooking time. After cooking completes, “Keep Warm” activates automatically for up to 10 hours. If “Burn” flashes, immediately cancel cooking, release pressure, and stir in ½ cup extra liquid to prevent scorching.
Time-Saving Button Combinations
For perfect white rice: Press Rice, then Start—no adjustments needed. Making chili with dried beans? Hit Bean/Chili, increase time to 40 minutes, and walk away. After pressure cooking, thicken sauces by pressing Cancel then Sauté on High for 3 minutes while stirring constantly.
Pressure Cooking Without Mistakes: Your Step-by-Step Workflow
Exact Filling Limits That Prevent Overflow
Fill the inner pot no higher than the ⅔ mark (or ½ full for rice and beans) to allow space for expansion. Always include at least 1 cup liquid—broth, water, or sauce—to create proper steam pressure. Never add thick sauces or dairy directly to the pot before pressurizing; they’ll scorch on the heating element.
Lid Locking Technique That Stops Steam Leaks
Align the lid’s arrow with the pot’s lock symbol, then twist clockwise until you hear a distinct click. The steam release valve must point backward to “Sealing” position—double-check this before starting. If steam leaks from the sides during cooking, immediately cancel the cycle, cool the cooker, and clean food debris from the rim before restarting.
Natural vs. Quick Release: When to Use Each
Natural Release (waiting 10-30 minutes) works best for meats, beans, and soups—prevents texture collapse. Quick Release (turning valve to “Venting” with oven mitts) suits vegetables and delicate fish to stop overcooking. Never force the lid open—wait until the pressure indicator pin drops completely.
Food-Specific Success Formulas

Rice and Grains That Never Fail
White Rice: Combine 1 cup rice + 1.25 cups water, cook 12 minutes high pressure, then 10 minutes natural release. Brown Rice: Use 1.5 cups water for 22 minutes. Steel-cut Oats: 1 cup oats + 3 cups water, 4 minutes high pressure, 15 minutes natural release—the oats finish cooking during the wait.
Protein Cooking Times That Guarantee Juiciness
Chicken Breasts: 8-10 minutes high pressure, quick release. Beef Stew Meat: 35 minutes high pressure, 15 minutes natural release. Pork Shoulder (3 lbs): 60 minutes high pressure creates pull-apart tenderness. Fish Fillets: Just 3-4 minutes on low pressure prevents dryness.
Vegetable Timing Cheat Sheet
Potatoes (quartered): 8 minutes high pressure for fluffy interiors. Broccoli Florets: 0 minutes high pressure (steam only) preserves bright green color. Carrots (whole): 4 minutes maintains natural sweetness without mushiness.
Pro Techniques That Expand Your Cooking
Layered Cooking for Complete Meals
Place potatoes and carrots at the bottom with 1 cup broth. Set a trivet halfway up, then add fish fillets on top. Everything cooks perfectly in 8 minutes high pressure—no overcooked vegetables.
Pot-in-Pot Method for Simultaneous Dishes
Put curry ingredients in the main pot with 1 cup water. Place rice and water in an oven-safe bowl on a trivet above. Both finish cooking together in 12 minutes—ideal for busy weeknights.
Frozen Food Adjustments That Work
Add 5-10 extra minutes when cooking frozen chicken or vegetables. Since frozen items release extra water, reduce initial liquid by ¼ cup to maintain proper consistency.
Cleaning Protocol That Extends Lifespan
Daily Maintenance Checklist
After unplugging and cooling, remove the inner pot for standard washing. Pop out the sealing ring and rinse under warm water—never leave it compressed in the lid. Wipe the lid’s underside, focusing on the steam release valve. Empty the condensation collector by pulling it straight out. Critical warning: Never immerse the base unit—just wipe with a damp cloth.
Sealing Ring Care That Prevents Odors
Soak the ring in a vinegar-water solution (1:1 ratio) for 30 minutes if it retains curry or chili smells. Replace it annually or immediately if cracked—stretched rings cause steam leaks. Store it loosely in a drawer, not compressed in the lid.
Troubleshooting Emergency Fixes
Burn Message Appears During Cooking
Cancel immediately, release pressure, and open the lid. Scrape the pot bottom clean, add ½ cup extra liquid, and restart cooking. This usually happens when thick sauces or starches sit directly on the heating element without enough liquid coverage.
Lid Stuck Shut After Cooking
The pressure hasn’t fully released—wait 10 more minutes for natural release. Gently tap the pressure valve with a wooden spoon to ensure it’s fully vented. Never force the lid open—this risks serious injury from trapped steam.
Steam Leaking from Lid Sides
Food debris on the rim prevents proper sealing. Remove the lid, clean both surfaces with a damp cloth, and reseat the sealing ring without twists. If leaks continue, replace the ring immediately—it’s stretched beyond safe use.
Safety Rules That Prevent Accidents
Critical Limits Every User Must Know
Never fill past ⅔ capacity (or ½ for grains). Always use at least 1 cup liquid. Never attempt pressure frying—oil blocks steam release. Keep hands and face clear of the steam valve during quick release. Your Mueller has 7 safety mechanisms, but they can’t compensate for user error.
Annual Maintenance That Matters
Replace the sealing ring yearly or sooner if damaged. If you cook daily, have the pressure valve professionally checked annually. Register at muellerdirect.com within 30 days for warranty coverage—most users miss this critical step.
Your Mueller pressure cooker becomes a kitchen hero once you master these precise techniques. Start with the water test, then progress to simple rice and steamed vegetables. Within days, you’ll confidently cook complete meals faster than delivery while saving 70% cooking time. Remember the golden rules: never overfill, always use enough liquid, and respect pressure release timing—your perfect pressure cooking journey starts now.


