
Your Cuckoo pressure cooker sits on the counter, promising restaurant-quality meals in half the time—but that blinking display and unfamiliar valves can make even seasoned cooks hesitate. Whether you own the Twin Pressure model with dual-pressure settings or the precision-focused IH induction cooker, mastering this Korean engineering marvel transforms rushed weeknights into stress-free feasts. This guide cuts through the confusion with exact steps verified by Cuckoo’s technical specifications, so you’ll confidently cook perfect rice, fall-off-the-bone ribs, and creamy cheesecake—all while avoiding common pressure-cooking pitfalls.
Unlocking Your Cuckoo’s Core Components
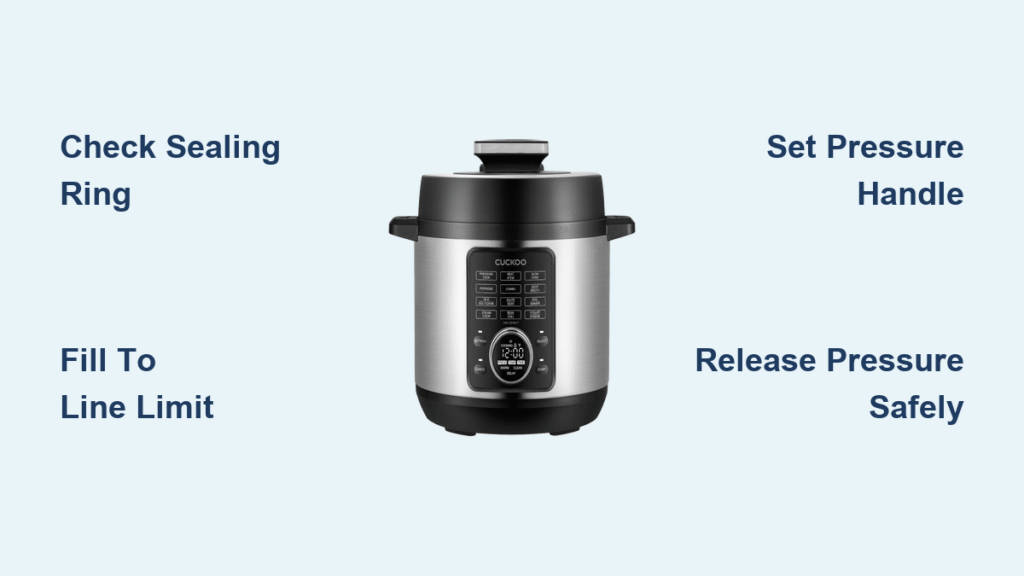
Verify All Parts Before First Use
Every Cuckoo arrives with critical safety components that must be inspected. Remove the inner pot, sealing ring (cover packing), and steam release valve from packaging. Run your finger along the silicone sealing ring—any cracks or stiffness means immediate replacement. Confirm the steam release valve moves freely without obstruction; rice grains often lodge here during shipping. Finally, ensure the floating valve (pressure indicator pin) drops down when the unit is cold.
Essential Pre-Use Cleaning Protocol
Wash the inner pot with warm soapy water using a non-abrasive sponge—scratches compromise the non-stick coating. Dry thoroughly to prevent mineral spots on the heating element. Wipe the lid’s underside, paying special attention to the steam vent channel. Never immerse the main housing; clean it only with a damp cloth. Remove any protective film from the control panel to ensure responsive touch operation.
Loading Ingredients for Foolproof Results

Critical Fill Lines You Must Respect
Never fill beyond ⅔ capacity for stews or soups, and ½ capacity for expanding foods like rice or beans. Overfilling blocks steam circulation, risking dangerous pressure spikes. For a standard 6-quart model, this means:
– Max 4 quarts for chili or soup
– Max 3 quarts for rice or legumes
Always add at least 1 cup liquid (water, broth, or wine) to generate pressure—less triggers E04 overheating errors.
Food Prep Secrets for Even Cooking
Cut ingredients into uniform sizes: 2-inch meat cubes cook in 35 minutes while 1-inch pieces need only 20. Layer dense items like potatoes at the bottom and delicate fish on the steamer basket. Never add thickeners like flour before cooking—they clog steam valves. Instead, use the sauté function post-cooking to perfect sauces.
Locking, Setting, and Starting Programs
Secure Lid Closure Checklist
Align the lid’s arrow with the pot handle’s arrow. Rotate clockwise until you hear a definitive click. Verify the pressure release handle points to SEAL, not VENT. If the floating valve is already raised, pressure remains inside—never force the lid. A twisted sealing ring causes steam leaks and prevents pressure buildup, triggering E01 errors.
Program Selection Made Simple
Choose settings based on your model’s capabilities:
– RICE: Auto-adjusts for perfect grains (sushi, jasmine, brown)
– MEAT: Sustains 15 PSI for tough cuts like chuck roast
– STEAM: Lower pressure for vegetables or fish (prevents mushiness)
– MULTI COOK: Manual control for custom recipes
Add 5% more time per 1,000 feet elevation using the +/- buttons—critical for mountain dwellers.
Pressure Release: Timing Is Everything

Natural Release for Tender Proteins
Let the cooker cool untouched for 15 minutes after cooking rice or 25 minutes for large meat cuts. The floating valve drops when pressure fully releases. This method prevents meat fibers from seizing, yielding fork-tender results. Never use natural release for foamy foods like oatmeal—they’ll clog the valve.
Quick Release for Crisp Vegetables
Use a wooden spoon to shift the pressure handle to VENT. Stand back—steam erupts powerfully for 90 seconds. Ideal for broccoli or asparagus, as residual heat turns them to mush. Stop venting immediately when the floating valve drops to avoid undercooking. For mixed dishes like chicken-and-rice, use the combination method: 10 minutes natural release followed by quick release.
Critical Safety Checks Every Cook Must Do
Pre-Cooking Safety Verification
Before each use:
1. Inspect the sealing ring for twists or debris
2. Ensure the steam vent path is clear (use the cleaning pin)
3. Confirm the inner pot sits flush against the heating element
A misaligned pot causes E03 temperature errors and scorched food.
Emergency Response for Steam Leaks
If steam escapes from lid edges during cooking:
– Immediately unplug the unit
– Wait 10 minutes for natural cooling
– Check and reseat the sealing ring
Never force the lid open if it resists—pressure remains. Wait until the floating valve drops completely.
Cleaning Routines That Extend Lifespan
Daily Post-Cooking Protocol
Hand-wash the inner pot with a soft sponge—never steel wool. Remove and rinse the sealing ring under warm water. Empty the condensation cup (small reservoir at the unit’s back) after every use. Wipe the lid’s underside with a damp cloth, focusing on the float valve area where food particles hide.
Monthly Deep Maintenance
Soak the sealing ring in baking soda solution weekly to eliminate odors. Descale the heating element monthly using equal parts water and white vinegar if you have hard water. Test safety features by running a water-only cycle: pressure should build within 12 minutes, and the lid should lock automatically. Replace the sealing ring every 12-18 months—it’s a consumable with only 90-day warranty coverage.
Troubleshooting Top Error Codes
Fixing Pressure Build Failures
If pressure won’t build:
1. Verify at least 1 cup liquid is present
2. Check the sealing ring for proper groove seating
3. Ensure the pressure handle is set to SEAL
4. Clean the steam release valve with a pipe cleaner
Food particles frequently block the valve—this causes 70% of E04 errors.
Correcting Over/Undercooked Food
Adjust for these common issues:
– Frozen ingredients: Add 5 extra minutes
– High altitude: Increase time by 15% above 3,000 feet
– New cooker: Reduce times by 10% (units run hotter initially)
Never open the lid early to check food—reset the timer if you interrupt cooking.
Advanced Techniques for Pro Results
Layer Cooking with Steam Baskets
Place potatoes or carrots directly in the inner pot. Position a steamer basket with broccoli or fish 5 minutes before cooking ends. For pot-in-pot cooking (cheesecake or rice pudding), place the dish on the trivet with 1 cup water below. This prevents burning while cooking multiple items simultaneously.
Perfect Recipe Conversion Formulas
Adapt stovetop recipes with these rules:
– Reduce liquid by 20% (e.g., 4 cups → 3.2 cups)
– Cut cooking time to one-third of original (e.g., 60 minutes → 20 minutes)
– Add dairy or herbs after pressure release (they curdle or lose flavor under pressure)
Brown meats first using the sauté function for richer flavor—this works exceptionally well in IH models.
Model-Specific Power Features
Twin Pressure System Mastery
Switch between high pressure (15 PSI) for meats and low pressure (8 PSI) for delicate fish. Use the auto-steam clean function after pungent dishes like kimchi—it runs a steam cycle to eliminate odors. Disable voice navigation in settings if preferred, but it’s invaluable for beginners.
IH Induction Precision Advantages
Leverage the induction heating for sous-vide style cooking at exact temperatures. The stainless steel inner pot offers superior searing—brown ribs directly in the pot before pressure cooking. Voice guidance walks you through each step, making complex recipes foolproof.
Master your Cuckoo pressure cooker by starting with its RICE function—perfect grains build foundational confidence. Remember the golden rules: never overfill, always verify the seal, and respect pressure release timing. Within weeks, you’ll convert tough brisket into tender masterpieces in 45 minutes and transform weeknight dinners from chores into celebrations. Register your warranty online within 30 days for 5-year heating element coverage, and visit Cuckoo’s support portal for model-specific troubleshooting videos. Your Korean kitchen powerhouse isn’t just faster—it’s the key to flavors you never thought possible at home.


