
That vintage Mirro pressure cooker gathering dust in your pantry isn’t just a relic—it’s a mealtime miracle waiting to happen. With its distinctive jiggle-top weight and satisfying safety-lock clunk, this workhorse transforms tough chuck roast into fall-apart tenderness in under 45 minutes. But if you’ve never operated one, that red button popping up or steam hissing from the handles might make you nervous. Don’t worry: mastering how to use a Mirro pressure cooker safely takes just one practice run. This guide cuts through the confusion with precise steps straight from the manufacturer’s specs—no guesswork, no jargon.
Unlike modern electric models, your Mirro relies on mechanical physics and failsafes built to last decades. When steam pressure hits 15 PSI, that red button rises like a traffic signal saying “locked,” while dual metal latches clunk into place under the handles. Think of it as your cooker’s seatbelt system—active only when needed, releasing only when safe. By the end of this guide, you’ll confidently pressure-cook pot roast, can tomatoes, or steam potatoes while respecting the physics that make these vintage units so reliable. Let’s unlock your cooker’s potential.
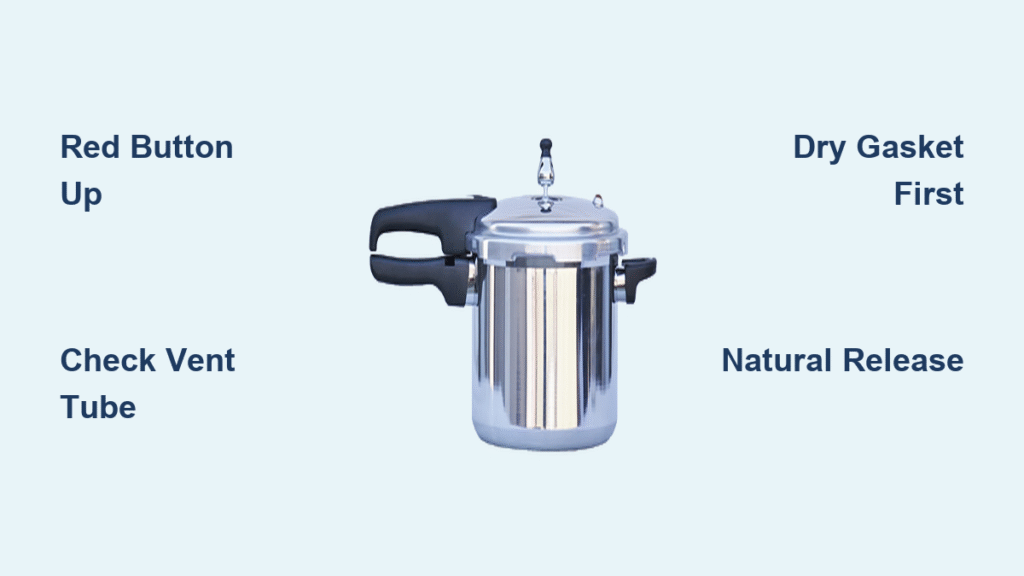
Essential Components to Identify

Red Button Pressure Indicator
This red plunger in your lid handle is your primary pressure gauge. As steam builds, it rises visibly when reaching 15 PSI—signaling the cooker is pressurized and locked. Never force the lid open while this button is elevated, even slightly. Once cooking finishes, it sinks back down only when pressure fully releases, giving you a visual “safe to open” indicator. Check it’s moving freely before each use; if stuck, clean around the base with a toothpick.
Dual Safety Locks
Two metal latches drop automatically from the upper handle into slots on the lower handle when pressure builds. You’ll hear a distinct metallic clunk as they engage—this is your second critical safety layer. Before opening, verify both latches have retracted upward. If they remain locked down, pressure is still present. Forcing the lid when latches are engaged risks severe burns—always wait for the red button to drop first.
Overpressure Safety Plug
That small red plastic plug on the lid acts as your emergency pressure release. If pressure exceeds safe limits (like a blocked vent tube), it blows out harmlessly—think of it as a circuit breaker for steam. Replace it immediately if dislodged during operation. Never seal it with tape or grease; this plug must move freely to prevent dangerous over-pressurization.
Water Requirements for Operation
Standard Cooking Setup
Always start with 2 full quarts of water in the bottom—never less. This creates the steam volume needed for safe pressure building. For foods that foam (beans, pasta, or grains), reduce liquid by ¼ cup to prevent clogging the vent. Never fill past the ⅔ line on the inner pot, as expanding foods need steam circulation space. Use a marked wooden spoon to measure water consistently—eyeballing risks underfilling.
Canning Water Levels
Pressure canning demands deeper water: fill with 3 inches of water covering the rack. This prevents scorching during long processing times. Unlike stovetop cooking, never let water drop below this level mid-canning—add boiling water through the vent if needed. Remember: altitude adjustments apply here (more on that later), but water depth remains fixed.
Pre-Use Preparation Steps
Gasket Conditioning
New rubber gaskets often resist sealing. After your first three uses, lightly rub food-grade mineral oil (not cooking oil) on the gasket if closing feels stiff. Stretch it gently by hand—like warming up a rubber band—to improve flexibility. Never force the lid shut; if resistance persists, the gasket may be misaligned in its groove.
Critical Drying Step
Moisture is the #1 cause of steam leaks. After washing, dry the gasket and lid groove thoroughly with a towel. Wipe the sealing surface inside the cooker base too. A single water droplet prevents proper sealing, causing steam to hiss from the handles during pressurization. Verify dryness by touch before assembly—this 10-second check prevents 30 minutes of failed cooking.
Loading Your Cooker Correctly
Food Placement Guidelines
Place food directly in the pot or on the included rack, but never exceed the ⅔ fill line for solid foods (like meat) or ½ line for foaming items. Overfilling blocks steam paths and risks clogging the vent tube. For canning, ensure jars stand upright on the rack with 1–2 inches between them—crowding causes uneven heat distribution.
Lid Alignment Process
Position the lid so handles align perfectly with the base. Push down firmly while turning clockwise until you hear a sharp snap. The lid should sit flush with zero gaps. If it wobbles or feels loose, reopen and realign—the safety locks won’t engage properly otherwise.
Troubleshooting Your Mirro Pressure Cooker

Red Button Won’t Pop Up
This means pressure isn’t building. Immediately check:
– Water level: Less than 2 quarts? Add more and restart.
– Vent tube blockage: Shine a flashlight into the tube—food debris stops steam flow. Clear with a pipe cleaner.
– Lid seal: Moisture or food particles on sealing surfaces break the vacuum. Dry thoroughly and reseat.
Excessive Handle Steam
If steam hisses loudly from handles after 8 minutes (past the normal initial phase):
1. Turn off heat immediately.
2. Let cool completely—do not force open.
3. Inspect gasket seating and lid alignment.
Never ignore this—it indicates a failed seal that risks undercooked food.
Pressure Drops During Cooking
This happens when heat is too low. Gently increase burner level until the weight resumes steady rocking (1–2 rotations per second). If using gas, check for drafts near the stove; electric coils may need a heat diffuser. Maintain consistent pressure—fluctuations extend cooking times.
First-Time Mirro Pressure Cooker User Tips
Practice Run Protocol
Always start with a water-only test:
1. Add 2 quarts water to the empty cooker.
2. Secure lid and place on high heat.
3. Bring to pressure (red button rises, weight jiggles).
4. Maintain for 10 minutes, then cool naturally.
This familiarizes you with sounds and timing—no ruined dinner.
Sound Recognition Guide
- Hissing from handles (first 5 min): Normal steam release.
- Metallic clunk: Safety locks engaging—pressure is building.
- Steady weight rocking: Perfect operating pressure.
- Silence after cooking: Pressure releasing safely.
Common New User Mistakes
- Overfilling past the ⅔ line (causes clogs).
- Forgetting to dry the gasket (triggers steam leaks).
- Rushing pressure release (forces open while button is up).
- Using vegetable oil on gaskets (attracts debris—use only mineral oil).
Post-Cooking Cool Down

Natural Release Method
For meats, beans, or dense foods: remove cooker from heat and wait 15–20 minutes. The red button sinks as pressure drops—only open when it’s fully down. This prevents food from foaming over and ensures even cooking.
Quick Release Option
For vegetables or delicate foods: run cool water over the lid’s top (never the vent tube!) for 1–2 minutes. Steam releases rapidly, but never use this for canning—it risks seal failures in jars.
Long-Term Storage Practices
Seasonal Storage Prep
Before storing for months:
– Wash and dry all parts completely.
– Lightly oil the gasket with mineral oil.
– Store the lid upside down on the base to prevent gasket compression.
This maintains flexibility for your next cook—dry, compressed gaskets crack and leak.
Replacement Part Schedule
- Gasket: Replace every 12–18 months (sooner if hardened or cracked).
- Overpressure plug: Swap every 5 years, or if discolored/damaged.
- Weight regulator: Inspect annually for dents that affect PSI accuracy.
Worn parts compromise safety—don’t gamble with vintage equipment.
Mastering how to use a Mirro pressure cooker turns intimidating physics into your kitchen superpower. Start with potatoes or carrots to build confidence, then tackle pot roast or dried beans—always respecting the red button’s signals. Remember: steam leaks mean stop and check, never force the lid, and natural release prevents messy blowouts. With this guide, that heirloom cooker isn’t just safe—it’s your fastest path to rich, tender meals. Your grandmother’s secret is now yours: the satisfying jiggle of pressure cooking done right.


