
Your Tefal pressure cooker just delivered a perfect pot roast, but now you’re staring at stubborn food residue clinging to the inner pot and mysterious gunk around the valves. Don’t let the complex-looking parts intimidate you—properly cleaning your Tefal pressure cooker takes less time than cooking dinner when you know the exact steps. This guide cuts through the confusion with model-specific techniques to restore your cooker’s performance while protecting critical safety components. You’ll learn how to safely disassemble every part, eliminate mineral buildup, and prevent common cleaning mistakes that shorten your appliance’s lifespan.
Ignoring proper cleaning routines risks trapped food particles compromising the sealing ring’s integrity or mineral deposits clogging vital steam pathways. A poorly maintained Tefal might fail to reach pressure during your next cooking session, wasting ingredients and time. By following these precise methods, you’ll keep your pressure cooker operating at peak efficiency for years—no more guessing whether that faint hiss means danger or normal function.
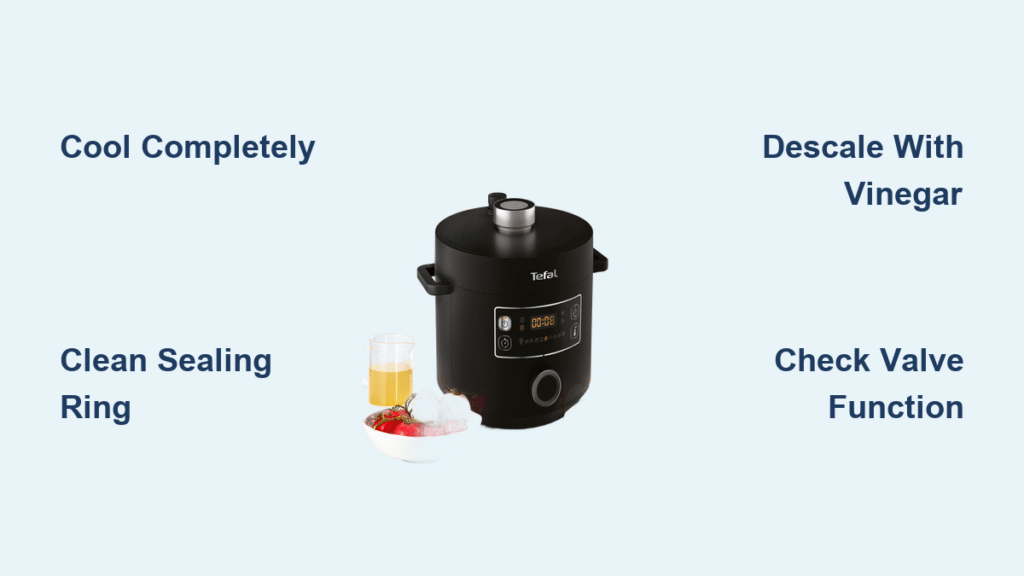
Cool Down Safely Before Touching Parts
Never rush this critical step—your safety depends on complete cooling. After cooking, set your Tefal pressure cooker on a heat-resistant surface away from children and let it sit undisturbed for 30-45 minutes. During this natural cooling period, internal pressure drops to zero. Only when the cooker feels completely cool to the touch should you initiate manual pressure release using your specific model’s valve method. Test for residual pressure by gently attempting to open the lid; if it resists, wait longer.
Pro tip: Place a folded towel under the cooker during cooling to protect countertops from residual heat transfer. The base remains warm longer than the lid, so always test multiple areas before handling.
Break Down Components Without Damage

Identify Every Removable Part First
Your Tefal’s disassembly success starts with recognizing these essential components:
– Inner cooking pot (stainless steel or non-stick coated)
– Lid assembly with embedded sealing ring
– Pressure valve system (safety valve + regulator weight)
– Rubber sealing ring/gasket (critical pressure seal)
– Condensation collector (beneath lid handle on most models)
– Steam basket or trivet (if used during cooking)
Follow Model-Specific Disassembly Steps
- Rotate lid counterclockwise firmly until it releases from the locking mechanism
- Lift sealing ring straight up from the lid groove—note its orientation for reassembly
- Remove pressure regulator by lifting vertically (some models require unscrewing)
- Slide out condensation collector from its track under the lid handle
- Lift inner pot straight up from the base unit
Critical mistake to avoid: Forcing stuck parts. If components resist removal, double-check that all pressure has fully released and the lid is properly unlocked.
Clean Each Component Using Correct Techniques
Inner Pot Deep Cleaning Protocols
Stainless Steel Models:
– Fill with warm water + 2 drops dish soap
– Scrub all surfaces with non-abrasive sponge (focus on rim where food traps)
– Rinse until water runs crystal clear
– Dry immediately with microfiber cloth to prevent water spots
Non-Stick Models:
– NEVER use metal scrubbers—they permanently damage the coating
– Soak in warm soapy water for 15 minutes to loosen residue
– Use soft cellulose sponge with baking soda paste for stubborn spots
– Rinse 3 times to remove all cleaning agents
Lid Assembly Precision Cleaning
- Wash exterior with damp soapy sponge, avoiding electrical components on electric models
- Critical step: Use a bottle brush to clean the valve opening channel—food here causes pressure failures
- Inspect the locking mechanism groove with a flashlight for trapped debris
- Wipe the pressure indicator window until completely clear
Sealing Ring Lifespan Extension
This rubber component determines whether your Tefal builds pressure properly:
– Hand-wash in mild soapy water (no dishwashers!)
– Check for damage: Replace immediately if you spot cracks, tears, or permanent flattening
– Air-dry completely before storage—never force-dry with heat
– Store loosely in a cool, dark place (never compressed in a drawer)
Replacement rule: Change every 12-18 months with regular use, or immediately after cooking strong-smelling foods like curry that cause lingering odors.
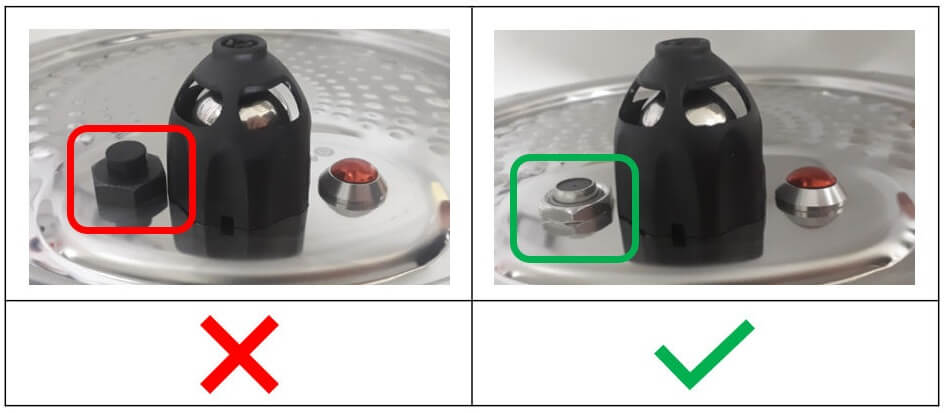
Valve System Safety Cleaning
Safety valve:
– Pull straight up to remove (model-specific)
– Rinse under warm water while shaking gently—internal parts must move freely
– Clear debris from openings using a toothpick (never metal)
Pressure regulator:
– Soak 5 minutes in warm soapy water
– Use small brush to clean all crevices
– Test by sliding weight up/down steam vent—it should move smoothly
Steam vent:
– Insert pipe cleaner through entire tube length
– Run water through vent to confirm unobstructed flow
Eliminate Hard Water Buildup in 6 Steps

Mineral deposits from hard water silently sabotage pressure performance. Use this vinegar method:
1. Mix equal parts white vinegar and water
2. Fill pot to minimum liquid level (usually 1 cup)
3. Heat until pressure builds, then maintain 5 minutes
4. Allow natural pressure release (no quick release!)
5. Cool completely before emptying
6. Rinse 3 times with clean water to remove vinegar taste
For severe buildup: Substitute citric acid (2 tbsp in 2 cups warm water). Soak without heating for 2 hours, then gently scrub and rinse thoroughly.
Electric vs. Stovetop Cleaning Differences
Electric Models (Cook4Me, Clipso Minut Duo)
- NEVER submerge base unit—wipe with damp cloth only
- Clean heating element area with cotton swab dipped in vinegar
- Empty condensation collector after every use
- Keep pressure sensor port completely dry
Stovetop Models (Clipso, Secure 5 Neo)
- Fully immerse all metal parts in soapy water
- Check pot base for discoloration where flame contacts
- Verify pressure indicator window remains transparent
- Inspect base flatness—warped pots won’t seal properly
Daily Maintenance That Prevents Major Problems
After every use:
1. Cool completely (30+ minutes)
2. Remove and wash sealing ring
3. Quick-wash inner pot with soapy water
4. Wipe lid interior with damp cloth
Storage protocol:
– Store lid inverted or separate from pot
– Keep sealing ring loose in original box
– Place paper towel inside pot to absorb moisture
– Never stack items inside the cooker
Fix These 3 Common Cleaning Failures
Stuck Food Residue Solutions
- For mild buildup: Soak pot 30 minutes in warm soapy water, then scrape gently with wooden spoon
- For severe burns: Pressure-steam water 5 minutes, then natural release—food lifts right off
- NEVER use steel wool on non-stick surfaces—it creates permanent scratches
Stubborn Odor Elimination
- Apply baking soda paste (3 tbsp + water) to inner pot, leave overnight
- Next day, steam lemon peels in 1 cup water for 5 minutes
- If odors persist, replace sealing ring immediately—old rings absorb smells permanently
Handle Discoloration Fixes
- Stainless steel: Rub with cream of tartar paste using cloth in grain direction
- Non-stick: Discoloration is harmless but permanent—focus on preventing future stains with proper preheating
Reassemble and Verify Safety Function
Correct Reassembly Sequence
- Sealing ring: Position evenly in groove with no twists
- Valves: Insert safety valve until it clicks into place
- Regulator: Confirm weight slides freely on steam vent
- Condensation collector: Snap firmly into lid handle track
Pressure Test After Cleaning
- Add 2 cups water to inner pot
- Lock lid securely
- Heat until pressure builds (10-15 minutes)
- Maintain pressure 2 minutes
- Natural release
- Critical check: No steam should escape around lid edges during cooking
Long-Term Care Schedule
Maintenance calendar:
– After each use: Basic pot/sealing ring wash
– Weekly: Deep clean all valves and lid components
– Monthly: Full disassembly inspection
– Every 6 months: Descaling if using hard water
– Annually: Mandatory sealing ring replacement
Storage essentials:
– Keep in dry, ventilated cabinet (not under sink)
– Place silica gel packets inside pot to absorb moisture
– Never store with lid locked in place
Professional help needed when:
– Pressure fails to build after cleaning
– Safety valves show physical damage
– Electric models display error codes
– Base becomes warped or dented
Your Tefal pressure cooker will deliver restaurant-quality meals for years when you follow these precise cleaning protocols. The secret isn’t complicated equipment—it’s consistently using the right techniques for each component. Never skip the sealing ring inspection or valve cleaning, as these small parts control your cooker’s safety and performance. By dedicating just 15 minutes after each use to proper cleaning, you’ll avoid costly replacements and ensure every meal cooks perfectly. Remember: a spotless pressure cooker isn’t just about appearance—it’s your guarantee of safe, efficient cooking every time you use it.


