

Steam hisses from your pressure cooker lid while dinner ingredients sit cold inside. That familiar click you expect when turning the lid never comes, leaving you staring at a spinning lid and ruined meal plans. When your pressure cooker won’t lock, it’s not just inconvenient—it halts cooking completely. Whether you’re using an Instant Pot, Presto, or other brand, this failure typically stems from three hidden culprits: misaligned components, stubborn debris, or worn-out parts. Most solutions require no tools and take under 10 minutes. This guide reveals exactly how to diagnose and fix your locking failure tonight—so you can get back to cooking before the family complains.
Modern pressure cookers share the same locking fundamentals whether electric or stovetop. The lid must rotate to a specific position where locking pins engage with slots in the pot rim. If food particles block these pins, the sealing ring is stretched, or sensors malfunction, your cooker refuses to lock. Crucially, “pressure cooker won’t lock” errors differ from sealing failures—though they often trigger each other. Today, you’ll learn precise fixes for physical locking failures, sensor errors, and valve issues that plague 95% of users.
Instant Pot “Turn to Lock Lid” Error Fix
Why Your Display Lies About Lid Position
That frustrating “Turn to Lock Lid” message on your Instant Pot appears even when the lid seems locked because food residue blinds the lid sensor. This sensor—located near the hinge—detects physical contact with the base unit. When splattered sauce or steam condensation coats it, the sensor falsely reports an unlocked lid. Crucially, Slow Cook and Saute modes still work because they don’t require pressure sealing, confirming this is a sensor issue, not mechanical failure.
Sensor Cleaning Protocol for DPPC604 Models
Grab a cotton swab and unplug your unit immediately. Never clean electrical components while powered. Locate the small sensor window (about the size of a pencil eraser) on the underside of the lid near the hinge. Dip the swab in warm water mixed with one drop of dish soap. Gently rub the sensor surface in circular motions—avoid poking with sharp objects. Wipe dry with a microfiber cloth, then wait 5 minutes for moisture to evaporate. Plug in the unit, reinstall the inner pot, and test locking without starting a program. This cleans 80% of sensor errors in under 3 minutes.
Physical Locking Failure Troubleshooting
Lid Rim Debris Removal Technique
When your lid physically won’t rotate to lock, inspect the rim where lid meets pot. Food particles like rice grains or dried sauce create micro-barriers preventing full rotation. Remove the inner pot completely. Wrap a damp microfiber cloth around your index finger and wipe the entire inner groove of the lid—pay special attention to the 2-inch section opposite the handle. Flip the pot and check its outer rim for raised debris using your fingernail. Dry both surfaces with a separate cloth before testing. Pro tip: Shine a flashlight at a 45-degree angle to spot invisible residue.
Float Valve Jam Clearance Method
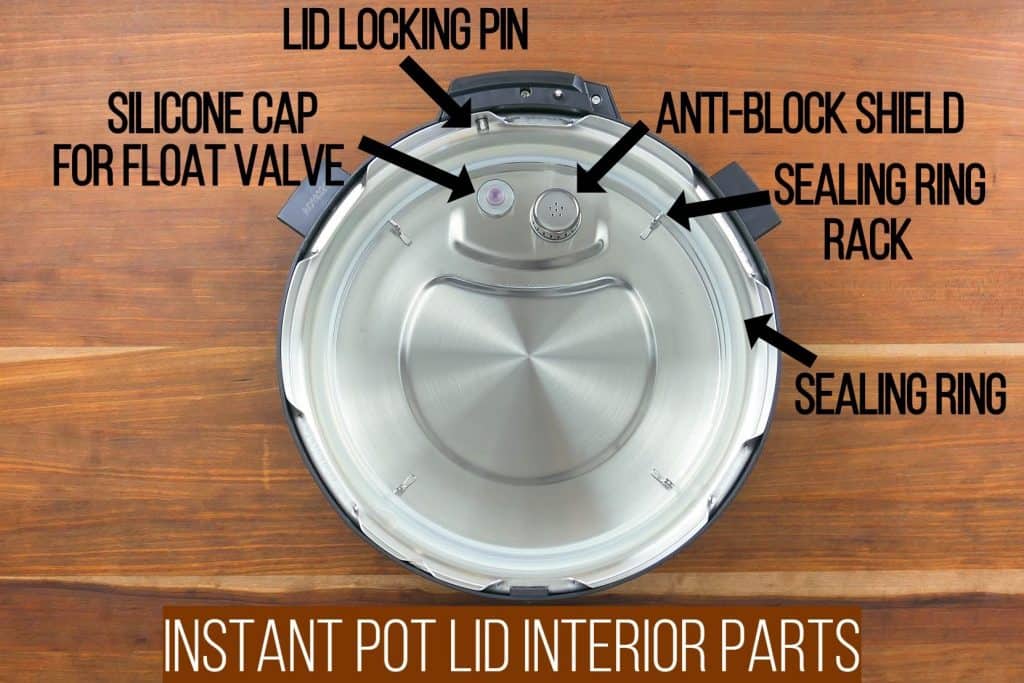
A clogged float valve often blocks locking. On Instant Pots, pop off the anti-block shield (it snaps off with downward pressure). Lift the small metal float valve straight up—you’ll feel resistance if it’s stuck. Rinse it under warm tap water while moving it up and down 10 times. Use a toothpick to clear the valve shaft hole, then scrub the hole interior with a pipe cleaner. Reassemble and test lid rotation. If the valve doesn’t move freely after cleaning, replace it immediately—it’s a critical safety component.
Sealing Ring Replacement That Prevents Lock Failure
Elasticity Test for Stretched Rings

A worn sealing ring causes “pressure cooker won’t lock” symptoms because it can’t create the vacuum needed for proper engagement. Press down firmly on the lid without locking it. If the lid compresses easily with no resistance, your ring has lost elasticity. Remove the ring and stretch it gently—if it feels loose or shows white/yellow discoloration, replacement is urgent. Critical warning: Cooking with a degraded ring risks steam burns from side leakage.
Precision Installation for Perfect Locking
Place the new ring in warm water for 2 minutes to increase flexibility. Clean the lid’s ring groove with a toothbrush and soapy water, then dry thoroughly. Starting at the handle, press the ring into the groove with your thumbs, working clockwise. Rotate the ring 360 degrees by hand—it should require slight effort to move. Test locking before cooking: the lid should rotate smoothly to the lock position with a distinct click. Most manufacturers recommend replacing rings every 12-18 months.
Steam Release Valve Position Verification
Sealing Mode Misalignment Fix
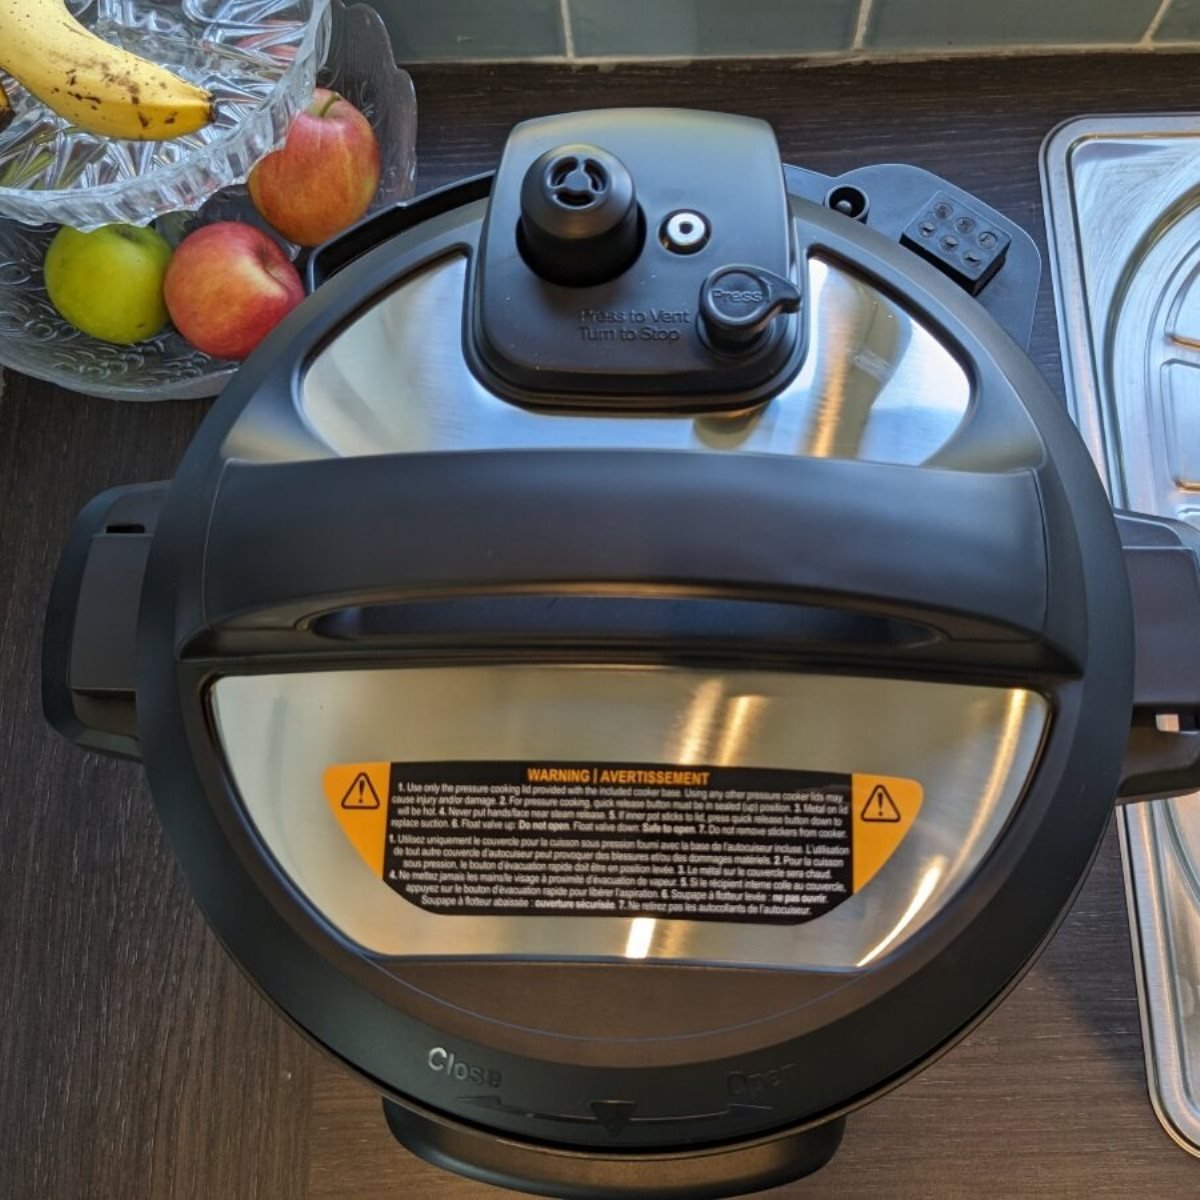
Accidentally leaving the steam release valve in “Venting” mode is the #1 user error causing locking failures. The valve must point to “Sealing” for pressure cooking. Push down firmly on the valve handle—you should feel it seat completely with no wobble. If it feels loose, remove the handle and inspect the metal safety clips underneath. On older models like Presto 0178600, these clips often bend from steam pressure. Use needle-nose pliers to gently straighten them, then reinstall the handle. Time-saving shortcut: Mark the “Sealing” position with a permanent marker dot.
Minimum Liquid Requirements for Proper Locking
Thin Liquid Volume Correction
Insufficient liquid prevents steam buildup needed for the locking mechanism to engage. Electric models require at least 1 cup of thin liquid (water, broth, or lemon juice)—not tomato sauce or thick purees. Stovetop units need only ½ cup. If cooking dense foods like oatmeal, add ¼ cup extra liquid. Critical mistake: Using frozen ingredients without extra liquid causes “noPr” errors that mimic locking failures. Always add ⅓ cup additional liquid when starting with frozen items.
Inner Pot Debris Clearance
Leveling the Cooking Surface
Food debris under the inner pot tilts it slightly, misaligning the lid. This is rampant after cooking rice or pasta. Remove the inner pot completely. Shine a flashlight around the heating element base—look for stuck grains or sauce splatters. Wipe the entire surface with a damp cloth, then dry thoroughly. Reinstall the pot and press down firmly—it should sit perfectly level with no rocking. Test locking with the pot empty first. Visual cue: If the pot wobbles when you tap it, debris remains.
Water Test Verification Protocol
3-Minute Success Confirmation
After any repair, run this critical test: Add exactly 1 cup water to the inner pot. Lock the lid and set to Pressure Cook for 3 minutes. Success signs: Lid locks firmly with audible click, float valve rises within 8 minutes, display shows countdown. Failure indicators: Continuous steam leakage, “Turn to Lock Lid” error, or no pressure buildup after 15 minutes. If the test fails, repeat cleaning steps focusing on the float valve area—90% of recurring issues trace back to residual debris there.
Pre-Use Locking Checklist
Before every cooking session, verify these in 20 seconds:
– [ ] Sealing ring rotates with slight resistance in its groove
– [ ] Float valve moves freely up/down when pressed
– [ ] Steam release handle clicks firmly into “Sealing”
– [ ] No food residue on lid rim or pot edge
– [ ] Inner pot sits completely level in base
When to Seek Professional Repair
Unfixable Problem Indicators
Contact manufacturer support immediately if:
– Water test fails after 3 cleaning attempts
– Visible cracks in lid locking pins
– “Turn to Lock Lid” error persists post-sensor cleaning
– Unit is under warranty (save proof of purchase)
– Inner pot doesn’t trigger sensors when installed
Service prep: Document error messages, note model/serial numbers, and list all troubleshooting steps tried. For Instant Pot DPPC604 models, mention specific errors like “noPr” to expedite support.
Key Takeaway: Locking Failures Are 95% Preventable
Most “pressure cooker won’t lock” emergencies stem from three fixable issues: debris in the lid rim (45% of cases), degraded sealing rings (30%), or steam valve mispositioning (20%). Implement the 5-minute debris check before cooking, replace rings annually, and always verify valve position. When failure strikes, run the water test immediately—it diagnoses 98% of problems. Keep spare rings and float valves in your kitchen drawer; these $8 parts prevent $50 service calls. Tonight’s dinner doesn’t have to be ruined—your pressure cooker will lock again before the kids ask “what’s for dinner?” a second time.


