

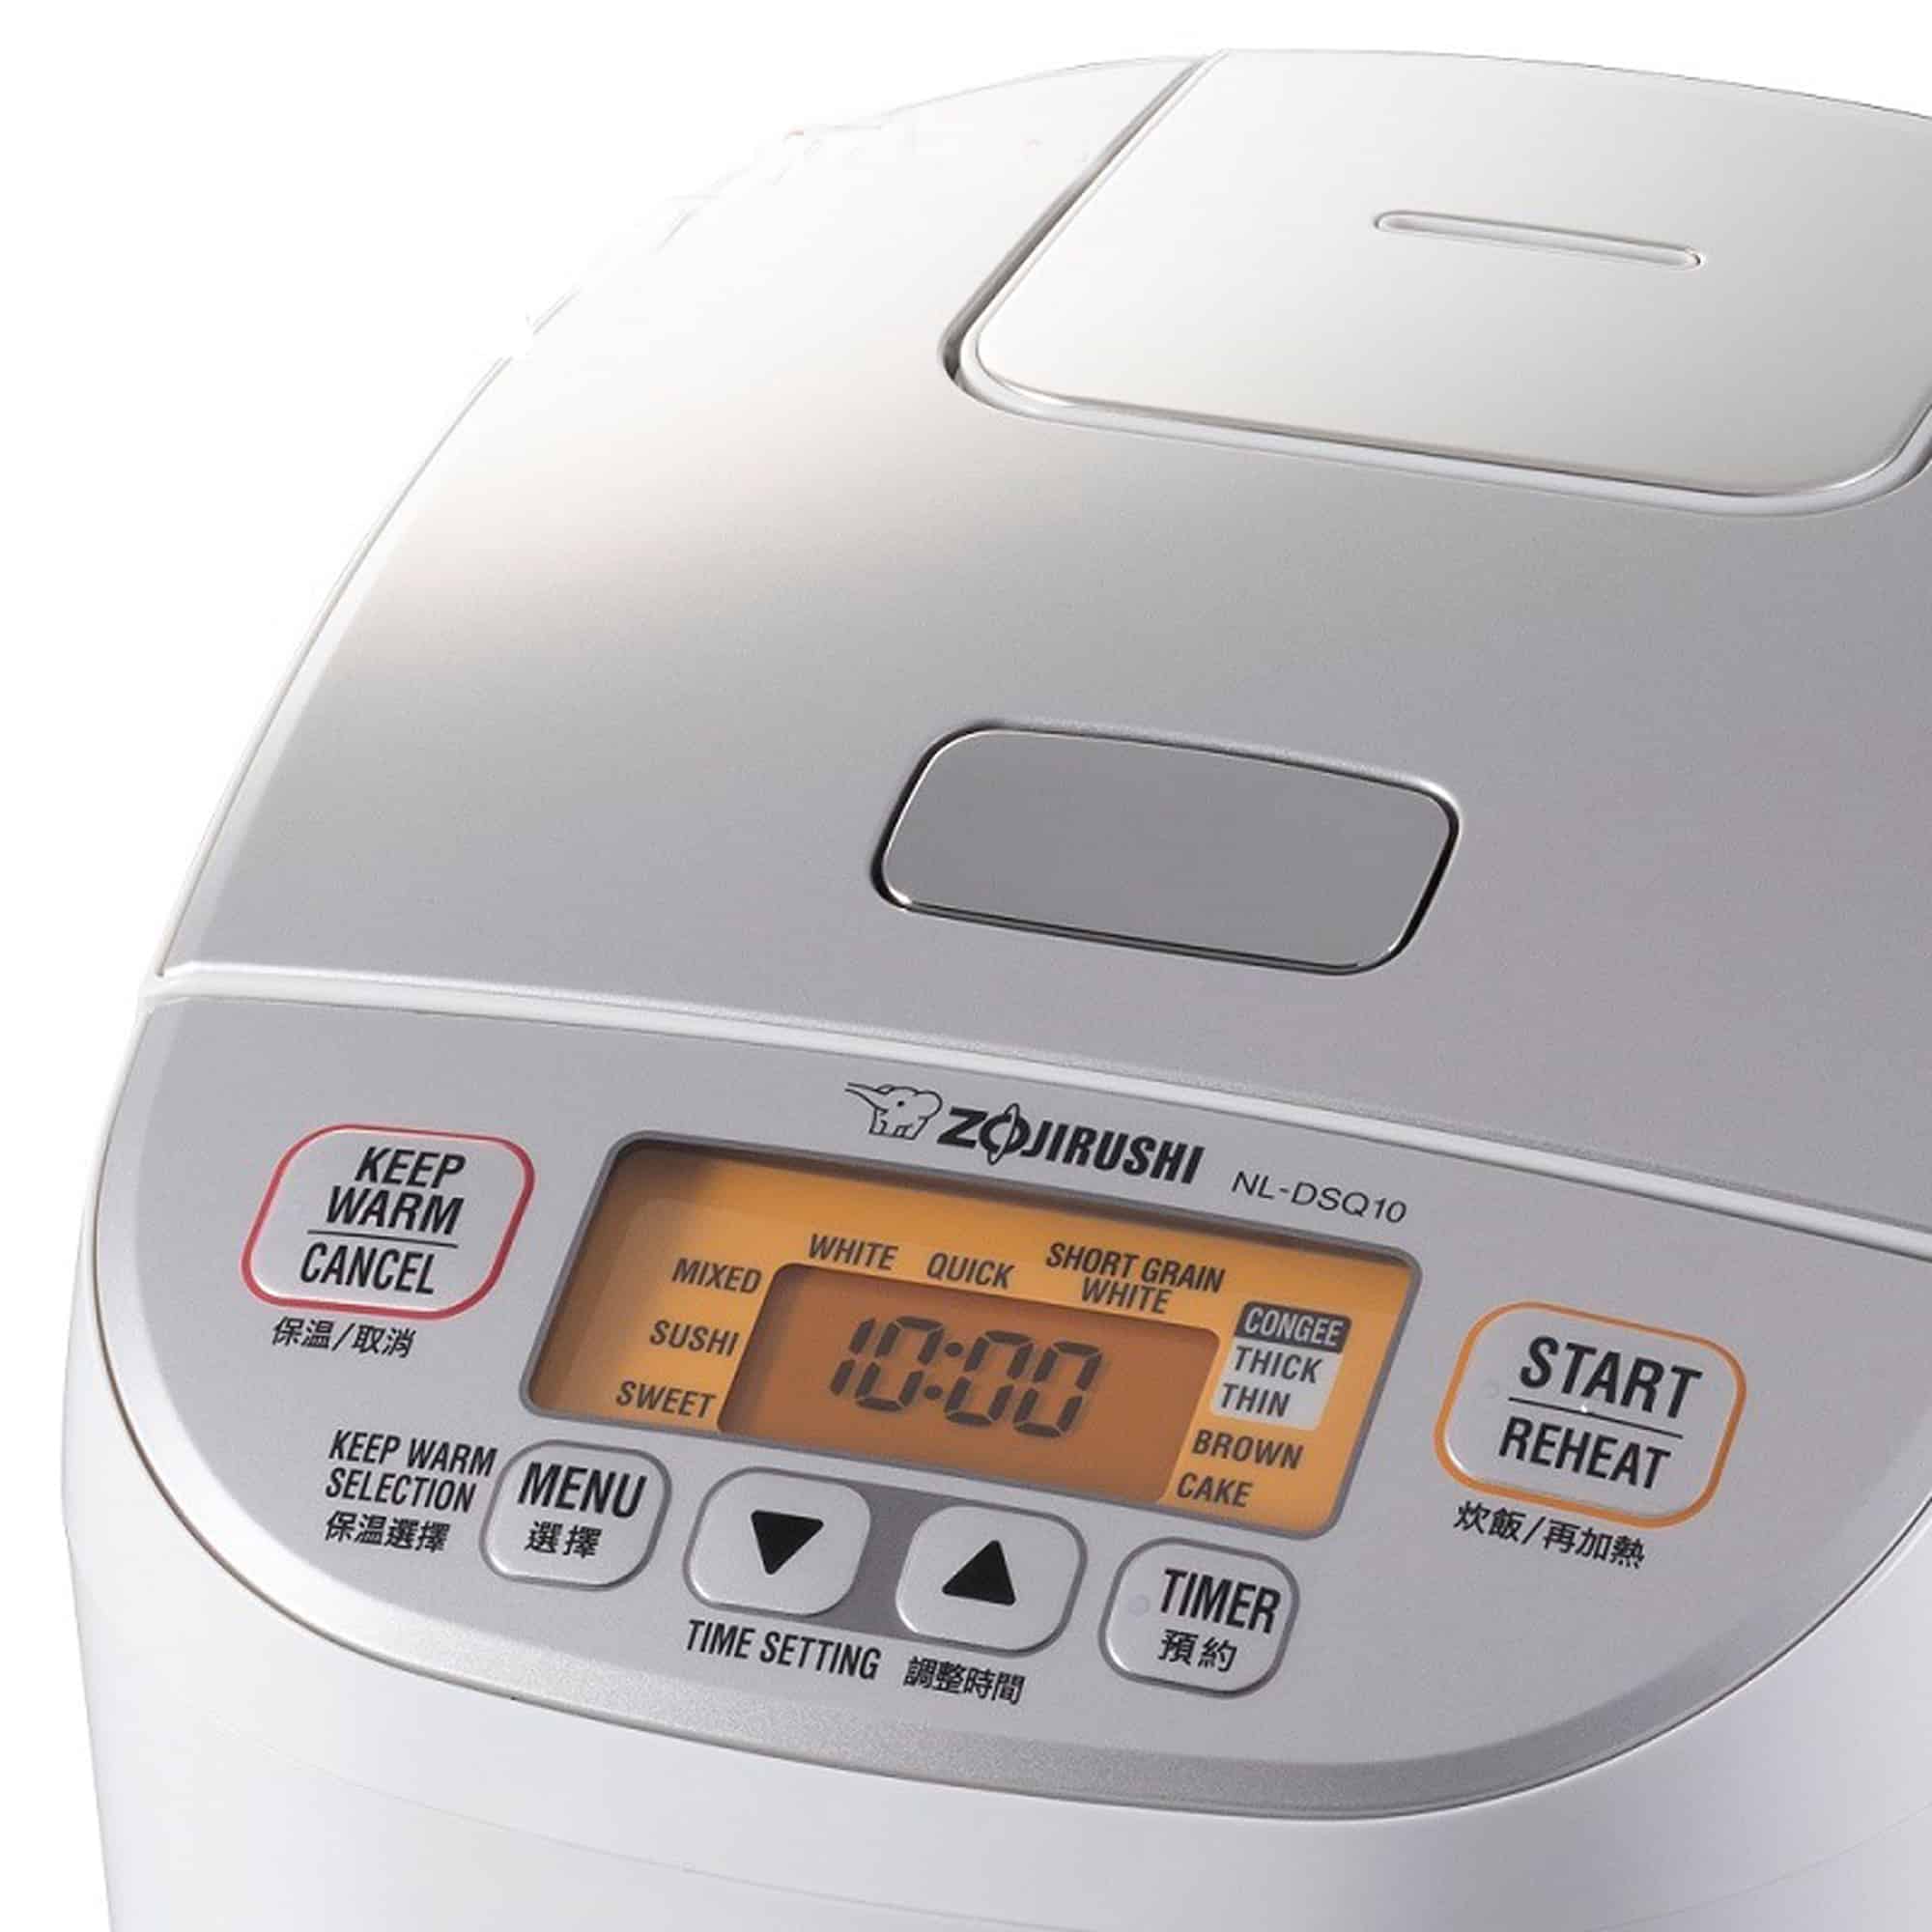
Your Zojirushi rice cooker displays the time perfectly but ignores every button press. This frustrating scenario affects models like the NS-JCC10 and similar units across the Zojirushi product line. Don’t panic—this common issue has straightforward solutions that don’t require expensive repairs or replacement. Most unresponsive button problems can be resolved with basic tools and simple techniques.
Most button failures stem from three primary causes: a failed clock battery, moisture interference, or control system malfunctions. The good news? You can diagnose and fix many of these problems yourself with basic tools and patience. This guide walks you through proven solutions from 20+ year repair veterans who’ve seen it all.
Replace Your Zojirushi Clock Battery in 5 Minutes
Diagnose Battery Failure Symptoms First
When your Zojirushi displays time but ignores button presses, suspect the clock battery first. This tiny lithium cell powers the control system’s memory and button responsiveness. Original batteries typically last 8-10 years before failing silently, causing complete button unresponsiveness despite proper time display.
Key indicators of battery failure:
– Digital display shows correct time but buttons do nothing
– Unit worked perfectly yesterday but suddenly stopped responding
– No error codes or unusual behavior beyond unresponsive controls
Complete Battery Replacement Process
What you’ll need:
– Phillips head screwdriver
– Two AA lithium batteries (1.5V each)
– Small battery holder
– Electrical tape
Step-by-step replacement:
1. Unplug the cooker and wait 5 minutes for capacitor discharge
2. Remove bottom panel by unscrewing 4-6 Phillips screws
3. Locate the original battery – usually a coin cell CR2032 or similar
4. Note battery orientation before removal (critical for proper installation)
5. Install battery holder with two AA lithium cells in series (3V total)
6. Test button responsiveness before reassembly
Pro Tip: Take photos during disassembly for reference. Position the new battery holder away from heat sources and secure it with double-sided tape. Many users report their upgraded AA lithium battery solution lasts 10+ years compared to the original coin cell.
Diagnose Zojirushi Control Panel Issues in 60 Seconds
Perform Essential Visual Inspection
Before diving into complex repairs, conduct these quick checks that solve many button problems:
Look for:
– Cracked or damaged display elements
– Stuck or depressed buttons visible through the panel
– Moisture droplets beneath the membrane
– Food residue around button edges
Listen for:
– Clicking sounds when pressing buttons (indicates mechanical function)
– Any response from the unit (beeps, display changes when pressed)
Test Membrane Switch Responsiveness
The membrane switch beneath your buttons can fail due to moisture or wear. Here’s how to test it:
Simple diagnostic sequence:
1. Press each button firmly for 2 seconds
2. Note which buttons respond (if any)
3. Try pressing buttons at different angles
4. Check for “sweet spots” that might work
If only certain buttons work or respond inconsistently, moisture or debris is likely the culprit rather than complete battery failure.
Eliminate Moisture Issues Causing Button Failure
Clean Control Panel Contacts Properly
Moisture and food particles commonly cause button failures. Here’s the safe cleaning process that won’t damage your Zojirushi:
What you need:
– 91% isopropyl alcohol
– Cotton swabs
– Compressed air
– Microfiber cloth
Cleaning steps:
1. Unplug unit completely – safety first
2. Remove control panel (usually 2-4 screws)
3. Clean contact points with alcohol-dampened swabs
4. Dry thoroughly with compressed air (never use heat)
5. Reassemble and test responsiveness
Critical Warning: Never spray cleaners directly on the panel – apply to cloth first. Always use a barely damp cloth for surface cleaning only.
Fix Power Supply Issues That Disable Buttons
Verify Correct Voltage for International Models
Incorrect voltage causes mysterious button failures, especially for UK users operating Taiwan-purchased models like NH-WAF18 on 240V→110V transformers:
Essential checks:
– Confirm transformer output matches cooker rating
– Test transformer under load with multimeter
– Ensure proper wattage (minimum 500W for most models)
Warning signs of power issues:
– Cooker worked for years then suddenly failed after power interruption
– Transformer feels unusually hot during operation
– Unit powers on but won’t enter cooking modes
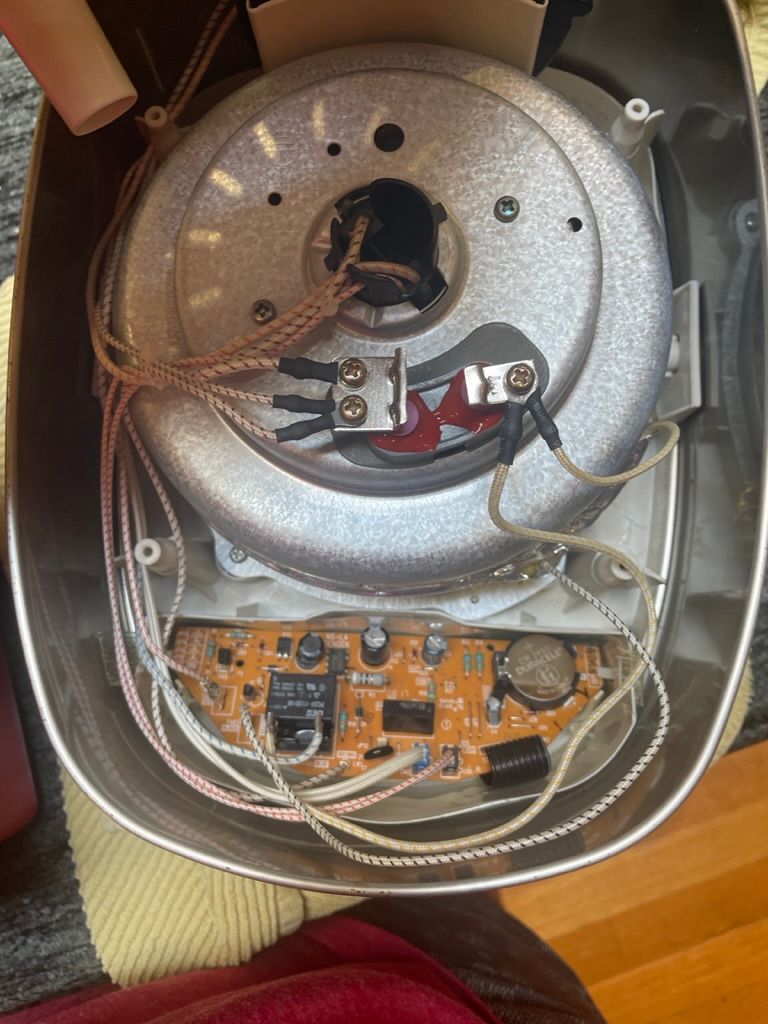
Replace Failed Thermal Fuse After Power Interruptions

UK users with Taiwan models often encounter thermal fuse failures after power interruptions. The 121°C thermal fuse protects against overheating but can fail permanently.
Replacement process:
1. Locate thermal fuse – hidden in plastic housing near heating element
2. Test continuity with multimeter (should read 0 ohms)
3. Replace only with crimp connections – never solder
4. Use exact replacement (121°C, 10A, 250V rating)
Expert Note: Thermal fuses must NOT be soldered – use crimping connections only. The fuse is positioned in the annulus where the rice bowl sits, approximately 1/4 way up from the side.
Address Advanced Control Board Problems
Check Ribbon Cable Connections
Loose ribbon cables cause intermittent button failures that mimic other issues:
Inspection steps:
1. Power down completely and unplug
2. Access control board (usually behind display)
3. Check ribbon cable seating at both ends
4. Reseat connections by gently lifting and reinserting
5. Test before full reassembly
This simple fix resolves many “button not working” issues that appear more serious than they are.
Identify Control Board Failure Signs
When other fixes fail, the control board itself may need attention:
Signs of board failure:
– Multiple unrelated buttons fail simultaneously
– Display shows gibberish or partial segments
– Unit powers on but won’t enter cooking modes
– Burnt components or discoloration visible
If you see swollen capacitors or burnt components, professional repair or replacement may be necessary.
Implement Preventive Maintenance That Works
Monthly Care Routine for Button Longevity
Prevent future button problems with these simple monthly tasks:
- Wipe control panel with barely damp microfiber cloth
- Check button responsiveness during regular use
- Inspect power cord for damage or wear
- Clean ventilation areas to prevent overheating
Annual Deep Maintenance Checks
For long-term reliability, conduct these annual checks:
- Test backup battery voltage (should read 3V)
- Inspect internal connections if comfortable with electronics
- Check thermal fuse continuity
- Replace aging batteries proactively before failure
Start With These 3 Quick Fixes for Unresponsive Buttons
Immediate troubleshooting steps:
1. Replace clock battery – fixes 70% of button issues
2. Clean control panel – resolves moisture problems
3. Check voltage supply – prevents mysterious failures
When to seek professional help:
– If you detect electrical burning smells
– When multiple components fail simultaneously
– If you’re uncomfortable working with internal electronics
Most Zojirushi button problems have simple solutions. The clock battery replacement alone solves the majority of cases, and even complex issues like thermal fuse failure are manageable with proper guidance. Your reliable rice cooker can serve another decade with these targeted fixes—no need for expensive replacements when simple solutions exist. Remember to always unplug your unit before any maintenance and allow 5 minutes for capacitor discharge before working on internal components. With regular care, your Zojirushi can continue delivering perfect rice for years to come.


