
That innocent-looking rice cooker humming on your counter holds hidden dangers you might not see. Starch buildup from yesterday’s jasmine rice, invisible oil residues from coconut rice, and stubborn grains baked onto heating elements can transform your trusty appliance into a flavor-contaminating hazard. Worse? These deposits shorten your cooker’s lifespan and create breeding grounds for mold. The good news is a proper how to wash rice cooker routine takes under 30 minutes and prevents the crusty disasters that require vinegar-soaked marathons later.
Whether you just finished dinner or are tackling months of neglect, this guide delivers exact steps—no guesswork, no damaged non-stick coatings, and no lingering fishy odors. You’ll learn which parts disassemble safely, how to banish burnt-on residue without abrasives, and the critical mistakes that void warranties. Follow these methods to keep your rice cooker turning out perfect grains for years.
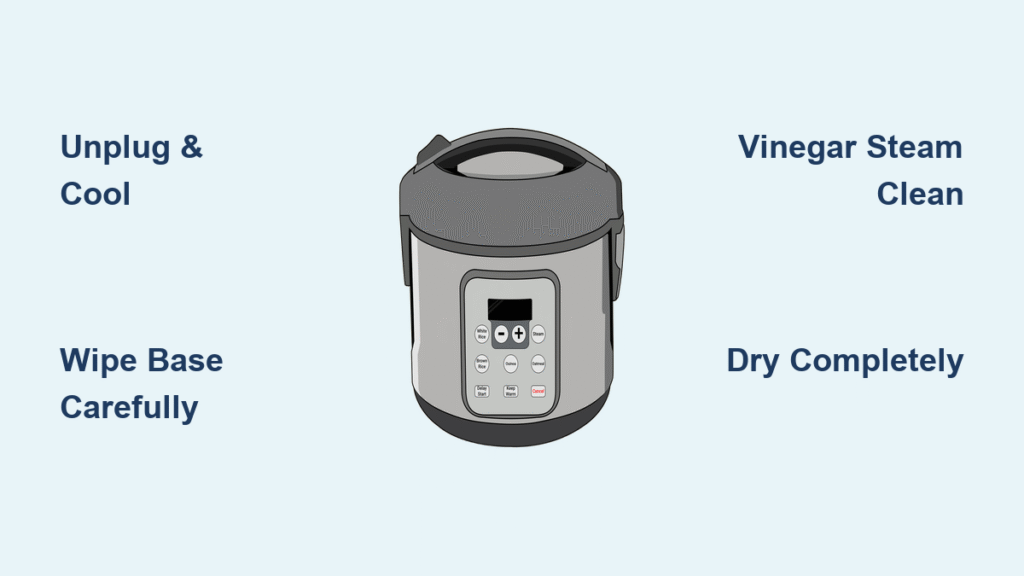
Critical Safety Steps Before Cleaning Your Rice Cooker
Always unplug your rice cooker and wait until all components reach room temperature. Thermal shock from plunging hot parts into cold water creates microcracks in ceramic pots and damages heating sensors. This isn’t just about appliance longevity—it prevents electrical hazards when moisture meets live components.
Never let water penetrate the base unit. A single drop entering the electrical compartment can cause permanent short circuits or shock risks. When wiping the base, dampen your cloth slightly—never wet—and wring it until it feels barely moist to the touch. Skip this step, and you’ll face costly replacements instead of fluffy rice.
Must-Have Tools for Washing Your Rice Cooker
Skip harsh chemicals that strip non-stick coatings. Instead, build your arsenal with these kitchen-safe items:
Essential tools:
– Non-abrasive sponge (keep the scrubby side hidden—only soft foam touches non-stick surfaces)
– Rubber spatula (gently lifts stuck grains without scratching)
– Soft-bristle brush (reaches steam vents and crevices)
– Microfiber cloth (streak-free drying for exteriors)
Proven cleaning solutions:
– Daily cleaning: Mild dish soap in warm water
– Exterior shine: 1:1 white vinegar-water spray in a bottle
– Odor eraser: Baking soda + lemon juice paste (bubbles on contact)
– Sanitizing soak: 2 tbsp bleach + 2 tbsp dish soap in hot water
10-Minute Daily Rice Cooker Cleaning Routine
Disassemble Components in the Correct Order
Pull parts in this sequence to avoid breaking clips or gaskets:
1. Inner pot (cradle with both hands—never lift by the rim)
2. Inner lid (gently pull toward you using the side grips)
3. Steam cap (insert fingers into cutouts and lift straight up)
4. Condensation collector (squeeze sides and slide out horizontally)
Clean Removable Parts Without Damage
For dishwasher-safe models (Aroma, Instant Pot): Place all parts on the top rack. Never stack items—the inner pot must sit upright to prevent warping.
Hand-washing method:
– Soak components in warm soapy water for 20 minutes (extend to 2 hours for stubborn residue)
– Use the soft sponge side only—never the abrasive green side on non-stick surfaces
– Remove large debris first with your rubber spatula before soaking
– Rinse thoroughly under running water until suds disappear
Base Unit Cleaning Without Water Damage
Wipe the heating plate with a vinegar-dampened microfiber cloth, focusing on the center sensor where rice grains hide. Critical: Never spray liquid directly onto the base. For burnt-on spots, lightly dampen the abrasive sponge side once—but press gently as if polishing glass. Skip this step, and carbonized rice will scorch your next batch.
How to Deep Clean a Rice Cooker with Burnt-On Residue
Vinegar Steam Method for Baked-On Messes
When rice has carbonized onto the pot:
1. Mix 1 cup white vinegar + 1 cup water in the inner pot
2. Close the lid and start the “Cook” cycle
3. Let it boil for 5 minutes, then turn off
4. Cool completely (30+ minutes) before washing
Residue wipes away effortlessly—no scrubbing needed.
Baking Soda Power Clean for Lingering Odors
For fishy or sour smells:
1. Create a bubbling paste with baking soda and lemon juice
2. Apply with a soft brush to affected areas
3. Wait 10 minutes—do not let it dry
4. Rinse with warm water until paste is gone
This neutralizes odors without harsh chemicals.
Sanitizing Soak for Thorough Disinfection
Monthly, eliminate bacteria with:
1. Fill a basin with hot water + 2 tbsp bleach + 2 tbsp dish soap
2. Soak removable parts for 2-3 hours
3. Rinse under running water for 60+ seconds
4. Air-dry completely before reassembly
Never use this solution on the base unit.
Rice Cooker Part-by-Part Cleaning Guide
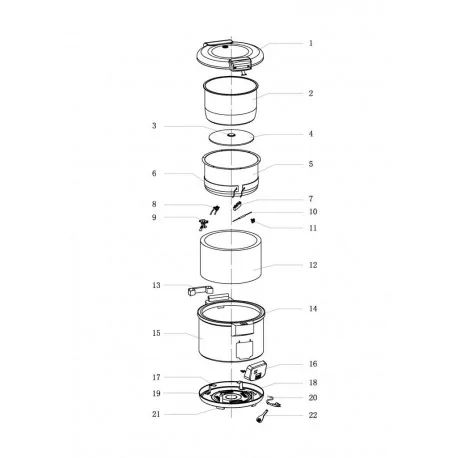
Inner Pot Maintenance by Material Type
Non-stick coatings: Hand-wash only. Never store metal utensils inside or stack pots—this scratches the surface. Dishwasher use accelerates coating degradation.
Stainless steel (Aroma models): Dishwasher-safe but hand-washing extends life. Add ½ cup extra water if rice sits on “Keep Warm” over 20 minutes to prevent scorching.
Lid and Vent System Deep Clean
Remove the inner lid completely—it often hides residue. Use your soft-bristle brush on steam vents; clogged vents cause uneven cooking. For rubber gaskets, hand-wash separately and ensure 100% dryness to prevent mold growth in storage.
Heating Element Care Protocol

Wipe the heating plate with a barely damp cloth only. Never use vinegar or baking soda directly on this surface—acids degrade electrical components. Remove loose grains immediately after cooking; burnt residue requires gentle abrasion with a dampened abrasive sponge (use only once per deep clean).
3 Proven Ways to Prevent Rice Cooker Messes
The 5-Minute After-Use Ritual
Clean while components are warm (not hot)—residue wipes off in seconds. Waiting turns soft starch into concrete-like buildup. This daily habit prevents 90% of deep-cleaning emergencies.
Cooking Best Practices That Reduce Residue
- Use exact water-to-rice ratios (consult your manual)
- Never leave rice on “Keep Warm” beyond 1 hour
- Stir gently with plastic spatulas if rice sticks during cooking
Storage Tips for Dust-Free Readiness
Store with the lid closed to block dust and moisture. Never nest the inner pot inside the base unit—this traps humidity and breeds mold. Countertop storage ensures ventilation and quick access.
7 Deadly Sins of Rice Cooker Washing (Avoid These!)

❌ Plunging hot parts into cold water (causes microcracks)
❌ Using steel wool on non-stick surfaces (irreversibly damages coating)
❌ Washing the inner pot upside down (warps the base and ruins non-stick integrity)
❌ Immersing the base unit in water (guarantees electrical failure)
❌ Using oven cleaner or bleach on the heating plate (corrodes sensors)
❌ Storing damp components (creates mold in 48 hours)
❌ Ignoring steam vent buildup (causes pressure imbalances and overflow)
Your Rice Cooker Washing Schedule for Longevity
After every use: Basic wash (10 minutes)
Weekly: Deep clean removable parts with vinegar soak
Monthly: Sanitizing bleach soak for odor prevention
Every 3 months: Heating element inspection and gentle abrasion
Consistent cleaning adds years to your rice cooker’s life. That five-minute daily wipe prevents five hours of scrubbing later—and ensures every grain stays perfectly fluffy. Start tonight: unplug, cool, and follow these steps. Your future self (and your taste buds) will thank you when your next pot of rice cooks flawlessly, free from yesterday’s ghost flavors.


