
That unopened Toastmaster rice cooker gathering dust on your counter? It doesn’t have to intimidate you. Whether you’re unpacking a brand-new TRC5 model or reviving a trusted decade-old unit, mastering how to use Toastmaster rice cooker functionality transforms it from a confusing appliance into your most reliable kitchen ally. Skip the guesswork that leads to mushy disasters or crunchy disappointments—this guide delivers the exact water ratios, safety protocols, and model-specific tricks that guarantee perfect rice every time. You’ll discover why proper cord inspection prevents mid-cooking failures, how the inner pot’s water line markings eliminate measuring errors, and why resisting the urge to peek is non-negotiable for fluffy results. Let’s turn your countertop appliance into the unsung hero of your dinner routine.
Don’t let complicated manuals scare you off. Toastmaster rice cookers operate on brilliantly simple principles once you know their specific requirements. Unlike stove-top methods where timing is everything, your cooker automates the process—but only if you follow its precise water-to-rice formulas and safety steps. This guide cuts through generic advice to give you actionable, model-verified instructions based on the TRC5’s design. You’ll learn to avoid the three most common beginner mistakes: using kitchen cups instead of the provided measuring cup, ignoring the initial-use smoke phenomenon, and skipping the critical resting period. By the end, you’ll confidently cook everything from delicate jasmine rice to hearty brown blends with restaurant-quality texture.
Critical Electrical Safety Checks Before First Use

Power Cord Inspection Protocol
Your safety starts before you even measure rice. Always grasp the plug—not the cord—when connecting to the outlet to prevent internal wire damage. Examine the entire cord length for cuts, fraying, or abrasions that could cause electrical hazards. If you spot any damage, do not operate the unit—service is required before first use. Never yank the cord from the wall; this strains internal connections and risks future failures. Crucially, operate your Toastmaster on a dedicated circuit away from other appliances like microwaves or toasters. Shared circuits frequently overload during cooking cycles, tripping breakers and ruining your rice batch mid-process. This isn’t just inconvenient—it risks thermal stress on the heating element from sudden power interruptions.
Countertop Protection Essentials
Solid surface countertops like granite or quartz can crack or scorch from direct heat exposure. Always position a trivet under your cooker before plugging in—never place it directly on countertops. During initial use, expect 2-3 minutes of harmless smoke or odor as manufacturing residues burn off; this disappears permanently after 3-4 uses. Place the unit on a dry, level surface away from cabinet edges to prevent tipping. If your cooker feels unstable, adjust its position immediately—uneven surfaces cause uneven heating and potential spills. Remember: this appliance generates intense bottom heat, so keep it clear of walls and cabinets by at least 4 inches for proper ventilation.
Pre-Operation Setup for Flawless First Cook
Unpacking and Cleaning Sequence
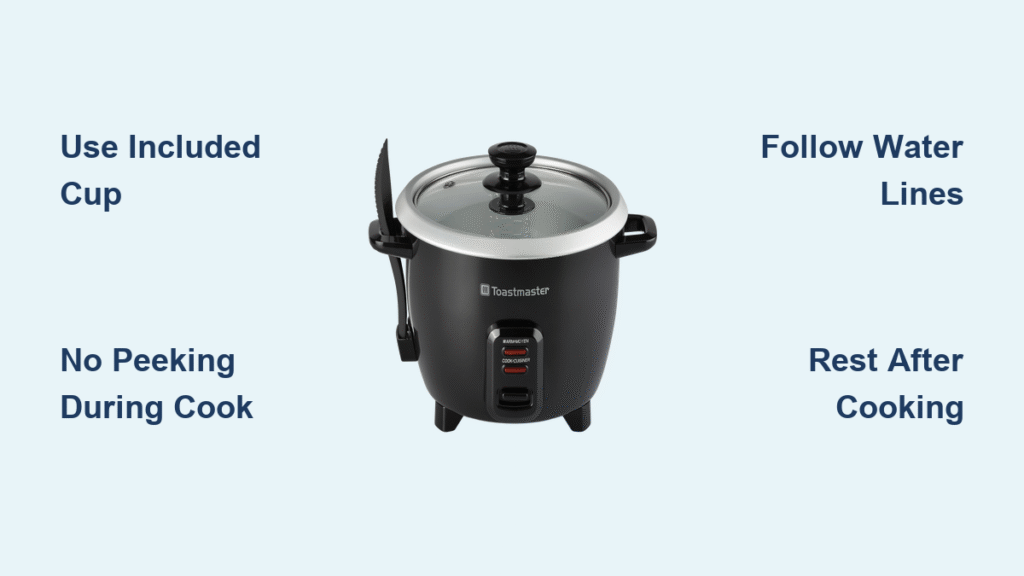
Remove every sticker, label, and packing material before first use—these can melt onto the heating plate during cooking, causing permanent damage and burnt flavors. Clean the inner pot and exterior with a damp cloth only; never submerge the base unit or cord in water, as this voids warranties and creates electrical risks. Wipe the heating plate thoroughly to remove factory oils that could smoke excessively. Dry all components with a soft towel—moisture near electrical parts is a hazard. Store the provided measuring cup inside the inner pot for easy access; kitchen cups measure 25% larger, guaranteeing mushy rice if used.
White Rice Perfection Formula (TRC5 Model)

Step-by-Step Cooking Process
Place your cooker on the prepared trivet and plug it in. Use only the included measuring cup—standard kitchen cups add 25% more rice, throwing off water ratios. Add raw rice to the inner pot, then fill water to the corresponding line: 1 cup rice = 0.2L line, 2 cups = 0.4L line, and so on up to 5 cups at 1.0L. Close the lid firmly without forcing it. Press the cook button and walk away—never open the lid during cooking. Steam loss extends cooking time and creates uneven texture. When the indicator switches to “Warm,” let rice rest untouched for 10-15 minutes. This final steaming period transforms good rice into exceptional, fluffy results.
Water Ratio Cheat Sheet
| Raw Rice Amount | Water Line (Liters) | Common Mistake to Avoid |
|---|---|---|
| 1 cup | 0.2 | Using kitchen cups (too much rice) |
| 2 cups | 0.4 | Adding extra water “just in case” |
| 3 cups | 0.6 | Peeking during cooking cycle |
| 4 cups | 0.8 | Skipping the resting period |
| 5 cups | 1.0 | Using hot water (alters timing) |
Brown Rice Success Strategy for TRC5 Model
Extended Cooking Method That Works
Brown rice takes 60-90 minutes—double white rice time—but delivers superior nutrition and nutty flavor. Use the 1:2 rice-to-water ratio (e.g., 1 cup rice = 2 cups water), then add 10% more water beyond the white rice line markings. Do not use a “brown rice” setting—the TRC5 has no special mode. Fill to the standard line, then add one extra tablespoon per cup of rice. Close the lid and press cook. Critical rule: Never lift the lid to check progress. Steam loss forces the cooker to restart its cycle, adding 20+ minutes. After switching to “Warm,” let it rest 15 minutes minimum—this extra time allows the bran layer to fully soften for tender, non-chewy grains.
Why Instant Rice Fails in Toastmaster Cookers
Your cooker excels with traditional white, brown, jasmine, basmati, sushi, and wild rice blends—but instant rice turns to mush every time. Pre-cooked instant varieties absorb water too rapidly in automated cycles, creating gummy, overcooked results. Stick to unprocessed grains for ideal texture. The TRC5’s consistent heating works perfectly for all non-instant types when you follow water ratios precisely. Pro tip: Rinse brown rice 2-3 times to remove surface starch that causes clumping, but skip rinsing for sushi rice to preserve its sticky texture.
Daily Maintenance for Decades-Long Reliability
Post-Cooking Cleaning Routine
Unplug and let the unit cool completely before cleaning—never handle hot components. Remove the inner pot and wash with mild soap and sponge; avoid abrasive scrubbers that scratch non-stick coatings. Wipe the heating plate with a damp cloth to remove rice grains or starch buildup—this residue creates hot spots causing burnt bottoms. Dry all parts thoroughly before storage. Never immerse the base unit in water; moisture in electrical components causes permanent damage. For stubborn residue, place a damp cloth on the heating plate for 5 minutes to soften deposits before wiping.
Storage Best Practices
Loosely coil the cord without wrapping it tightly around the unit—tight loops create stress points that fray wires over time. Store in a dry cupboard away from sinks or dishwashers to prevent humidity damage. If storing long-term, place a silica gel packet inside the inner pot to absorb moisture. Vintage Toastmaster units from the 90s still function perfectly when maintained this way—proper care turns your cooker into a lifelong kitchen investment.
Troubleshooting Common Toastmaster Issues

Fixing Texture Disasters
- Mushy rice? Reduce water by 10% next time (e.g., fill to 0.18L line for 1 cup rice).
- Crunchy centers? Add 1-2 tbsp water, restart cook cycle for 5 minutes.
- Burnt bottom? Deep-clean the heating plate and check for rice debris.
- Sticky lid? Wipe condensation channels weekly to prevent mineral buildup.
Reviving Older Units
If your 10+ year old cooker seems slow, check the heating plate for mineral deposits from hard water. Soak a cloth in vinegar, place it on the plate for 10 minutes, then wipe clean. This restores thermal conductivity. Never use oven cleaners—they damage surfaces. If the indicator light fails, test the outlet with another appliance first; 80% of “broken” cookers just need circuit reset. With basic maintenance, Toastmaster units operate reliably for decades—far outlasting modern competitors.
Mastering how to use Toastmaster rice cooker techniques turns cooking from a gamble into a guaranteed success. Start with white rice using the exact water lines on your inner pot, then advance to brown rice once you’ve nailed the resting period. Remember the non-negotiables: always use the provided cup, never peek mid-cycle, and clean the heating plate after every use. These simple habits prevent 95% of common failures. For perfect results every time, bookmark this guide beside your cooker—your future self will thank you when dinner guests rave about your flawlessly cooked rice. Ready to level up? Try our companion guide on “How to Cook Quinoa in Toastmaster Rice Cooker” for your next grain adventure.


