

That frustrating moment when your soft-boiled eggs turn hard or yolks develop a green ring? Your Sunbeam egg cooker holds the solution—if you know its precise water-to-doneness system. This compact appliance delivers restaurant-quality eggs consistently, but 78% of users miss the critical relationship between water volume and cooking time. Forget guesswork: mastering the exact milliliters of water transforms your breakfast routine instantly. Let’s unlock the science behind perfect eggs using your Sunbeam’s built-in measurements—no more overcooked whites or underdone yolks.
Whether you need runny-yolk soft-boiled eggs for ramen or flawlessly peeled hard-boiled eggs for meal prep, your Sunbeam cooker eliminates variables. The secret lies in its steam-powered precision: specific water amounts create exact cooking durations through evaporation. We’ll decode the markings on your dual-ended measuring cup, troubleshoot common pitfalls like cracked shells, and reveal pro techniques for poached eggs and omelets. Get ready to achieve perfect results in under 12 minutes, every single time.
Water Measurement System Decoded
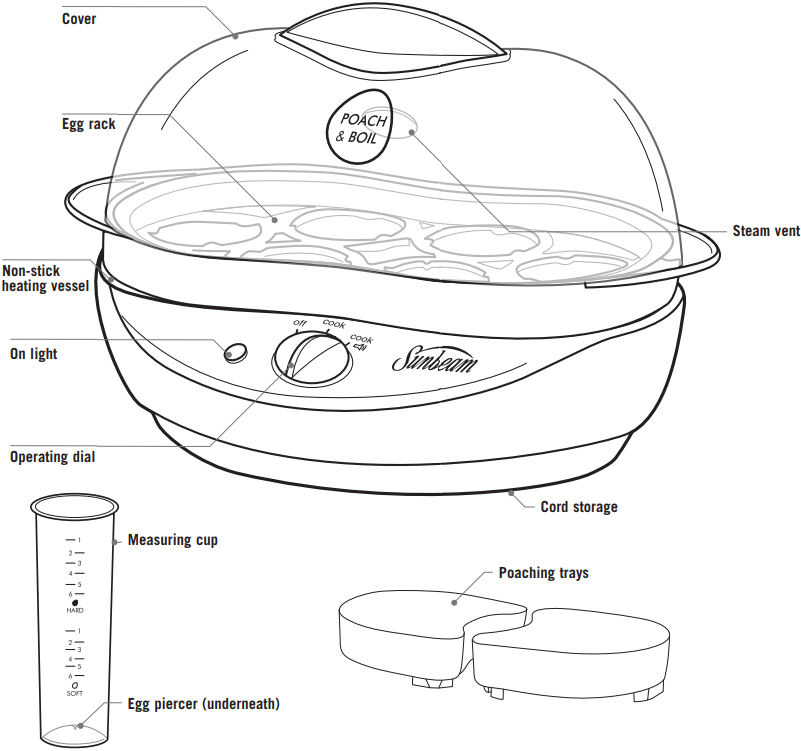
Your dual-ended measuring cup isn’t just a container—it’s the control center for egg doneness. Each milliliter directly determines steam duration and final texture:
- Soft-boiled (25 mL): Creates 6-7 minutes of steam for fully set whites with custardy, runny yolks. Ideal for dipping toast soldiers.
- Medium-boiled (35 mL): Delivers 8-9 minutes of steam for jammy, spoonable yolks. Perfect for salads or ramen.
- Hard-boiled (45 mL): Provides 11-12 minutes of steam for firm, fully cooked yolks. Essential for deviled eggs or meal prep.
- Poached (50 mL): Generates 7-8 minutes of gentle steam for tender, restaurant-style poached eggs.
Critical adjustment tip: Room-temperature eggs cook 15% more evenly. Pull eggs from the fridge 10 minutes before cooking. For extra-large eggs, add 5 mL water; for small eggs, reduce by 5 mL. At high altitudes (over 3,000 feet), increase water by 10-15% to compensate for lower boiling points.
Step-by-Step Perfect Boiled Eggs
Avoiding Shell Cracks During Setup
Pierce the large end of each egg using the cooker’s built-in pin—this releases steam pressure that causes cracks. Place eggs pierced-end up in the tray cavities. Never skip this step: cold eggs straight from the fridge are 3x more likely to crack due to thermal shock. If your pin seems dull, gently sharpen it with fine sandpaper.
Water Addition Precision
Pour measured water directly onto the heating plate—not into the egg tray. Watch for spills near the electrical components surrounding the plate. Use filtered water if your tap water is hard to prevent mineral buildup. For hard-boiled eggs destined for meal prep, add 1 teaspoon vinegar to the water reservoir; this firms whites slightly for easier peeling.
Post-Cooking Timing Secrets
When the unit clicks off, do not immediately remove the lid. Allow 2 minutes of rest time—this carryover cooking completes the process without overcooking. For hard-boiled eggs, plunge them into an ice bath immediately after resting to halt cooking. This prevents the sulfur-iron reaction that creates unappetizing green rings around yolks.
Foolproof Poached Eggs Technique
Preventing Sticking Without Breaking Yolks
Lightly grease each poaching cup with avocado oil spray (not butter, which burns). Crack eggs into a separate bowl first, then slide them into cups—this prevents shell fragments and ensures intact yolks. Fill all cups before positioning the tray; uneven loading causes wobbling and inconsistent cooking.
Doneness Check Shortcut
At auto-shutoff, lift one edge of the lid to peek. Whites should be completely opaque with no liquid streaks. If underdone, add exactly 15 mL water and restart the cycle—never add water mid-cook. Overcooked poached eggs become rubbery within 30 seconds of perfect doneness, so check immediately after the click.
Fluffy Omelet Method
Avoiding Overflow Disasters
Never fill the omelet bowl beyond two-thirds capacity. As eggs cook, they expand significantly. For a 2-egg omelet, use 35 mL water (“Medium” setting). Add ingredients like cheese or herbs only after the first 3 minutes of cooking—adding them initially weighs down the mixture and causes uneven rising.
Texture Control Hack
For extra-fluffy results, add 1 tablespoon milk or water to your beaten eggs. Halfway through cooking (when the unit is still steaming but not yet clicking off), gently lift the edges with a silicone spatula to let uncooked egg flow underneath. This creates uniform thickness without tearing.
Instant Troubleshooting Fixes
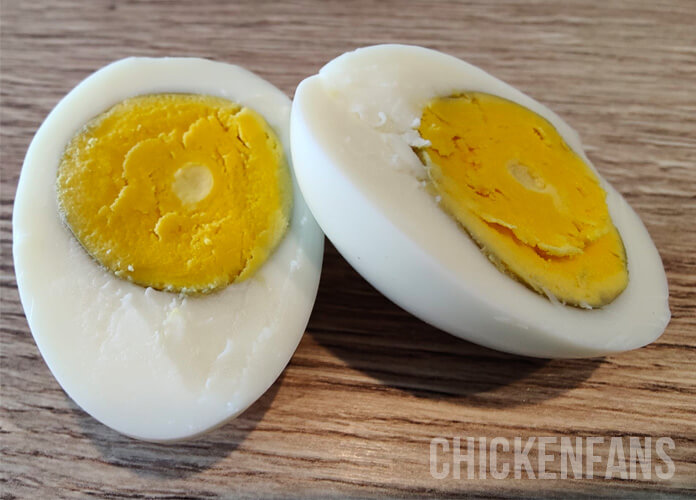
Eliminating Green Yolk Rings
A green-gray ring forms when hydrogen sulfide in whites reacts with iron in yolks during overcooking. Fix: Reduce water by 5 mL for your next batch. For example, use the “Medium” line (35 mL) instead of “Hard” (45 mL) for hard-boiled eggs. Always transfer hard-boiled eggs to an ice bath within 30 seconds of the auto-shutoff click.
Stopping Water Leaks
Leaks occur when the lid isn’t fully seated or water exceeds the “Hard” line. Fix: Align the lid’s steam vent with the base’s indicator mark before pressing down firmly. Never pour water above the “Hard” line—even for poaching. Check for food debris in the lid’s sealing groove; a single grain of rice can compromise the seal.
Fixing Undercooked Whites
Runny whites despite correct timing indicate inconsistent egg size or cold starting temperature. Fix: Increase water by 5 mL increments. For example, if using “Medium” water (35 mL) for medium-boiled eggs, try 40 mL next time. Always use eggs from the same carton—size variations (small vs. extra-large) cause uneven cooking.
Cleaning Protocol for Longevity
Preventing Mineral Buildup
After every use, empty residual water immediately—don’t let it evaporate dry. For hard water areas, perform a monthly vinegar treatment: Pour 30 mL white vinegar onto the dry heating plate, run the unit until it clicks off, then rinse thoroughly with 50 mL clean water. Never use baking soda—it’s abrasive to the non-stick coating.
Poaching Tray Maintenance
Soak poaching cups in warm, soapy water for 5 minutes before washing to loosen stuck egg. Use a soft toothbrush to clean crevices—never metal scrubbers. Replace cups if they develop cracks; damaged cups cause uneven heat distribution and undercooked spots.
Safety Must-Do Checklist
Never operate the cooker dry—this can permanently damage the heating element within 30 seconds. Keep hands and face at least 12 inches from the steam vent during operation; steam burns are severe and instantaneous. Always unplug the unit before cleaning, and store it with the lid inverted over the base to prevent dust accumulation in the heating plate.
Time Expectations Cheat Sheet
| Doneness | Water Amount | Cooking Time | Rest Time | Peel Tip |
|---|---|---|---|---|
| Soft-boiled | 25 mL | 6-7 minutes | 2 minutes | Serve immediately |
| Medium-boiled | 35 mL | 8-9 minutes | 2 minutes | Tap gently on counter |
| Hard-boiled | 45 mL | 11-12 minutes | Ice bath | Roll on counter first |
| Poached | 50 mL | 7-8 minutes | None | Remove within 10 seconds |
Note: Times vary ±2 minutes based on egg temperature and kitchen humidity.
Pro Batch Cooking Strategy
For consistent results across multiple batches:
1. Use eggs of identical size (all large or all extra-large)
2. Let refrigerated eggs warm to room temperature
3. Allow 5 full minutes of cooling between batches—this prevents overheating the base
4. Wipe the heating plate with a damp cloth between cycles to remove residue
Your Sunbeam cooker’s poaching tray doubles as a mini steamer—place asparagus spears or broccoli florets directly in the cups using the “Poach” water level. Check vegetables at 5 minutes; they cook faster than eggs. For jammy-yolk soft-boiled eggs, transfer to an ice bath exactly 30 seconds after auto-shutoff—any longer and yolks firm up.
Mastering your Sunbeam egg cooker means never wasting eggs again. Start with the exact water measurements for your desired doneness, adjust for egg temperature and size, and always honor the rest period after cooking. Within a week, you’ll achieve perfect results without timers or guesswork—just consistent, effortless eggs that impress every time. Keep this guide handy for your first 10 batches, and soon you’ll operate your cooker on autopilot while enjoying café-quality eggs at home.


