
The scent of tender pulled pork or simmering beef stew greeting you after work isn’t magic—it’s your Rival Crock Pot stoneware slow cooker working its set-and-forget wonder. Yet too many users battle scorched bottoms, lukewarm meals, or cracked inserts simply because they skip critical setup steps. Whether you own a compact 3100 model for solo dinners or a 5-quart 3300 for family feasts, this guide reveals the exact techniques Rival engineers recommend. You’ll learn why stoneware must be seated just right, how to layer ingredients for zero scorching, and the 10-second fix when your lid seals shut. Stop guessing—start mastering your slow cooker today.
Verify Stoneware Integrity Before First Use

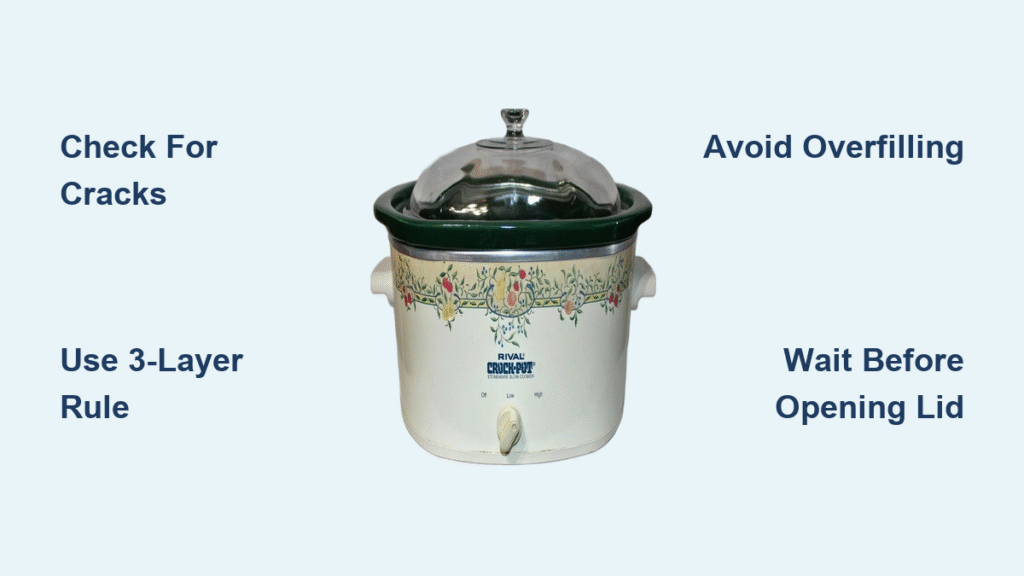
Spot Cracks That Cause Catastrophic Failure
Run your fingertips along the stoneware’s interior and base. Even hairline cracks invisible to the eye will expand under heat, leaking food into the metal base and ruining your appliance. Discard damaged inserts immediately—Rival’s warranty won’t cover thermal shock damage from pre-existing flaws. For model-specific replacements, note that 3100/3101 (3.5 qt) inserts won’t fit 3102/3300 (5 qt) bases due to subtle rim variations.
Test Electrical Functionality in 30 Seconds
Twist the control knob firmly between Off, Low, and High positions. It should click distinctly into each setting. Plug into a grounded 120V outlet—never use extension cords. Confirm the indicator light glows steadily on both heat settings. No light? Unplug, check your home’s circuit breaker, then test the outlet with another appliance before contacting Rival support.
Position Your Slow Cooker for Safety and Performance
Avoid Countertop Damage with Strategic Placement
Place the unit on a flat, dry trivet or heat-resistant mat—not bare wood or laminate. The metal base reaches 300°F (149°C) on High, which can scorch unprotected surfaces in under 30 minutes. Maintain 6 inches of clearance on all sides to prevent heat buildup that warps cabinets or triggers smoke alarms. Keep the cooker at least 12 inches from walls and never under overhead cabinets.
Prevent Tripping Hazards with Cord Management
Route the power cord behind the unit so it hangs straight down, not across your countertop. Loop excess cord loosely and secure with a Velcro tie—never twist tightly, as this damages internal wiring. If your outlet is behind the cooker, unplug before moving it to avoid yanking the entire appliance off the counter.
Load Ingredients for Flawless, Scorch-Free Cooking

Follow the 3-Layer Rule for Even Heat Distribution
- Bottom layer: Dense root vegetables like potatoes or carrots (they conduct heat upward).
- Middle layer: Meat nestled into vegetables—not piled on top—to prevent drying.
- Top layer: Pour liquids (broth, tomatoes) last until they cover solids by ½ inch. Insufficient liquid is the #1 cause of scorched stoneware.
Never Exceed the ⅔ Fill Line—Here’s Why
Overfilling pushes food against the lid, causing messy boil-overs and uneven cooking. For a 3.5 qt model (3100/3101), stop at 2.3 quarts; for 5 qt models (3102/3300), max at 3.3 quarts. Pro tip: Fill a liquid measuring cup before adding to avoid eyeballing errors.
Choose Temperature Settings Like a Slow Cooking Pro
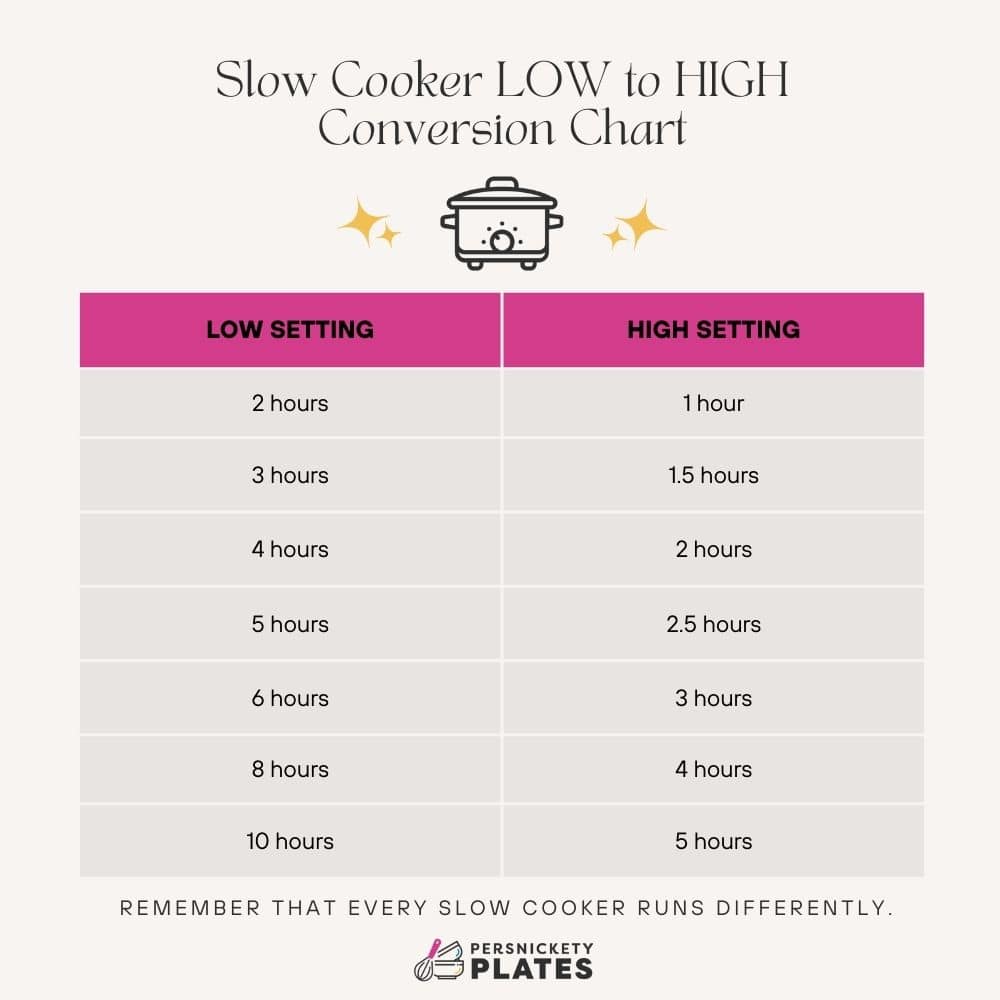
Low vs. High: When to Use Each Setting
| Setting | Ideal For | Time Conversion | Critical Rule |
|---|---|---|---|
| Low (200°F/93°C) | Tough cuts (brisket, pork shoulder), dried beans | 1 hour High = 2–2.5 hours Low | Never switch settings mid-cook—thermal shock cracks stoneware |
| High (300°F/149°C) | Poultry, pre-cooked beans, soups, desserts |
Frozen food warning: Thaw meat completely before adding. Frozen ingredients drop the stoneware temperature into the bacterial danger zone (40–140°F), requiring 1–2 extra hours of cooking and risking foodborne illness.
Master Lid Discipline for Perfect Results
Resist peeking during the first 2 hours on High or 4 hours on Low. Each lid lift releases enough heat to extend total cook time by 15–20 minutes. If stirring is essential (e.g., for thick sauces), do it quickly and reseat the lid firmly. In the final 30 minutes, verify internal temperatures: 165°F for poultry, 190°F for shreddable meats.
Clean Without Damaging Your Stoneware
Remove Baked-On Residue Safely
Hand-wash the stoneware insert with warm water, mild soap, and a soft sponge. For stubborn residue:
1. Fill with warm soapy water and soak 15 minutes.
2. Gently scrape with a nylon scraper (metal pads scratch glaze, creating bacteria traps).
3. Never submerge the metal base—wipe with a damp cloth only.
Fix Lid Seal Failures in Seconds
If liquid leaks around the glass lid, check for food debris trapped in the silicone gasket (on newer models). Pop out the gasket, rinse under warm water, and reseat it evenly. For models without gaskets, ensure the lid sits perfectly centered—misalignment causes steam escape.
Troubleshoot Common Issues Immediately
Lid Stuck Shut? Wait 10 Minutes—Don’t Force It
Rapid cooling creates a vacuum seal. Forcing the lid risks shattering the glass. Let the cooker sit unplugged for 10 minutes to equalize pressure, then lift straight up.
Scorched Bottom? Rescue Your Meal Now
Turn the knob to Off, add ½ cup hot broth, switch to Low, and gently scrape the bottom with a silicone spatula. Never add cold liquid to hot stoneware—it causes immediate cracking.
| Symptom | Quick Fix | Prevention Tip |
|---|---|---|
| Warm base but cold food | Remove stoneware, rotate 90°, re-seat | Always twist insert slightly when placing |
| Excessive counter condensation | Skim ½ cup liquid if overfilled | Fill only to ⅔ capacity |
| No power | Test outlet with another appliance | Plug directly into wall (no power strips) |
Model-Specific Hacks You Need to Know
3100/3101 (3.5 Qt) Secrets
This compact model feeds 2–3 people but requires recipe adjustments. Halve all 5-qt recipes—don’t just reduce ingredients by 30%. For chicken dishes, use thighs instead of breasts (they stay moist at lower volumes). Never attempt a whole chicken—it won’t fit.
3102/3300 (5 Qt) Power Moves
Maximize this workhorse’s capacity:
– Fit a 4–5 lb whole chicken upright with legs tucked.
– For stews, brown meat in the stoneware first (remove insert, place on stove), then deglaze with broth before slow cooking.
– Use the “resting trick”: After cooking, unplug and let sit 15 minutes—the retained heat finishes tenderizing meat without overcooking.
Starter Recipes That Never Fail
20-Minute Prep Chicken & Rice (5 Qt)
Skip the rice cooker—this one-pan meal cooks perfectly:
– Add: 1.25 lb chicken cubes, 1 cup rice, 1.5 cups broth, 1 cup frozen veggies, 1 tsp garlic powder.
– Cook: High 3 hours. Fluff rice, rest 10 minutes. Pro tip: Add 2 tbsp lemon juice last 30 minutes for bright flavor.
No-Stir Apple Crisp (Dessert Hack)
Yes, your slow cooker bakes too:
– Layer: 5 cups apples + ¼ cup sugar/cinnamon mix. Top with crumble (½ cup flour, ½ cup oats, ¼ cup brown sugar, ¼ cup butter).
– Cook: Low 4 hours. Critical: Place a paper towel under the lid to absorb excess moisture.
Prevent Costly Mistakes With These Pro Habits
- Cool stoneware gradually: Never place hot inserts on cold counters or in sinks—set on a wooden board for 20 minutes first.
- Store smartly: Keep stoneware inside the base with the lid inverted on top (prevents chipping).
- Never cook dry: Even bean dishes need 1 cup liquid minimum to prevent scorching.
- Wipe the base weekly: Food splatter in the heating well causes smoke—use a damp cloth wrapped around a chopstick.
Master these techniques, and your Rival Crock Pot transforms from a countertop ornament into your most reliable kitchen ally. No more mystery lukewarm meals or ruined inserts—just set it, forget it, and come home to perfection. Ready to try your first flawless cook? Grab that brisket and set your knob to Low. Your future self (and dinner guests) will thank you.


