
That first batch of sticky, undercooked rice from your new Panasonic cooker doesn’t have to be a kitchen disaster. Whether you own the compact SR-G06 or the advanced SR-HZ106, mastering how to use Panasonic rice cooker techniques transforms raw grains into consistently fluffy results—no guesswork needed. The secret lies in understanding your model’s quirks, from measuring cups to steam-rest timing. Skip these precise steps, and you’ll battle mushy centers or crunchy grains. Follow them, and you’ll unlock restaurant-quality rice that stays perfect for hours on keep-warm mode.
In the next few minutes, you’ll learn the exact water ratios for sushi, brown rice, and porridge, plus how to avoid the #1 mistake that damages non-stick pots. Most importantly, you’ll discover why your cooker’s specific measuring cup is non-negotiable—and how to troubleshoot error beeps before they ruin dinner. Ready to cook perfect rice on your first try? Grab that included cup, and let’s begin.
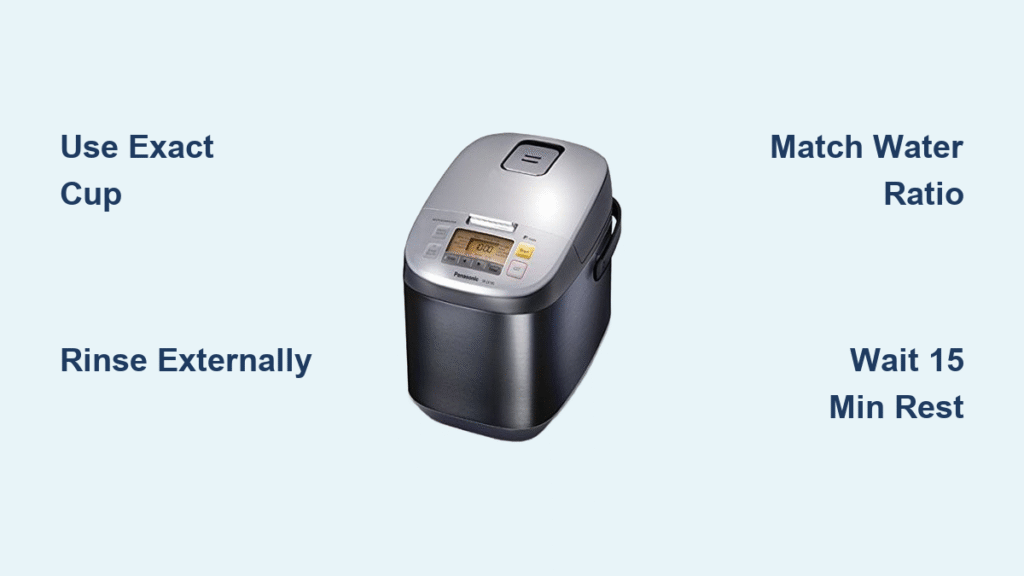
Measure Rice Using Your Model’s Exact Cup

Never substitute a standard measuring cup—your Panasonic’s included cup is engineered for precise hydration. Using the wrong cup throws off water ratios and guarantees inconsistent results. Check your model family:
– 90 mL cup: SR-3NAL series (holds less than standard cups)
– 180 mL cup: Most home models like SR-G, SR-HZ, SR-Z, and SR-CN series
– 1 L cup: Commercial SR-GA721 line
Fill the cup level to the rim—no heaping—and count scoops carefully. Why? The numbered water lines inside your pot correspond to scoop count, not volume. For example, 3 scoops of rice require filling to the “3” line, regardless of grain type. Exceeding your model’s max capacity (like putting 6 cups in an SR-HZ106) risks overflow that can short-circuit the control panel.
Why Cup Choice Makes or Breaks Your Rice
Using a standard 240 mL cup in an SR-3NAL model creates 33% more rice than intended, drowning grains in excess water. The result? Soggy, gluey rice that sticks to the pot. Conversely, under-measuring in a commercial SR-GA721 leaves rice bone-dry. Always verify your cup size against Panasonic’s model chart before cooking.
Rinse Rice Properly to Avoid Sticky Disasters
Rinse grains in a separate bowl—not inside the inner pot—to protect the non-stick coating. Swirl rice under cool tap water for 10 seconds, drain completely, and repeat 4–5 times until water runs mostly clear. Skipping this step leaves excess starch that migrates to the heating plate during cooking, causing gumminess and uneven texture. For brown rice, extend rinsing to 6–7 times since its bran layer releases more starch.
Critical Mistake: Rinsing Inside the Pot
Many users dump rice directly into the inner pot to rinse, thinking it saves a dish. But abrasive grains scratch the non-stick surface over time, creating hot spots that burn future batches. Worse, residual starch in the pot’s crevices hardens into crusts that resist cleaning. Always rinse externally—it takes 30 extra seconds but doubles your cooker’s lifespan.
Match Water Levels to Your Rice Type and Cup Count
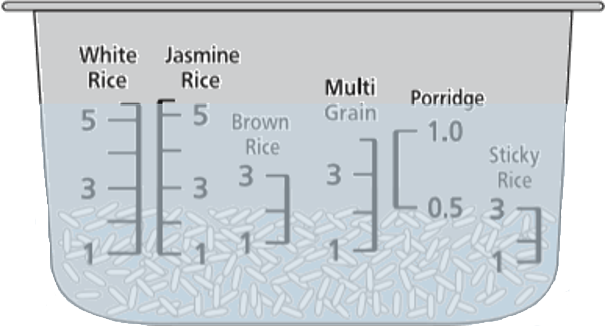
After rinsing, transfer rice to the dry inner pot and add cool tap water to the line matching your scoop count (e.g., 4 scoops = fill to “4”). Hot water is strictly forbidden—it causes uneven swelling and off-flavors. Stick to these verified ratios per your model’s 180 mL cup:
– White rice: 1 cup water per cup rice (reduce by 1 Tbsp for sushi)
– Brown rice: 1.15–1.3 cups water (requires 30–45 min pre-soak)
– Porridge: 5–7 cups water for 1 cup rice (adjust thickness with water volume)
Never exceed ±¼ cup water tolerance. Too much water floods grains; too little leaves crunchy centers.
Dry Pot Bottom and Seat Correctly to Prevent Damage
Moisture on the pot’s exterior causes alarming cracking sounds and risks heating element damage. After filling, wipe the entire base and sides with a dry towel until no dampness remains. Then lower the pot into the cooker until it clicks into place—listen for that definitive thunk. If it wobbles, lift and reseat it. Finally, close the lid firmly until you hear a mechanical click. Skipping this step reduces steam pressure, leading to undercooked rice.
Power Up in the Exact Order to Avoid Malfunctions
Plug in using this sequence:
1. Insert the appliance connector into the cooker body
2. Plug the cord into a grounded wall outlet
Reversing this order tricks the thermostat into activating “Keep Warm” mode prematurely. You’ll see the lamp glow before cooking starts, confusing the temperature sensors. This common error causes mid-cycle shutdowns and unevenly cooked rice. Always connect body-to-cord first.
Start Cooking Based on Your Model Type
Mechanical One-Switch Models (SR-2363, SR-42FZ, SR-W10FGE)
Flip the Cook switch down. The red “Cooking” lamp illuminates. When it switches off and “Keep Warm” lights up (after 40–55 minutes), do not open the lid—wait 15 minutes for residual steam to finish cooking.
Digital Multi-Menu Models (SR-HZ106, SR-CN188, SR-ZE185)
- Press Menu until your desired program blinks (e.g., Brown for brown rice)
- Press Start
- Wait for completion beep—then immediately close the lid for 15 minutes of steam rest (except Porridge or Quick modes)
When to Use Special Programs
- Eco Mode: Saves 20% energy with identical texture to “Delicious” in 44 minutes
- Mixed Rice: For rice with veggies/meat (max 4 cups raw)
- Brown Rice: Auto-soaks grains—never skip pre-soak for this program
Never Skip the 15-Minute Steam Rest
Resist peeking when the “Keep Warm” light activates. Those 15 minutes of closed-lid steaming equalize moisture from top to bottom, transforming potentially soggy surface rice into uniformly fluffy grains. Set a timer—if you lift the lid early, steam escapes, leaving a wet layer on top and dry rice below. This step is non-negotiable for white and brown rice (but skip for porridge).
Clean Components Immediately After Cooking

Unplug by pulling the plug—not the cord—to avoid damage. Then:
– Inner pot: Hand-wash with soft sponge after cooling (never use steel wool)
– Dew collector: Slide out from rear slot, empty water, rinse, and snap back
– Steam cap & inner lid: Detach, rinse under tap, air-dry fully before reassembly
Leaving rice residue in the dew collector causes overflow in your next cook cycle. Always clean these parts while warm—they harden if left overnight.
Fix Common Rice Cooker Emergencies Fast
| Symptom | Instant Solution |
|---|---|
| Soggy rice | Reduce water by ¼ cup next batch |
| Crunchy center | Add 2 Tbsp water, close lid for 5 min on Keep Warm |
| Steam leaks | Reposition inner lid or replace worn gasket |
| Error beep | Verify cup count is within model limits; close lid fully |
For persistent “Keep Warm” lamp issues, check if the unit was unplugged mid-cycle. Continuous power is required—use a dedicated outlet.
Maximize Your Steaming Basket (SR-AFG186/SR-AFM187 Models)
Place veggies or fish in the shallow basket (max 5 cups rice) or deep basket (max 4 cups rice). Keep water levels identical to normal rice cooking—the steam cap diverts vapor upward. Never overload the basket; excess weight blocks steam vents, causing unevenly cooked rice below. Remove food immediately after the rice cycle ends to prevent sogginess.
Never Exceed Your Model’s Capacity Limits
Overfilling causes boil-overs that short-circuit electronics. Stick to these max raw capacities:
– SR-3NAL/SR-G06: 3 cups → yields 9 cups cooked
– SR-G18: 10 cups → yields 30 cups
– SR-HZ106: 5.5 cups → yields 16.5 cups
When in doubt, underfill by ½ cup. Your rice will cook more evenly, and you’ll avoid costly repairs from rice sludge in the heating chamber.
Cup → Rinse → Line → Click → Cook → Wait 15 → Fluff → Clean. Memorize this eight-word mantra, and you’ll never fumble your Panasonic rice cooker again. For your next cook, try brown rice using the dedicated menu—just remember the mandatory 30-minute pre-soak and 15-minute steam rest. Perfect rice isn’t luck; it’s knowing exactly how to use Panasonic rice cooker protocols. Now unplug that takeout app and cook with confidence.


