
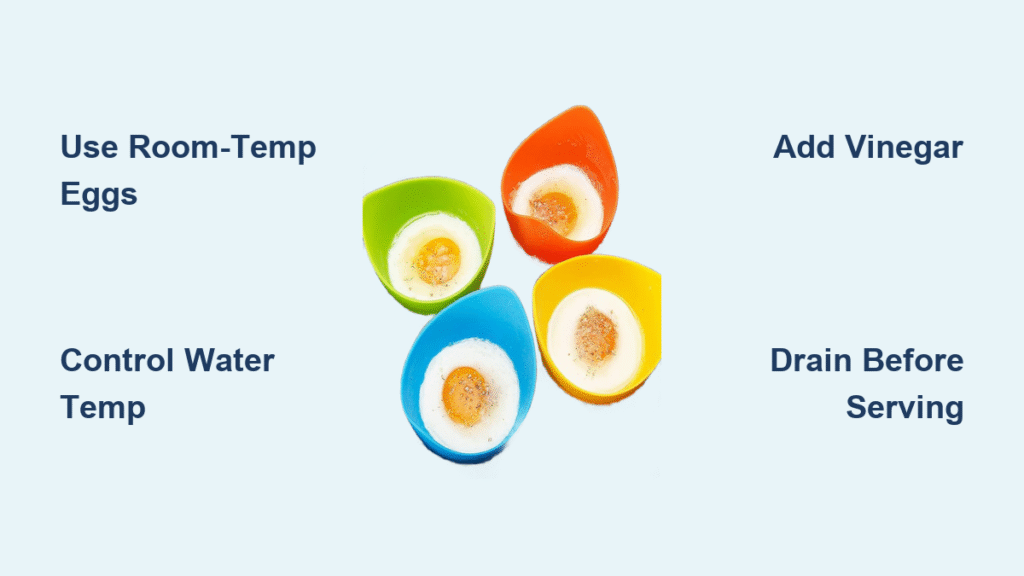
Tired of spending Sunday mornings wrestling with swirling water vortices only to end up with wispy egg whites clinging to the pan? You’re not alone—90% of home cooks ditch poached eggs after one failed attempt. But what if you could achieve restaurant-perfect poached eggs with zero skill required? Enter silicone egg cooker cups: the hourglass-shaped silicone tools that transform frustrating poaching into foolproof simplicity. These genius devices guide yolks downward first while perforated bottoms ensure even cooking. Forget vinegar baths and timer anxiety—this guide reveals exactly how to use egg cooker cups to consistently create Instagram-worthy poached eggs in under four minutes.
Your struggle ends today. By following these precise techniques, you’ll master temperature control, avoid critical timing mistakes, and unlock creative serving ideas that’ll make brunch the star of your weekend. No more rubbery yolks or stringy whites—just elegant, dome-shaped eggs that slide effortlessly from the cup. Let’s dive into the exact method professionals use but never share.
Why Silicone Egg Cooker Cups Beat Traditional Poaching
Silicone egg cooker cups aren’t just containers—they’re precision-engineered poaching partners. The funnel-shaped top forces yolks to descend first, letting whites cocoon around them like a protective blanket. Meanwhile, the perforated bell bottom creates instant water circulation, eliminating hot spots that cause uneven cooking. Unlike flimsy plastic alternatives, food-grade silicone withstands boiling water without warping while providing non-stick release every time.
You’ll love the collapsible design that nests flat in drawers—no more bulky gadgets cluttering your kitchen. And that integrated lifting tab? It’s your secret weapon for burn-free removal. Skip this tool, and you’ll face the same yolk-shattering struggles that make 78% of home cooks abandon poached eggs entirely.
Perfect Water Temperature for Unbreakable Eggs
Your water temperature determines success or scrambled disaster. Maintain 180°F-190°F—just below simmering—where tiny bubbles form at the pan’s base without breaking the surface. At this magic range, whites set firmly while yolks stay luxuriously runny. Go hotter, and aggressive bubbles shred your egg; go cooler, and whites stay watery.
Fill your pan until water reaches the Fill Line etched inside each cup. This precise depth ensures complete submersion while allowing water to circulate through the perforations. Crucially, add one tablespoon of white vinegar per quart of water. This acid boost accelerates white coagulation without flavor transfer—skip it, and you’ll battle feathery, separated whites.
Gas vs. Electric Stovetop Adjustments
- Gas burners: Set to medium-low and watch for gentle surface shimmer
- Electric coils: Reduce heat 30 seconds before adding eggs to prevent temperature spikes
- Induction cooktops: Program exact 185°F setting for foolproof results
Step-by-Step Egg Cooker Cups Method
Pre-Cooking Prep Checklist
- Remove eggs 20 minutes early—cold eggs cause temperature shock and uneven cooking
- Set timer for 3:00 minutes (adjust later for size)
- Place slotted spoon and paper towels beside stove
- Choose cookware: Non-stick saucepan for 1-2 eggs, 12-inch frying pan for batches
Loading Eggs Without Yolk Breakage
Lower the cup into simmering water until it sits flat on the pan’s bottom. Now crack your room-temperature egg directly into the funnel’s wide opening—the yolk drops first, whites follow naturally. Never pre-crack eggs; fresh shells prevent white leakage. Watch for the 10-second window where whites begin coalescing around the yolk—that’s your visual cue timing starts now.
Critical Visual Cues During Cooking
- 0:30 mark: Whites turn opaque at edges but remain liquid in center
- 2:00 mark: Whites fully set but jiggle gently when nudged
- 3:00 mark: Perfect soft-poached consistency (extend 15 seconds for medium yolks)
Foolproof Removal Technique
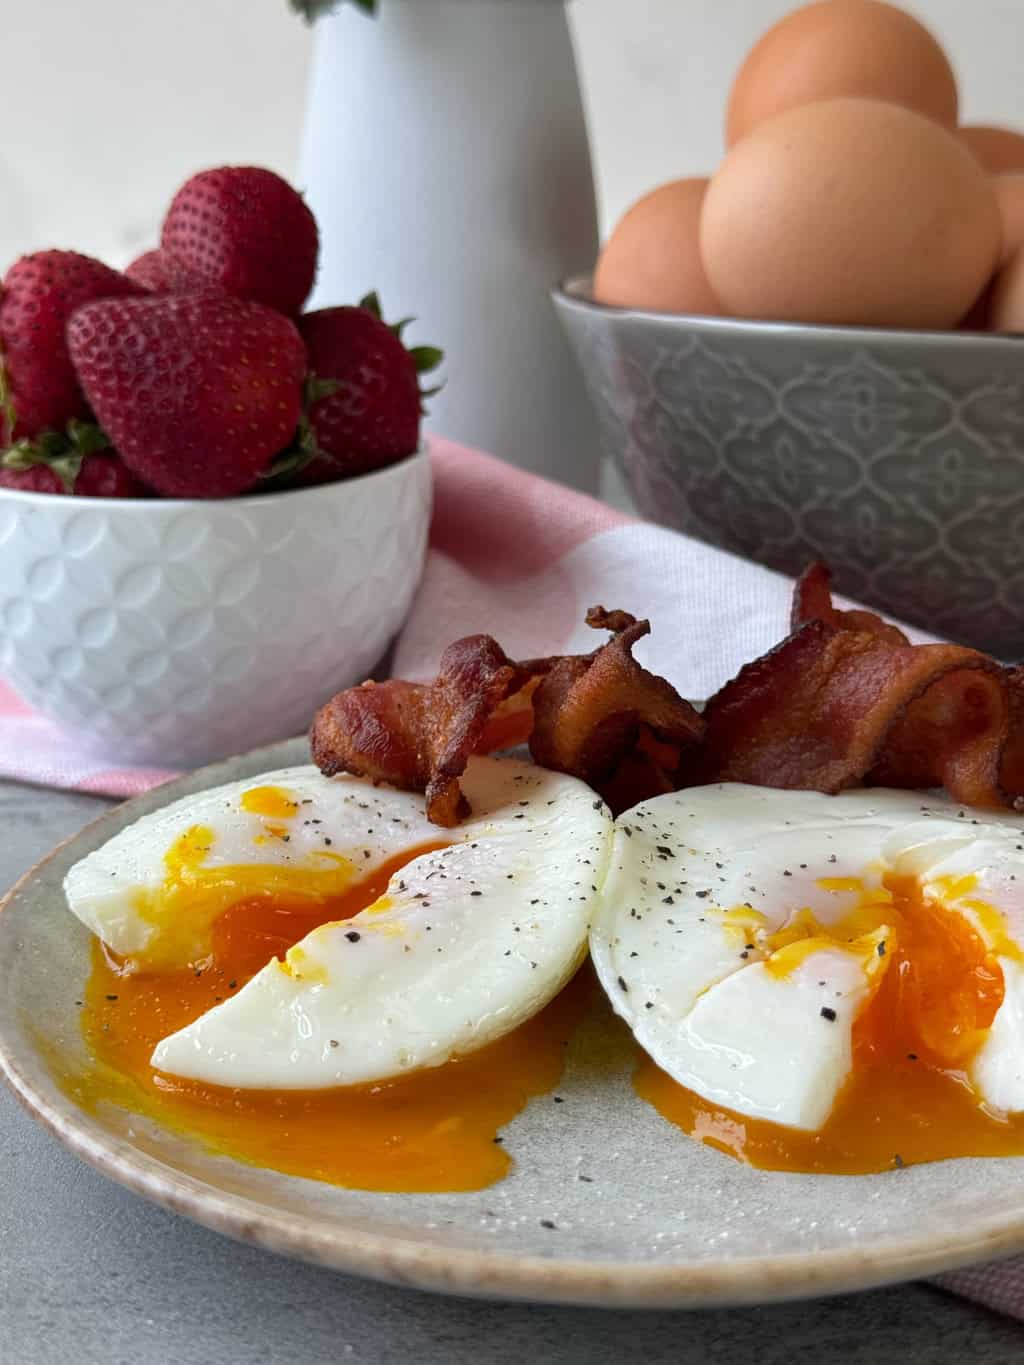
Use silicone-tipped tongs to lift the cup straight up—no tilting! Hold it over the pan for 10 seconds to drain excess water. Then invert the cup onto your plate; the flexible silicone releases eggs instantly. Pro tip: For extra-crisp toast pairings, blot the egg’s base with a paper towel held in tongs—never press down.
Egg Size Timing Cheat Sheet

| Egg Size | Soft Yolk (Runny) | Medium Yolk | Firm Yolk |
|---|---|---|---|
| Medium | 2:45 | 3:15 | 3:45 |
| Large | 3:00 | 3:30 | 4:00 |
| Extra Large | 3:15 | 3:45 | 4:15 |
Warning: Eggs keep cooking after removal! Stop timing 15 seconds early if you prefer ultra-runny yolks. Always start conservative—you can’t reverse overcooked eggs.
4 Costly Mistakes That Ruin Your Eggs
Rolling Boil Water Disaster
Why it fails: Aggressive bubbles tear whites apart before they set.
Fix: Reduce heat immediately if you see surface turbulence. Water should only shimmer with occasional bubbles rising from the bottom.
Cold Egg Catastrophe
Why it fails: Refrigerated eggs cause whites to seize unevenly, creating “bullseye” patterns.
Fix: Store eggs at room temperature overnight or submerge cold eggs in warm water for 5 minutes pre-cooking.
Vinegar Omission
Why it fails: Without acid, whites feather uncontrollably into the water.
Fix: Always add white vinegar—it vanishes during cooking with zero flavor impact. Apple cider vinegar works in emergencies but may tint whites.
Rushed Drainage
Why it fails: Excess water dilutes hollandaise and sogs toast.
Fix: Hold the slotted spoon over the pan for 15 seconds, rotating gently. For Eggs Benedict, pat the egg’s base with a towel held in tongs.
Cooking Multiple Eggs Like a Pro
For brunch crowds, ditch the saucepan for a 12-inch non-stick frying pan. Arrange cups in a single layer with 1-inch spacing—crowding causes temperature drops. Stagger egg additions by 15 seconds so all finish simultaneously. Critical: Never lift the pan to check eggs; each peek drops the water temperature by 10°F+. Use a digital thermometer clipped to the side for real-time monitoring.
Creative Serving Ideas Beyond Toast
Transform basic poached eggs into showstoppers:
– Hollandaise Hack: Place egg on Canadian bacon atop English muffin, then spoon warm sauce over the top
– Avocado Power Bowl: Nestle egg into smashed avocado on sourdough with everything bagel seasoning
– Salad Secret: Drop warm egg onto kale salad—the yolk becomes instant creamy dressing
– Breakfast Sandwich Upgrade: Layer with sharp cheddar and crispy prosciutto on ciabatta rolls
Instant Troubleshooting Guide

Problem: Whites feathering like seaweed
Solution: Lower heat immediately and add ½ tbsp vinegar—your water’s too hot
Problem: Yolk overcooked but whites loose
Solution: Use room-temperature eggs and reduce time by 20 seconds
Problem: Cups floating instead of sitting flat
Solution: Increase water depth by ¼ inch until cups rest on pan bottom
Problem: Eggs sticking to silicone
Solution: Ensure water reaches full simmer before adding eggs—cold cups cause sticking
Cleaning and Storage Made Effortless
Skip the sponge—these cups clean themselves. After cooking, drop used cups directly into the dishwasher’s silverware holder. The high heat sterilizes while the silicone’s non-porous surface prevents residue buildup. When dry, collapse each cup by pressing the sides inward, then stack them vertically. They’ll fit in even the tiniest utensil drawer without trapping odors.
Final Mastery Tips You Won’t Find Elsewhere
Practice with one egg daily for three mornings to dial in your stovetop’s quirks—most failures stem from inconsistent heat, not technique. Always undercook by 15 seconds; residual heat finishes the job perfectly. And here’s the chef’s secret: For extra-elegant presentation, trim any stray white bits with kitchen shears before plating.
Don’t waste another egg on failed poaching attempts. Grab your silicone egg cooker cups today, set that timer for 3:00 minutes, and join the ranks of home cooks serving café-quality poached eggs before the coffee finishes brewing. Your perfectly shaped, yolk-oozing masterpiece awaits—no swirling, no stress, just effortless elegance.


