
You’re rushing through your morning routine, desperately craving that perfect soft-boiled egg for avocado toast, but you’re stuck hovering over a boiling pot—timing it wrong yet again. The frustrating reality? Traditional egg cooking leaves you with rubbery whites, green-tinged yolks, or shells that crack beyond recognition. Mastering how to use Dash Egg Cooker eliminates this daily breakfast battle completely. This countertop wizard transforms raw eggs into consistently flawless results with zero guesswork—whether you need hard-boiled eggs for meal prep or delicate poached eggs for brunch. In just minutes, you’ll unlock restaurant-quality eggs without the stress.
Stop wasting eggs and time on unreliable methods. With this guide, you’ll discover exactly how to leverage every component of your Dash Egg Cooker for soft-boiled perfection, easy-peel hard-boiled eggs, and even fluffy omelets. Let’s transform your breakfast game starting today.
Unpack Your Dash Egg Cooker Components Before First Use
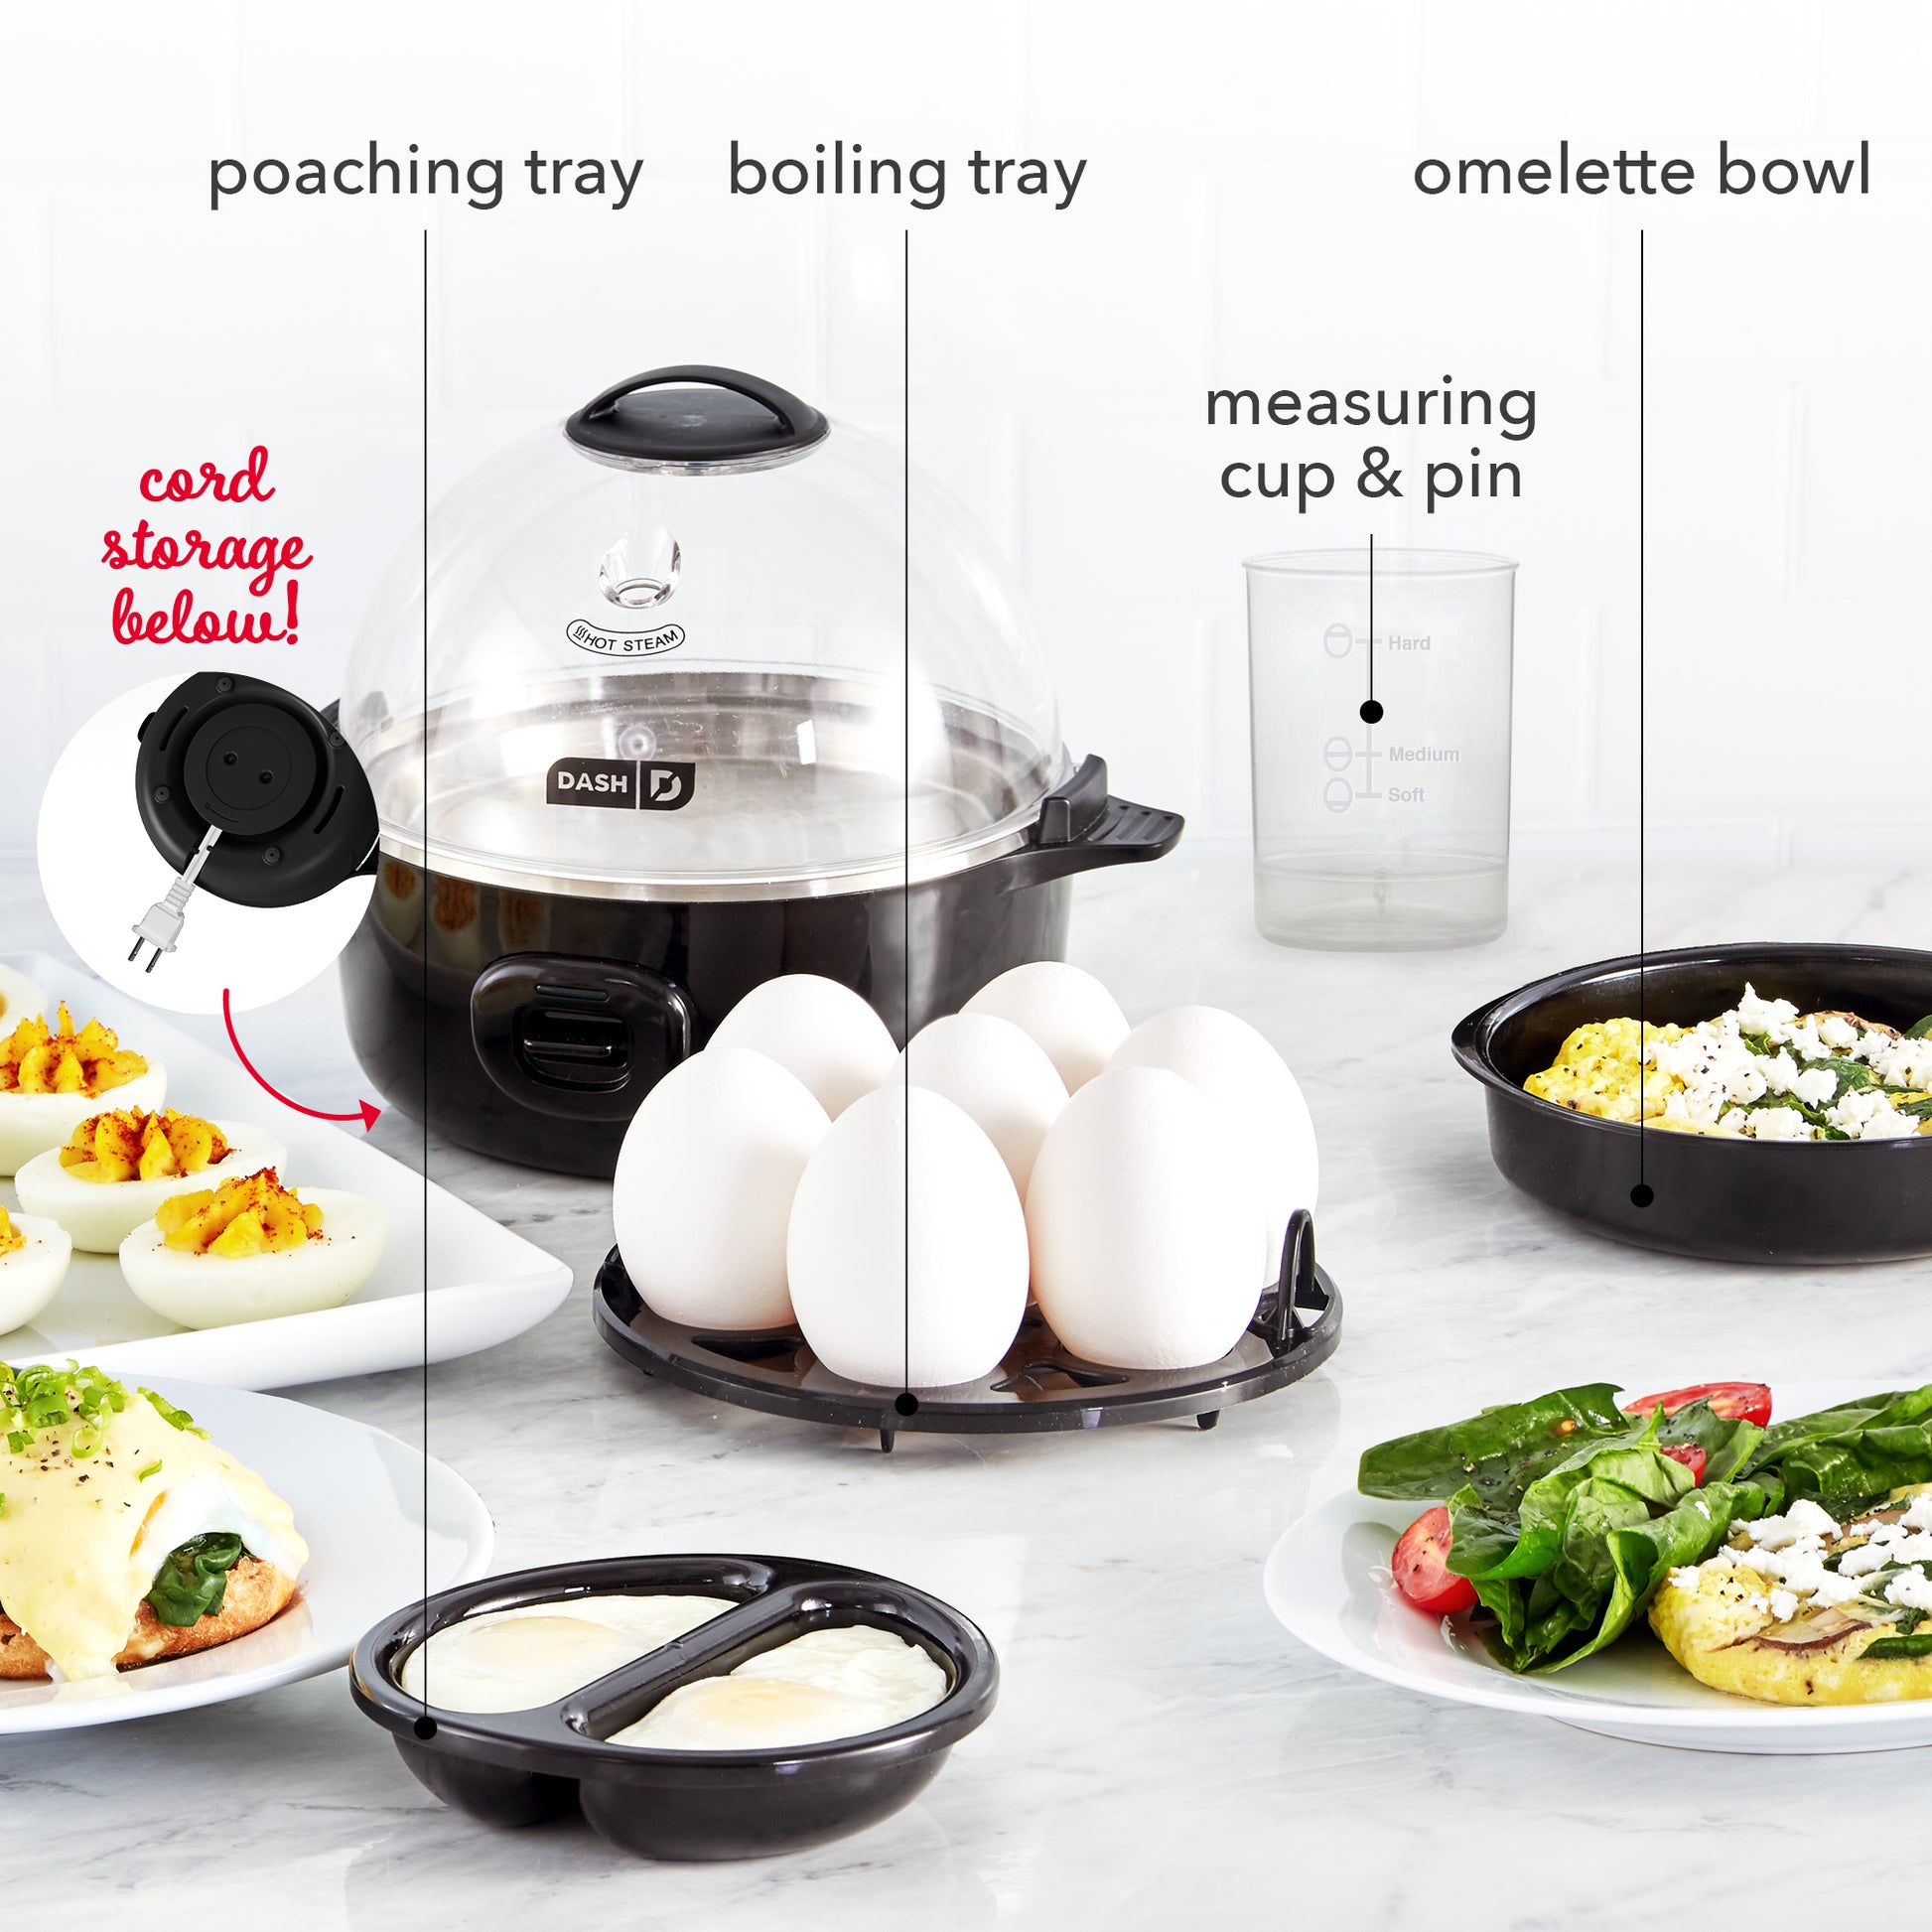
Before cooking your first egg, identify each piece in your starter kit. Your Dash Egg Cooker arrives with six precision-engineered parts that work together for perfect results:
- Heating base unit – the powerhouse with a 360-watt element and visible power indicator
- Removable egg tray – securely holds 6 eggs in individual slots to prevent rolling
- Clear plastic lid – lets you watch cooking progress without steam escape
- Poaching tray – features two non-stick compartments for restaurant-style poached eggs
- Omelet tray – shallow dish designed for perfectly set 2-3 egg omelets
- Measuring cup – your secret weapon with engraved lines for each cooking style
That tiny piercing pin attached to the measuring cup? It’s not optional—it prevents explosive steam buildup inside shells. Without piercing, pressure cracks cause messy explosions during cooking. Always use this pin on the egg’s larger end before loading the tray.
First-Time Setup Safety Steps You Must Follow
Critical Pre-Cleaning Protocol
Wash all removable trays and the lid in warm, soapy water before initial use. While the egg tray, poaching tray, and omelet tray can handle your dishwasher’s top rack, hand-washing preserves their non-stick coating longer. Never submerge the heating base—simply wipe it with a damp microfiber cloth. Residual moisture invites electrical hazards, so dry every component thoroughly before assembly.
Non-Negotiable Safety Checks
Place your cooker on a stable, heat-resistant surface at least 12 inches from sinks or stovetops. The base reaches 212°F during operation—keep it away from curious children and pets. Always verify the power cord remains dry and untangled, and never operate the unit without water. Warning: Running it empty can melt internal components and void your warranty.
Master Water Measurement for Flawless Results Every Time

Your measuring cup’s engraved lines aren’t suggestions—they’re scientifically calibrated for perfect steam pressure. Using incorrect water amounts causes undercooked yolks or rubbery whites. Follow this precise guide:
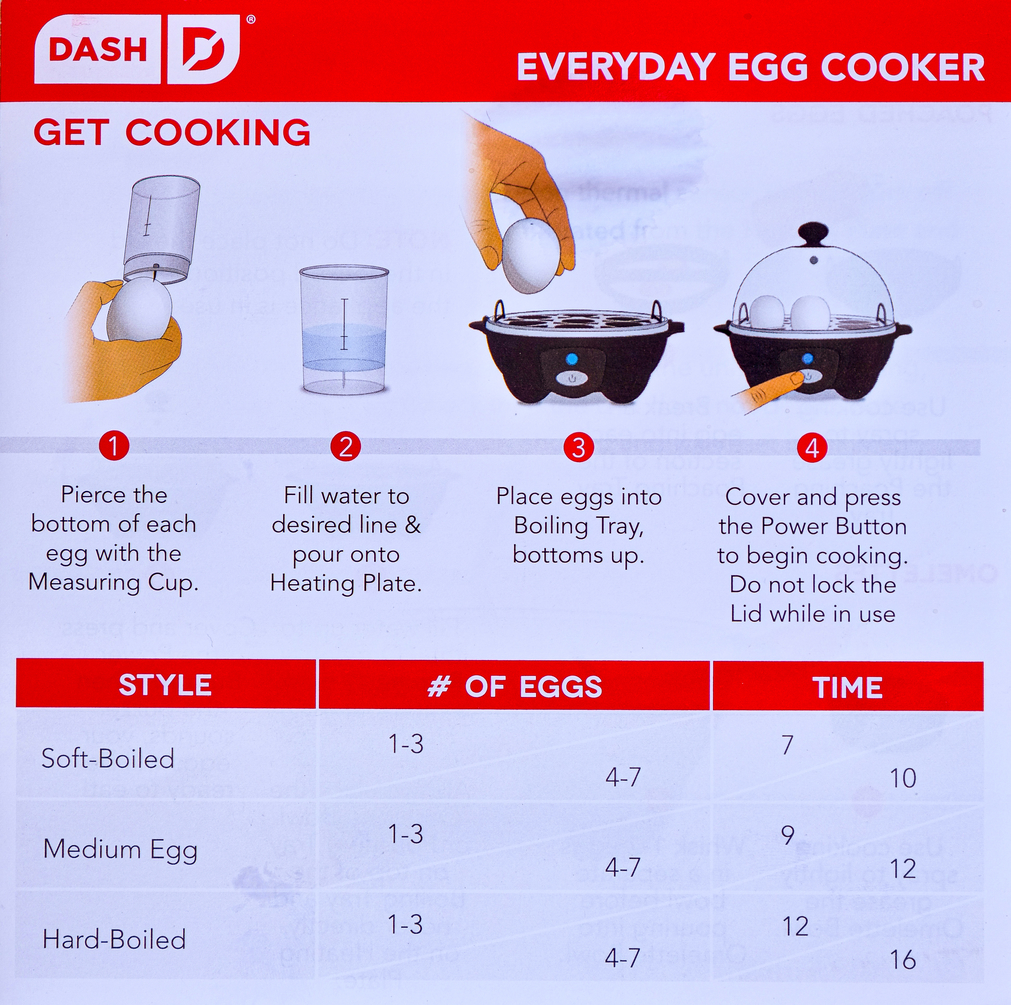
- Soft-boiled: Fill to “Soft” line (50ml) for 8-10 minute cook time
- Medium-boiled: Fill to “Medium” line (75ml) for 10-12 minutes
- Hard-boiled: Fill to “Hard” line (100ml) for 12-16 minutes
- Poached eggs: Fill to “Poached” line (75ml) for 7-9 minutes
- Omelets: Fill to “Omelet” line (60ml) for 9-12 minutes
Pro tip: Cold eggs straight from the fridge need 1 extra tablespoon of water. At high altitudes (3,000+ feet), increase water by 25% to compensate for lower boiling points.
Hard-Boiled Eggs: Foolproof Method for Easy Peeling
Step-by-Step Process for Perfect Results
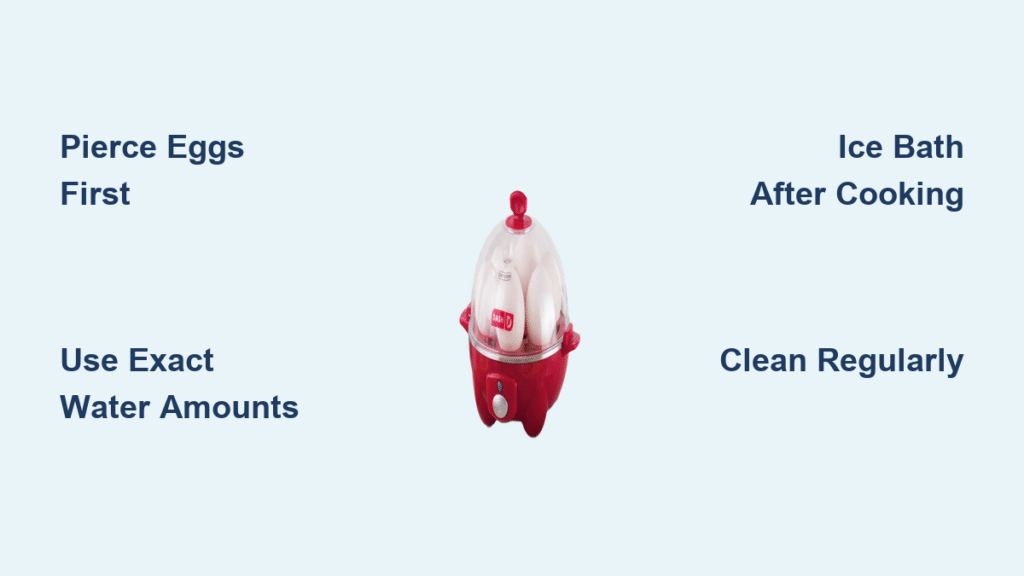
- Pierce every egg – use the pin on the measuring cup’s bottom at the larger end
- Place eggs pierced-side up in the tray—this channels steam away from yolks
- Pour exact water amount into the base (100ml for hard-boiled)
- Lock lid securely ensuring the steam vent aligns with the base
- Plug in unit – the indicator light confirms operation
- Walk away – automatic shut-off triggers when water evaporates (12-16 minutes)
- Transfer immediately to an ice bath for 5 minutes—this stops cooking and creates peel-friendly separation
Critical mistake to avoid: Leaving eggs in the hot base after cooking causes that unappetizing green sulfur ring around yolks. The ice bath is non-negotiable for clean peeling.
Soft-Boiled Eggs: Achieve Runny Yolk Perfection
Soft-boiled mastery requires precise water measurement and fresh eggs. Room-temperature eggs yield more consistent results than fridge-cold ones, which extend cook times unpredictably.
Follow this exact sequence:
– Use 50ml water (Soft line) for 8-10 minute cook time
– Pierce shells and load tray as with hard-boiled eggs
– Unplug immediately when the unit shuts off
– Serve within 30 seconds for that ideal liquid gold yolk
Quality check: When cracked open, the white should be fully set but tender, while the yolk flows like warm honey. Overcooking by just 60 seconds turns runny yolks into chalky disappointments.
Poached Eggs: Restaurant-Quality Without the Hassle
Preparation Essentials for Flawless Results
Lightly grease the poaching tray compartments with butter or cooking spray—this prevents sticking and ensures clean release. Fresh eggs work best as their tight whites hold shape during steaming.
Cooking sequence:
1. Measure 75ml water (Poached line)
2. Crack eggs directly into greased compartments
3. Cover with lid and plug in
4. Cook 7-9 minutes until whites are fully set
5. Lift gently with silicone spatula—metal utensils scratch the non-stick surface
Pro technique: Add a sprig of fresh dill or chives to the water reservoir for subtle flavor infusion. The steam carries delicate aromas into your eggs without adding calories.
Troubleshoot Common Egg Failures in 60 Seconds
Green Ring Around Yolks
Why it happens: Overcooking from excess water or delayed removal after shut-off
Instant fix: Use exact water measurements and transfer eggs to ice water within 10 seconds of cooking completion
Cracked Shells During Cooking
Root cause: Eggs not pierced or temperature shock from fridge-to-steamer
Prevention: Always pierce the large end, and let eggs sit at room temperature for 15 minutes before cooking
Water Residue After Cycle
Diagnosis: Mineral buildup from hard water clogging steam vents
Solution: Run a cleaning cycle with 50ml vinegar and 50ml water, then rinse thoroughly
Uneven Cooking Results
Quick diagnosis: Mixing egg sizes or tray sitting unevenly on base
Fix: Use uniformly sized eggs and verify the tray sits flat before locking the lid
Clean Like a Pro: Daily Maintenance in 2 Minutes
Essential Post-Use Routine
Unplug and let the unit cool for 30 minutes minimum—never handle hot components. Remove all trays and wash with warm soapy water using a soft sponge. Wipe the heating base with a damp cloth only; submerging it causes electrical damage. Critical step: Dry every component completely before storage to prevent mold and mineral deposits.
Weekly Deep-Clean Protocol
Descale the heating base monthly with a 1:1 vinegar-water solution. Soak stubborn residue in trays for 10 minutes before gentle scrubbing. Clear the piercing pin with a toothpick to maintain its effectiveness. Inspect the power cord for frays—replace immediately if damaged.
Advanced Techniques for Power Users
Batch Cooking Efficiency Hack
For families, cook two batches back-to-back. The preheated base reduces second-batch water needs by 1 tablespoon and shortens cook time by 2 minutes. Load the second tray while the first batch cools in the ice bath—this maintains consistent morning routines.
Flavor Infusion Secrets
Add fresh thyme, garlic cloves, or smoked paprika directly to the water reservoir. The steam carries subtle flavors into your eggs without altering texture. For herb-infused poached eggs, place a rosemary sprig in the poaching tray compartment before adding eggs.
Perfect Peeling Guarantee
Use eggs that are 3-5 days old—they peel 70% easier than super-fresh ones due to air pocket expansion. Combine this with the mandatory ice bath, and you’ll achieve smooth, intact whites every time. Never skip the ice bath—it’s the difference between frustration and perfection.
Mastering how to use Dash Egg Cooker transforms chaotic mornings into stress-free breakfast victories. Start with hard-boiled eggs to perfect your water measurement technique, then experiment with poached eggs and omelets. Within a week, you’ll consistently achieve runny yolks, easy-peel shells, and fluffy omelets with minimal effort. Remember: precise water measurement, immediate ice baths, and regular descaling are your golden rules. This compact powerhouse pays for itself in saved time, reduced food waste, and the joy of perfect eggs every single morning—no more guessing games over a boiling pot. Your ideal breakfast starts with one simple plug-in.


