
That gummy rice disaster from last Tuesday? It’s fixable in 20 minutes—with zero effort. Whether you’re wrestling with the compact RC503 or the family-sized RC516, your Black+Decker rice cooker holds the secret to perfect grains. No more sticky pots, crunchy centers, or midnight boil-overs. Just measure, click, and walk away while it transforms rice into restaurant-quality results. In this guide, you’ll master exact water ratios for every grain type, avoid the #1 first-time mistake (spoiler: it’s not the water), and unlock steaming tricks most owners miss. Let’s turn your countertop appliance into a kitchen hero.
First-Time Setup: Avoid These 3 Costly Mistakes
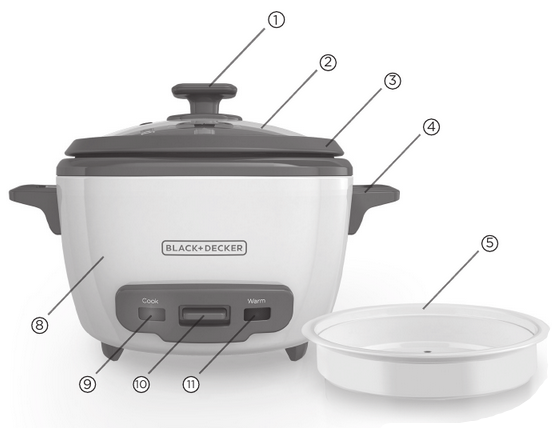
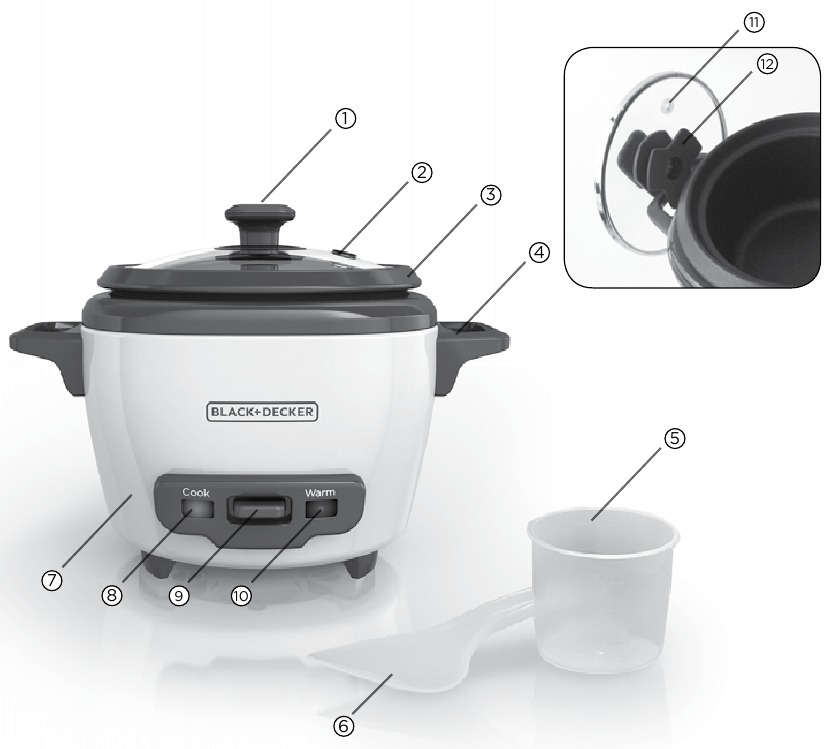
Skip this step and you’ll battle burnt rice from day one. Unbox every component—non-stick pot, glass lid, 6-oz measuring cup, spatula, and (for RC516) the steaming basket—and wash them immediately. Run through the dishwasher or scrub with soapy water; all parts are dishwasher-safe except the base. Here’s what 90% of beginners miss: wipe the heating base with a damp cloth only. Never immerse it in water or let moisture pool inside—that fries the heating element instantly. Position the cooker on a flat, heat-resistant surface with 4 inches of clearance on all sides. Steam needs room to escape; crowding it against cabinets traps heat and warps your countertops.
RC503 vs RC516: Which Model Solves Your Rice Nightmare?

Don’t guess your capacity—match your cooker to your potluck. The RC503 (3-Cup) handles 1.5 cups raw rice → 3 cups cooked, ideal for singles or small meals. Its 200W power churns out rice in 20–30 minutes. The RC516 (16-Cup) tackles 8 cups raw → 16 cups cooked with 500W muscle, perfect for meal prep or family dinners (20–40 minute cook time). Both auto-switch to Keep-Warm mode and share the same 2-year warranty. But here’s the critical detail: the bundled measuring cup holds 6 fl oz, not a standard 8-oz cup. Using a regular cup throws off water ratios and guarantees gummy rice. Always measure rice with the included cup—your texture depends on it.
Rinse and Measure: Why Your Rice Fails Before Cooking Starts
Rinse Until Water Runs Clear (Non-Negotiable!)
Dump rice into a mesh strainer and swirl under cold water. Keep rinsing until the water loses its milky cloudiness—that’s excess starch causing gummy clumps. For delicate jasmine or basmati, rinse gently to preserve aroma. Skip this, and you’ll battle gluey rice no Keep-Warm mode can fix.
Exact Water Ratios for Every Grain Type
| Rice Type | Water per Included Cup | Pro Adjustment Tip |
|---|---|---|
| White, long-grain | 1½–2 cups | Start with 1¾ cups; reduce ¼ cup if mushy |
| White, short-grain/sushi | 1¼–1½ cups | Use 1⅓ cups for perfect sticky texture |
| Brown or wild | 2–2¼ cups | Soak 20 minutes first for tender results |
| Jasmine/Basmati | 1½ cups | Add 1 tsp oil to prevent sticking |
Level rice in the cup—never pack it down. Water ratios assume room-temperature liquid; cold water extends cook time. If your rice is crunchy, add ¼ cup water next batch. Mushy? Reduce by ¼ cup. Track adjustments in your phone notes.
Load and Launch: 60-Second Setup for Foolproof Cooking
- Pour rinsed rice into the dry non-stick pot.
- Add measured water—no stirring yet.
- Stir once gently to distribute grains evenly.
- Wipe the pot’s outer rim with a towel; stray grains or moisture prevent proper contact with the heating plate.
- Place pot squarely on the base—rotate until it clicks into position.
- Close the glass lid with the steam vent pointed backward (prevents water spots on cabinets).
- Plug in and press the Cook switch—the red light confirms it’s heating.
Critical visual cue: Watch for steam escaping the vent within 5 minutes. No steam? Unplug, reseat the pot, and restart. Never lift the lid mid-cycle—that drops temperature and creates crunchy centers.
Keep-Warm Secrets: Why You Shouldn’t Serve Immediately
When the red Cook light shuts off and amber Warm light glows, do not open the lid. Let rice rest 5–10 minutes—this redistributes moisture for uniform fluffiness. Opening too soon releases steam that should finish cooking the grains. After resting, open the lid away from your face (steam burns are no joke) and fluff with the plastic spatula. Metal forks scratch the non-stick coating, leading to future sticking. For best results, serve within 2 hours; quality declines after 5–6 hours on Keep-Warm.
Steam Veggies or Fish in 10 Minutes (RC516 Owners Only)
Your RC516 isn’t just for rice—its steaming basket turns it into a multi-tool. Never add food directly to water. Instead:
– Pour 1–2 cups water into the empty pot (below basket height).
– Load broccoli, carrots, or fish into the perforated basket.
– Position basket on pot rim, close lid, and press Cook.
– Steaming times: Broccoli (6–8 min), Carrots (10–12 min), Fish (10–15 min).
Warning: Lift the basket with oven mitts—the steam is scalding even if handles feel cool. For dumplings or buns, line the basket with parchment paper to prevent sticking.
Beyond Rice: Oats, Soups, and One-Pot Dinners
Treat your cooker like a mini slow cooker:
– Steel-cut oats: 1 cup oats + 3 cups liquid → 25 minutes.
– Quinoa: Rinse well, use 1½ cups water per cup quinoa.
– One-pot chicken rice: Layer seasoned chicken over rice; add ½ cup extra water.
– Soup hack: Use 1½× stove-top liquid volume and stir during first 10 minutes.
Never cook pasta or beans—they foam and clog the steam vent. Stick to grains and steamed proteins for foolproof results.
Clean Without Ruining the Non-Stick Coating
After every cook:
– Unplug and cool 20 minutes.
– Remove the pot—rinse immediately to prevent stuck grains.
– Wash pot, lid, and basket in soapy water (or top-rack dishwasher).
– Wipe the base with a damp cloth only—no sprays or abrasives.
Weekly deep clean: Fill the pot halfway with water + ½ cup white vinegar. Run a 10-minute Cook cycle to dissolve starch film. Rinse twice. Store with the lid inverted on the pot—trapped moisture causes musty odors.
Fix These 5 Problems Before Dinner Burns
| Issue | Instant Fix | Prevention Tip |
|---|---|---|
| Mushy rice | Reduce water ¼ cup next time | Never lift lid mid-cycle |
| Crunchy centers | Add ¼ cup water, restart Cook | Ensure pot clicks flat on base |
| Scorched bottom | Increase water slightly; use plastic tools only | Replace pot if coating is scratched |
| Steam leaks | Clean lid rim; center lid properly | Check for food debris after each use |
| Fishy odors | Run vinegar cleaning cycle | Store lid ajar; never leave rice >6 hours |
Safety Must-Knows Before You Plug In
Your cooker auto-shuts off at 212°F—no timer needed. But ignore these, and you risk damage:
– Use only the 2-ft polarized cord—never plug into extension cords under 10A.
– Keep 4 inches clearance around the unit; steam warps nearby cabinets.
– Never immerse the base in water—wipe with damp cloth only.
– Keep receipt and model number (found on base label) for the 2-year warranty. Call 1-800-231-9786 for issues; commercial use voids coverage.
Tape this quick-reference card inside your cabinet:
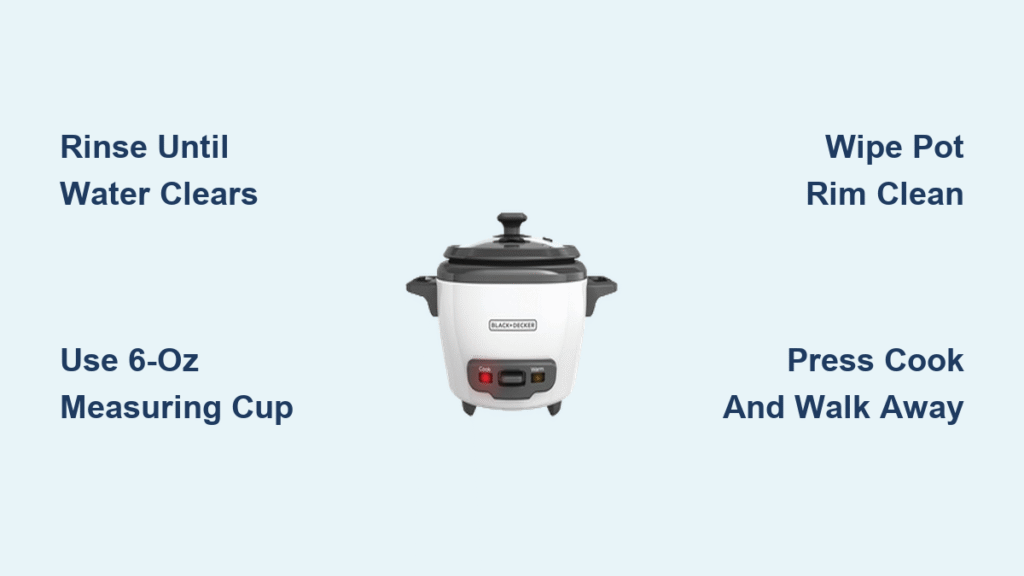
1️⃣ Rinse rice until water clears
2️⃣ Use the included 6-oz cup
3️⃣ Match water to rice type (see ratio chart)
4️⃣ Wipe pot rim → seat squarely → close lid
5️⃣ Press Cook → walk away
6️⃣ Rest 5–10 min after Warm light glows
7️⃣ Fluff with plastic spatula → serve
Follow these steps, and you’ll never serve gummy rice again. For RC516 owners, steam vegetables while rice cooks—dinner done in one pot. Clean after every use with the vinegar trick, and your Black+Decker will deliver perfect grains for years. Now go conquer that uncooked bag hiding in your pantry.


