
Nothing ruins dinner faster than mushy rice or a scorched pot. Your new BELLA 16-cup rice cooker promises foolproof results, but only if you master its quirks from day one. Whether you’re cooking fluffy jasmine for stir-fry tonight or prepping brown rice for weekly meal prep, this guide transforms you from rice rookie to grain guru using the exact techniques your BELLA manual describes—explained in plain English with zero guesswork. Follow these precise steps for how to use Bella rice cooker and you’ll never serve disappointing rice again.
Pre-Use Setup Checklist
Unbox and Clean Components Safely
Your BELLA arrives with critical safety hazards you must address before first use. Immediately dispose of all plastic packaging materials—they pose serious suffocation risks to children. Wash the glass lid, non-stick inner pot, measuring cup, and rice paddle in warm, soapy water. Rinse thoroughly and dry completely—water droplets on the inner pot’s exterior can damage the heating element. Wipe the main unit with a damp cloth only—never submerge the electrical base in water. This simple pre-use ritual prevents 90% of early failures.
Verify Your Complete Kit
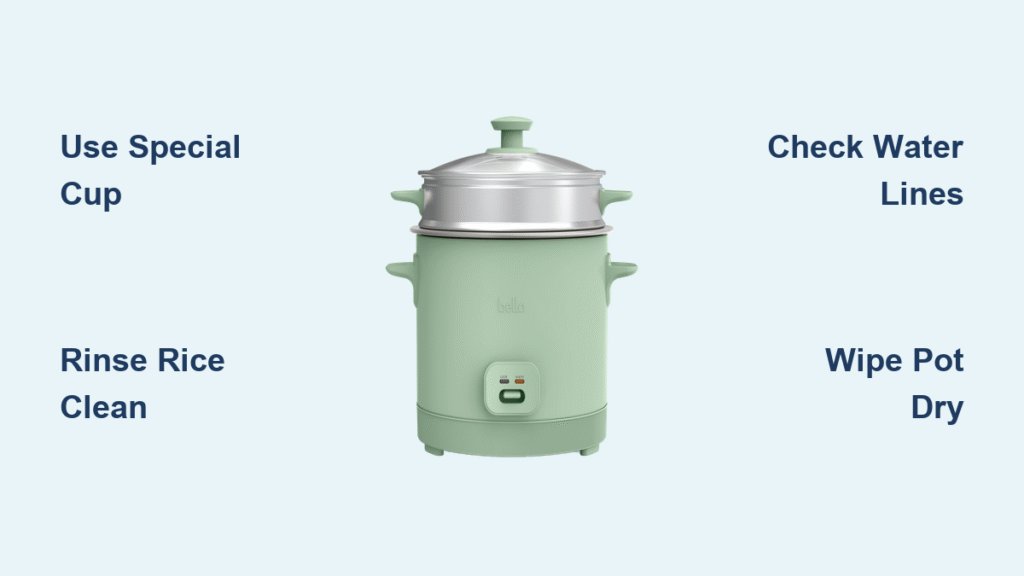
Your BELLA ships with four essential components you must identify immediately: the non-stick inner pot (with water measurement lines etched inside), tempered glass lid with steam vent, specialized 6-oz rice measuring cup (this isn’t a standard US cup!), and rice paddle. Losing the special measuring cup throws off every recipe ratio—it measures 180ml versus a standard cup’s 240ml. Store these components together in a dedicated drawer; without the correct cup, your rice measurements will be consistently wrong.
Measure Rice Like a Pro
Use the Special Cup Provided
That 6-ounce cup isn’t optional—it’s the foundation of every ratio. One level cup of uncooked rice equals exactly 2 cups cooked. Never substitute a standard 8-ounce measuring cup unless you want brick-like rice. The rice industry standard cup (6oz/180ml) differs significantly from US kitchen cups (8.11oz/240ml), explaining why many beginners fail. Always measure uncooked rice first, then add the corresponding water amount.
Rinse Until Water Runs Clear
Pour rice into a separate bowl and rinse under cold water, swirling with your hand. Drain and repeat 3-4 times until water loses its cloudy appearance. This removes excess starch that causes gummy texture. Drain thoroughly—wet rice throws off water ratios. For premium results, soak rinsed rice for 10-20 minutes before cooking; this simple step prevents the dreaded crunchy center while creating restaurant-quality fluffy grains.
Master Water Ratios and Timing

White Rice Quick Reference
| Uncooked | Water (measuring cups) | Water line in pot | Cooked yield | Total time |
|---|---|---|---|---|
| 1 cup | 1½ cups | Line 1 | 2 cups | 19-24 min |
| 2 cups | 2½ cups | Line 2 | 4 cups | 23-28 min |
| 3 cups | 3½ cups | Line 3 | 6 cups | 27-32 min |
Brown Rice Adjustments
Brown rice needs more water due to its bran layers—use 1½ cups water per uncooked cup. Skip the inner pot water lines entirely; they’re calibrated for white rice only. Expect 28-33 minutes cooking time regardless of quantity. Unlike white rice, brown rice benefits from a 15-minute soak before cooking to ensure even texture throughout. The extra time investment pays off with perfectly chewy, nutty grains.
Step-by-Step Cooking Process
Load and Start the Cycle
- Transfer rinsed rice to inner pot
- Add measured water or broth (beef, chicken, or vegetable stock works 1:1)
- Wipe pot exterior clean and dry—this prevents electrical damage
- Seat pot firmly in base—should click into place
- Lock lid securely
- Plug into 120V outlet only
- Press cook switch—indicator light confirms the cycle started
Pro Texture Tip
For restaurant-quality fluffy rice, let soaked grains rest 15 minutes before starting the cycle. This simple step prevents the dreaded crunchy center. After cooking completes, stir rice immediately with the paddle to release excess moisture, then replace the lid and let rest 5-10 minutes on “Keep-Warm” mode before serving.
Fix Common Rice Problems Fast
Rescue Dry or Hard Rice
Rice came out undercooked? Add ½ cup warm water, stir gently, and restart the cooking cycle. Check every 5 minutes until grains soften to your liking. This works because the additional moisture penetrates the hard grains during the second cooking phase. Never add cold water—it shocks the rice and creates uneven texture.
Salvage Soggy Rice
Overcooked rice needs moisture evaporation, not more heat. Stir rice thoroughly to redistribute moisture, then leave on “Keep-Warm” with lid closed for 10-30 minutes. Stir every 10 minutes—steam trapped inside will finish the job by drawing out excess moisture. For immediate rescue, spread rice on a baking sheet and warm in a 350°F oven for 5-10 minutes.
Safety Rules That Prevent Burns
:max_bytes(150000):strip_icc()/steam-burns-overview-4507433_color2-5c6f2661c9e77c000149e479.png)
Handle Steam and Heat Safely
Always open the lid away from your face—escaping steam causes serious burns faster than you can react. Use only the handles and knobs; the metal surfaces reach scalding temperatures within minutes. Keep children at arm’s length during operation and cooling. The steam vent releases superheated vapor that can cause third-degree burns in milliseconds.
Electrical Safety Essentials
Never yank the cord to unplug—pull the plug directly from the outlet. Operate on a separate kitchen circuit to prevent tripping breakers. Keep the unit away from water sources and never use outdoors. The rice cooker draws significant power during cooking—overloading circuits causes malfunctions and potential fire hazards.
Clean and Store for Longevity
Daily Cleaning Routine
Unplug and cool completely before cleaning. Wash inner pot, lid, measuring cup, and paddle in mild, soapy water. Skip abrasive sponges—they scratch the non-stick coating permanently. Wipe the main unit with a damp cloth; never submerge it. Store all components completely dry in a clean cabinet. Residual moisture breeds bacteria and causes unpleasant odors in your next batch.
Maintain the Non-Stick Surface
Light cooking spray prevents sticking without adding flavor. Avoid metal utensils that scratch the coating. Replace the inner pot immediately if you notice flaking—it’s covered under warranty for 90 days. Non-stick damage creates hot spots that burn rice and compromise safety. Proper care extends your BELLA’s life well beyond the warranty period.
Beyond Basic Rice: Creative Applications
One-Pot Meals That Impress
Transform your rice cooker into a meal-making machine. Try Green Chili Chicken Tacos: combine 1 cup rice, 1½ cups chicken broth, ½ cup canned chicken, ¼ cup green chilies, diced onion, and salt. The cooker handles everything—just stir when it switches to “Keep-Warm.” This versatile appliance also makes perfect soups, stews, and steamed vegetables with minimal supervision.
Flavor Enhancement Shortcuts
Substitute water with equal amounts of broth for instant flavor. Add one bouillon cube per cup of water for seasoned rice. Kosher salt requires 1.5x more than table salt due to purity differences. For Asian dishes, add a teaspoon of rice vinegar during cooking—it creates authentic sticky texture without gumminess.
Troubleshoot Like a Technician
When the Cooker Won’t Start
Check three things: pot seated firmly (should click), lid locked completely, and unit plugged into a working outlet. The safety mechanisms prevent operation if anything’s misaligned. If still unresponsive, verify your circuit breaker hasn’t tripped—this appliance draws significant power during initial heating.
Maximize Keep-Warm Function
The automatic keep-warm kicks in when cooking finishes. Maximum safe duration: 3 hours. Stir rice immediately after cooking, replace lid, and let rest 5-10 minutes for optimal texture before unplugging. Extended warming dries out rice and creates a hard crust along the pot’s bottom.
Warranty and Support Made Simple
Your Coverage Explained
BELLA backs mechanical defects for 2 years and non-mechanical parts for 90 days. Normal wear, voltage issues, or unauthorized repairs void coverage. Call 1-866-832-4843 for troubleshooting—most issues resolve over the phone. If not, request a case number and prepaid return label. Keep your original receipt; it’s required for warranty service.
Master these fundamentals and your BELLA transforms from countertop appliance to kitchen essential. Perfect rice isn’t about luck—it’s about following these exact steps every single time. How to use Bella rice cooker properly separates culinary novices from confident home chefs who serve flawless rice at every meal. With these techniques mastered, you’re ready to explore the full potential of your appliance—unlocking new recipes and consistent results that will impress family and guests alike.


