

Tired of ending up with mushy, undercooked, or burnt rice every time you try to make it? Your rice cooker holds the solution to consistently perfect grains with zero guesswork. This kitchen workhorse automates the entire process—from boiling to steaming—freeing you to focus on other meal components while delivering restaurant-quality results. Whether you’re a college student with a mini cooker or a home chef using a high-end model, mastering this appliance transforms rice from a stressful side dish into a foolproof foundation for countless meals. In this guide, you’ll learn exactly how to use a rice cooker to achieve fluffy, separate grains every single time, along with pro techniques that unlock its full potential beyond basic rice.
Unlike stovetop methods requiring constant monitoring, your rice cooker uses smart temperature sensors to detect when water is fully absorbed. As the pot reaches 212°F during boiling, rice hydrates and softens. Once all liquid evaporates, the internal temperature spikes, triggering an automatic switch to “Keep Warm” mode or full shutdown. This eliminates the risk of boiling over or scorching, making it ideal for beginners and busy cooks alike. Forget complicated timing or heat adjustments—you’ll get perfect rice in 20-30 minutes with just three simple actions: rinse, measure, and press start.
Master Basic Rice Cooker Operation

Core Heating Process Explained
Your rice cooker functions as an automated chef through precise thermal regulation. When you add rice and water, the heating element brings the mixture to a boil at 212°F. As water heats, rice grains absorb it through hydration, softening their structure. Once absorption completes and no liquid remains, the temperature rises above boiling point. Built-in sensors detect this change and immediately deactivate the heating element or engage “Keep Warm” mode. This entire cycle takes 20-30 minutes for white rice without any supervision required.
Essential Setup Before Cooking
Critical Pre-Use Checklist:
– Place your cooker on a flat, heat-resistant surface away from walls
– Verify the inner pot sits level in the base with no wobble
– Ensure the lid seals completely without gaps
– Confirm the power cord isn’t draped over hot surfaces
Safety Warning: Never operate with wet hands or near sinks—the heating element reaches scalding temperatures during use. Always unplug after cooking to prevent electrical hazards.
Perfect Water-to-Rice Ratios

White Rice Measurements
Standard Formula: 1 cup rice to 1 cup water works universally for short, medium, and long-grain varieties. This ratio produces light, fluffy grains that separate easily when served. For firmer texture (ideal for sushi), reduce water to ¾ cup per cup of rice. For softer results (great for congee), increase to 1¼ cups. Always use the rice cooker’s included measuring cup—standard kitchen cups run 20% larger, causing mushy rice.
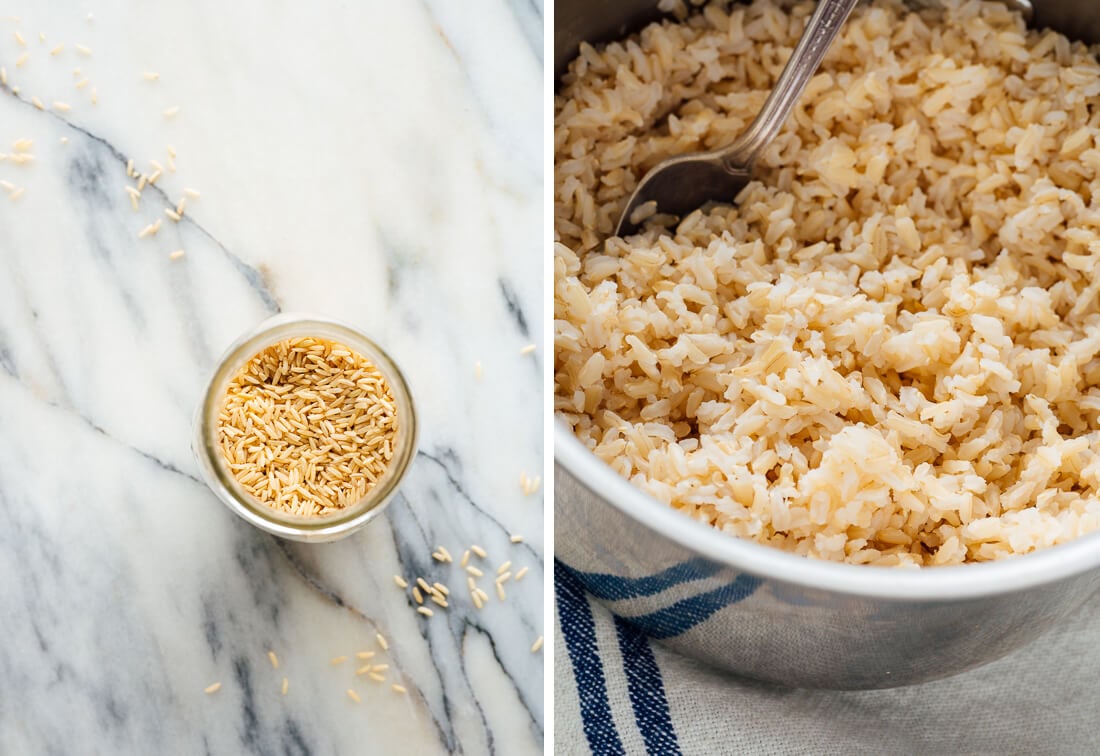
Brown Rice Requirements
Accurate Ratio: 1 cup rice to 1⅔ cups water compensates for the fibrous bran layer that slows absorption. This ensures tender, fully-cooked grains without chalky centers. For extra-soft brown rice, use 1¾ cups water per cup of rice. Unlike white rice, brown varieties benefit from a 10-30 minute pre-soak, which reduces cooking time by 5-10 minutes while maintaining the same water ratio.
Specialty Rice Guidelines
| Rice Type | Water Ratio | Critical Notes |
|---|---|---|
| Basmati | 1:1 | Reduce to 15/16 cups for drier texture |
| Wild Rice | 1:3 | Requires 50+ minute cook time |
| Enriched Rice | 1:1 | Never rinse—preserves added nutrients |
| Steel-Cut Oats | 1:3 | Cooks in 45 minutes for breakfast bowls |
Step-by-Step Cooking Process
Pre-Cooking Prep
Rinsing Protocol for Fluffy Results:
1. Measure rice using the included cup
2. Place in a fine-mesh strainer over the sink
3. Run cold water while gently stirring for 30 seconds
4. Repeat 3-4 times until runoff water runs clear
5. Drain thoroughly for 2 minutes before transferring to pot
Pro Tip: Skip rinsing for enriched/fortified rice to maintain nutrient content—this is the only exception to standard rinsing.
Loading Your Cooker
- Add rinsed rice to the inner pot
- Pour measured water using pot markings or a standard cup
- Level grains gently with your fingers—no packing!
- Wipe the pot’s exterior dry to prevent electrical issues
- Seal the lid until you hear a distinct click
- Press “Cook” and step away—no peeking allowed!
Post-Cook Fluffing Method
The Non-Negotiable 10-Minute Rest:
– Ignore the beep and let rice steam covered for 10 minutes
– This completes gelatinization for ideal texture
– Skipping this causes gummy, clumped grains
Fluffing Technique:
– Use the included rice paddle (never metal utensils)
– Slice vertically through rice, then horizontally
– Lift and turn gently—never stir or mash
– Serve immediately for best results
Brown Rice Mastery
Enhanced Process for Nutty Grains
Soaking Shortcut:
– Soak brown rice 10-30 minutes before cooking
– Reduces cook time by 5-10 minutes
– Promotes even hydration without altering water ratios
– Flavor Boost: Add ¼ teaspoon salt per cup of rice before starting
Storage and Reheating
Refrigeration Protocol:
– Cool rice to room temperature within 30 minutes
– Store in airtight containers for 4-6 days
– Revive Leftovers: Add 1 tbsp water per cup, cover, microwave 90 seconds
Troubleshooting Common Issues
Texture Problems Solved
Rice Too Wet?
– Reduce water by 1-2 tbsp next time
– Check lid seal integrity—gaps cause steam loss
– Ensure you’re using the cooker’s measuring cup
Rice Too Dry?
– Increase water by 1-2 tbsp
– Verify the “Keep Warm” function isn’t running too long
– Confirm the heating plate is clean and unobstructed
Quality Indicators
Perfect Rice Signs:
– Individual grains separate when lifted with a fork
– Tender bite with slight resistance at the core
– Zero water pooling at the pot’s bottom
– Clean, fresh grain aroma—no sour notes
Advanced Techniques and Variations
Multi-Functional Cooking
Steaming While Rice Cooks:
– Place vegetables in the steamer basket during the last 10 minutes
– Works perfectly for broccoli, carrots, or fish fillets
– Never exceed the cooker’s maximum capacity line
Batch Cooking Strategy
Weekly Meal Prep:
– Cook 3 cups dry rice for 8-10 servings
– Portion into meal containers while hot
– Refrigerate for 4-6 days or freeze for 3 months
– Pro Tip: Day-old refrigerated rice makes superior fried rice
Cleaning and Maintenance
Daily Cleaning Protocol
Immediate Post-Use Steps:
1. Unplug and cool for 15 minutes
2. Remove inner pot and rice paddle
3. Soak stuck rice in warm soapy water
4. Wash with a soft sponge—never steel wool
5. Dry completely before storage
Weekly Deep Clean:
– Wipe heating plate with a damp cloth
– Empty the condensation collector
– Check lid seal for trapped debris
– Clear the steam vent with a toothpick
Integration Into Daily Meals
Beyond Basic Rice
Breakfast Applications:
– Steel-cut oats: 1 cup oats to 3 cups water (45 minutes)
– Quinoa bowls: 1 cup quinoa to 2 cups water (15 minutes)
– Congee: 1 cup rice to 8 cups broth (60 minutes)
Dinner Enhancements:
– Add a bouillon cube to water for instant flavor
– Toss in frozen peas during the last 5 minutes
– Top with toasted sesame oil and scallions before serving
Final Note: Mastering your rice cooker starts with nailing the 1:1 white rice ratio, then experimenting with brown varieties and multi-functional techniques. The secret lies in precise measurements, thorough rinsing, and honoring the critical 10-minute rest period. Within weeks, you’ll leverage this appliance for steamed vegetables, grain bowls, and even breakfast porridge—freeing stove space while ensuring perfect results. Remember: clean your cooker after every use, store it dry, and never use metal utensils on the nonstick pot. Your journey to stress-free, consistently flawless grains begins with that simple “Cook” button press today.


