
Few kitchen frustrations rival the heartbreak of ruined poached eggs – wispy, scattered whites, broken yolks, or stubbornly raw centers that turn your brunch dreams into a soggy disaster. If you’ve ever wasted eggs trying to perfect the vortex swirl technique, a poached egg cooker is your solution. This simple device delivers restaurant-quality results with zero culinary expertise, whether you’re using eggs straight from the fridge or ones that have been sitting for days. How to use a poached egg cooker properly unlocks consistently tender whites and gloriously runny yolks without the traditional water-simmering anxiety.
The magic happens through controlled steam cooking, eliminating freshness worries and swirling water struggles. In this guide, you’ll discover exactly how to use a poached egg cooker for any model type – stovetop pans, electric units, microwave containers, or silicone pods. No more guesswork or wasted ingredients. By the end, you’ll pull perfect poached eggs from your cooker with confidence, transforming rushed mornings into elegant breakfast experiences.
Choose Your Poached Egg Cooker Type

Stovetop Pan Method for Precision Control
Stovetop poachers combine a shallow frying pan base with a metal frame holding 4-6 individual cups. When you remove the insert, you gain a versatile frying pan for other cooking tasks. Water sits below cup level, creating gentle steam that cooks eggs evenly without direct contact. This method gives you full control over heat intensity – crucial for achieving your ideal yolk consistency. Unlike traditional poaching, you never touch the water directly, preventing messy whites and broken yolks.
Electric Poacher Convenience for Hands-Off Cooking
Electric models automate the entire process with built-in heating elements and precise timers. Most accommodate 4-7 eggs and include bonus functions like hard-boiled egg settings. While you sacrifice some heat control, you gain foolproof consistency – ideal for beginners or busy mornings. Simply add water per your model’s specifications, set the timer, and walk away. The automatic shutoff prevents overcooking, though initial water measurements vary significantly between brands.
Microwave Speed Solution for Emergency Breakfasts
Microwave poachers deliver results in under 4 minutes using minimal water (just ½ teaspoon per cup). These compact containers hold 2-4 eggs and require a critical safety step: piercing each yolk with a fork to prevent dangerous explosions. Though fastest, this method demands vigilance – cook in 30-second intervals and check opacity frequently. It’s perfect for dorm rooms or single servings but requires careful monitoring to avoid rubbery textures.
Silicone Pod Flexibility for Minimalist Cooking
Individual silicone pods float directly on boiling water in any lidded pot, offering ultimate flexibility. They work for single-egg servings or when your main cooker is occupied. Unlike steam methods, pods require direct water contact, creating slightly firmer whites but allowing complete customization of your cooking vessel. Their portability makes them ideal for travel or small kitchens, though they demand careful handling during removal due to heat conduction.
Prepare Your Poached Egg Cooker Properly
Essential Water Levels for Optimal Steam
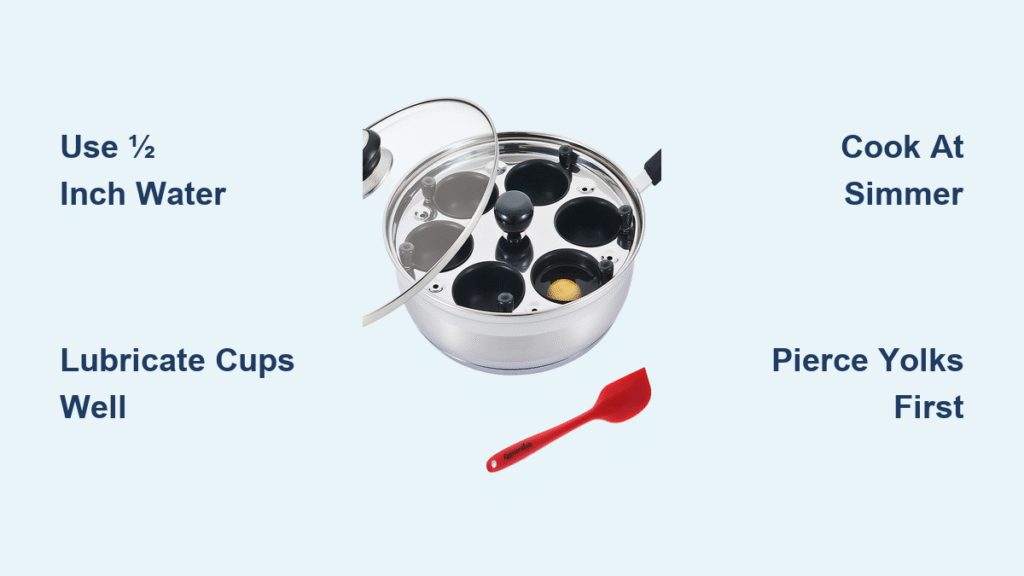
Fill your cooker base with exactly ½ inch (1.3 cm) of water – enough to touch cup bottoms when inserted but not submerge them. This measurement is non-negotiable across all cooker types. Too little water causes hot spots and uneven cooking; too much leads to splashing and messy whites. Use cold water for stovetop models to prevent premature cooking during heating. For electric units, always follow manufacturer measurements as they vary significantly.
Perfect Cup Lubrication Technique
Generously coat every cup interior with your preferred fat using a paper towel:
– Butter for rich, traditional flavor
– Olive oil for Mediterranean dishes
– Coconut oil for dairy-free diets
– Cooking spray for fastest application
Ensure complete coverage in corners and edges where eggs love to stick. Skimping here guarantees broken yolks during removal. This step is especially critical for silicone pods and microwave containers where direct contact increases sticking risk.
Smart Egg Handling Protocol
Crack eggs directly into prepared cups or use a small bowl for easier transfer. Fill unused cup slots with water to prevent frame warping and maintain even heating. Never drop eggs from height – gently slide them in to preserve yolk integrity. For microwave methods, pierce each yolk once with a fork before cooking to prevent explosions.
Master Stovetop Poached Egg Cooker Technique
Initial Setup Sequence
- Remove cups and frame from pan base
- Add ½ inch cold water to pan
- Place frame and lid in position
- Heat on high while greasing cups
Bring water to an active simmer – more vigorous than a gentle simmer but not a rolling boil. This precise temperature ensures consistent steam without disrupting the eggs.
Cooking Process Control
Once simmering, remove the lid, place greased cups into the frame, crack eggs in, and replace the lid immediately. Maintain active simmer on medium heat – high heat causes splashing while low heat yields undercooked whites. The lid traps steam for even cooking, eliminating the need for water swirling.
Timing Chart for Perfect Results
- Runny yolks: 7-9 minutes for large refrigerated eggs
- Jammy yolks: 9-11 minutes
- Firm yolks: 12-14 minutes
- Testing: Gently press yolk center with a rounded knife tip – it should yield slightly without jelly-like movement
Adjust times based on egg size and refrigerator temperature. Cold eggs need 30-60 extra seconds.
Electric Poached Egg Cooker Simplified

Setup and Operation Protocol
Follow your model’s specific water guidelines – some require 50ml, others up to 100ml. Preheat for 5-10 minutes until water actively simmers. Grease cups thoroughly with cooking spray, then add eggs. Most units deliver perfect results in exactly 6 minutes, though advanced models feature automatic timers. When in doubt, start with 6 minutes and adjust based on your first batch. Never exceed manufacturer water levels to avoid overflow.
Microwave Poached Egg Cooker Method Safely
Progressive Cooking Approach
- Pierce yolks once with a fork (critical safety step)
- Add ½ teaspoon water per cup plus a splash over each egg
- Cook 30 seconds on high power
- Continue in 30-second intervals, checking after each
- Total time: 3-4 minutes for runny yolks
Stop when whites turn opaque from the outside inward. Overcooking happens fast in microwaves – err on the side of underdone since eggs continue cooking from residual heat.
Troubleshoot Common Poached Egg Cooker Problems
Sticking Solutions and Prevention
Eggs stick when lubrication is insufficient or water levels drop too low. Increase butter or oil amount, ensuring complete cup coverage. If sticking persists, carefully add hot water during cooking to maintain ½ inch depth. For stubborn residue, soak cups in warm, soapy water immediately after use – never let egg dry on surfaces.
Timing Adjustment Strategy
Expect 1-2 trial runs to dial in your perfect timing. Reduce by 30 seconds for runnier yolks if first batch is overdone; extend gradually for firmer centers. Visual cues are key: eggs turn opaque from edges toward the center as they cook. Note that electric models require fewer adjustments than stovetop due to consistent heating.
Serve Like a Professional
Classic Combinations for Instant Elegance
- Sumac toast: Sprinkle sumac spice over granary bread for vibrant color
- Dill delight: Top wholemeal toast with fresh dill and cracked pepper
- Potato cake base: Replace toast with crispy potato cakes for hearty meals
Start toast preparation when eggs hit the 3-minute mark to ensure simultaneous finishing. For groups, coordinate multiple batches with toast timing – poached eggs hold well for 2-3 minutes under a warm lid.
Maintain Your Poached Egg Cooker
Cleaning and Storage Protocol
Allow complete cooling before handling – hot metal cups warp easily. Wash components immediately after use with warm, soapy water, removing all residue to prevent buildup. Most stovetop and silicone parts are dishwasher safe, but hand washing extends lifespan. Dry thoroughly before storage to prevent mold, and store cups within the frame to avoid loss. Keep lids slightly ajar to prevent moisture accumulation and odors.
Pro tip: Record your perfect timing for your specific setup – stovetop heat varies dramatically between kitchens. Once you nail the timing for your cooker, breakfast becomes effortless and impressive every single morning. With proper how to use a poached egg cooker knowledge, you’ll never waste another egg or settle for imperfect brunch again. The consistency this tool delivers transforms even weekday mornings into culinary celebrations – no chef skills required.


