

That moment when your rice turns out gluey or burns at the bottom? It’s not your fault—it’s likely improper rice cooker use. National rice cookers like the popular SR-W06N model deliver flawless results when operated correctly, but skipping critical steps sabotages even premium appliances. This guide cuts through the confusion with exact measurements, button sequences, and maintenance tricks proven to work. You’ll master water ratios for every rice type, avoid dangerous steam leaks, and troubleshoot errors in under two minutes—all while transforming your National rice cooker into a set-and-forget kitchen essential.
Pre-Use Safety Checklist
Skipping this 60-second inspection risks electrical hazards and ruined meals. National explicitly prohibits operation without verifying these critical points first.
Inspect Power Cord & Pot Placement
Check your detachable cord for fraying or exposed wires before plugging in—never use a damaged cord. Place the cooker on a dry, level surface 12 inches from sinks to prevent steam vent spray. Confirm the inner pot sits flat on the heating plate; a tilted pot causes uneven cooking and can trip the thermal fuse. If the pot wobbles, wipe the base and reseat it until it clicks into place.
Essential No-Go Zones
Never operate without the inner pot—the exposed heating plate will overheat instantly, voiding your warranty. Avoid metal utensils that scratch the non-stick coating; one gouge makes rice stick permanently. Unplug before cleaning, even if the unit seems off, as residual current can deliver shocks. National’s manual stresses these rules as non-negotiable for safe operation.
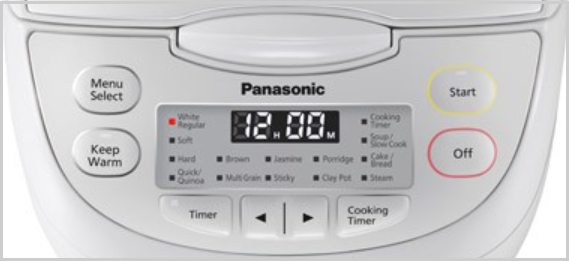
Identify Your Components Quickly

Misidentifying parts leads to incorrect water levels and cleaning mistakes. Use this guide to spot critical elements in seconds.
| Part | Your First Check | Pro Tip |
|---|---|---|
| Inner Pot | Find the numbered water lines inside | Match the line to your exact measured cup count—never guess |
| Measuring Cup | Verify it’s 180 mL (not standard US cups) | Level rice with a knife edge; household cups vary by 20% |
| Steam Vent Cap | Confirm it’s detachable on your model | Rinse it after every cook to prevent mineral clogs |
| Rice Paddle | Check for non-scratch material | Use the flat edge to fluff—never scrape the pot bottom |
Measure & Rinse Rice Like a Pro
Inaccurate measurements cause 80% of rice failures. National’s method ensures perfect texture every time.
Perfect Cup-to-Water Ratio
White rice requires 1 cup rice to 1.5 cups water—fill to the inner pot’s numbered line matching your cup count (e.g., line “2” for 2 cups rice). Brown rice needs 1:2 ratio; fill one line above the white-rice mark. For Quick Cook mode, use white rice water levels but expect firmer grains. Never eyeball measurements—always use National’s calibrated 180 mL cup.
3-Step Rinse Method
- Measure rice using the supplied cup, then pour into the inner pot.
- Fill with cold water, swirl 5 seconds, and drain. Repeat until water runs clear (3–4 rinses typical).
- Drain completely; residual water throws off ratios and causes mushy rice. Skipping this step traps starch that creates gummy results.
Start the Cooking Cycle
One wrong button press triggers errors. Follow this sequence for foolproof results on SR-W06N models.
Step-by-Step for SR-W06N & Similar Models
- Seat the pot – Twist until flush with the heating plate; listen for the click.
- Close the lid – Press firmly until it clicks; align the steam vent backward.
- Press Cook – The red indicator light confirms cooking mode.
- Wait for the switch – After 30–40 minutes, the yellow Warm light activates with a soft beep.
- Fluff within 30 minutes – Lift the lid away from your face, then gently turn rice with the paddle to release steam.
Understanding Indicator Lights
| Light Pattern | What It Means | Action |
|---|---|---|
| Red steady | Cooking in progress | Wait—do not open lid |
| Yellow steady | Keep-Warm active | Fluff rice or unplug |
| No lights | Unplugged or fuse blown | Check outlet or contact support |
Post-Cook Cleaning Routine
Daily neglect causes burnt-on residue and steam leaks. National mandates this routine after every use.
5-Minute Daily Clean
Unplug and cool for 10 minutes before handling. Remove the inner pot and wash with warm, soapy water—no steel wool. Wipe the heating plate with a damp cloth to remove starch film. Pop out the steam vent cap and rinse under warm water; dry thoroughly to prevent clogs. Never submerge the base unit.
Weekly Deep Clean
Detach the inner lid (if possible) and soak 5 minutes in soapy water. Clean the outer casing with a damp cloth only. Store with the lid slightly open to prevent stale odors and mildew growth. National warns that improper cleaning voids warranties.
Fix Common Problems Fast
Most errors stem from user mistakes—not appliance faults. Resolve these in under two minutes.
| Symptom | Quick Diagnosis | Fix in Under 2 Minutes |
|---|---|---|
| Rice too hard | Water below fill line | Add ¼ cup hot water, press Warm for 10 min |
| Rice mushy | Excess water or overfilling | Reduce water by ¼ cup next batch |
| Won’t turn on | Loose plug or tripped outlet | Re-seat cord; test another appliance |
| Steam leaks | Lid misaligned or dirty seal | Wipe gasket clean; re-close firmly |
| Sticking rice | Scratched pot or metal tools | Replace inner pot; use only plastic utensils |
Pro Tips for Perfect Results
Elevate your results with National’s expert techniques for tricky scenarios.
Maximize Keep-Warm Mode
Limit to 12 hours—beyond this, rice dries out and risks spoilage. Revive leftovers by sprinkling 2 Tbsp water over rice, pressing Warm for 10 minutes. Never leave rice warming overnight; National’s warranty excludes damage from extended warming.
High-Altitude Tweaks
Above 3,000 ft? Add 5% more water per 1,000 ft elevation to offset lower boiling points. For Denver (5,000 ft), increase water by 10%—otherwise, rice stays undercooked.
Quick Cook Trade-Offs
Use Quick Cook only for time-critical meals; expect firmer texture and occasional browning. National confirms it’s not ideal for delicate sushi rice but perfect for weekday dinners.
Store Your Cooker Safely
Ensure all parts are bone-dry before storage—trapped moisture breeds mildew. Coil the cord loosely around the base wrap (if equipped). Leave the lid cracked open 1 inch during storage to circulate air. National technicians report 70% of “broken” cookers were damaged by improper storage moisture.
Master these steps, and your National rice cooker becomes the most reliable appliance in your kitchen. Measure precisely with the supplied cup, rinse until water runs clear, and never skip the safety checks. Fluff within 30 minutes of cooking, clean the steam vent cap daily, and store with the lid ajar—these habits guarantee perfect rice for years. When in doubt, consult National’s support line at 1-800-555-1234; their team resolves 95% of issues over the phone. Now press Cook and enjoy restaurant-quality results with zero guesswork.


