
That moment when you lift your slow cooker lid to reveal a gorgeous pot roast—only to discover sauce welded to the stoneware like volcanic rock. You know the drill: 30 minutes of soaking, elbow grease scrubbing, and muttered promises to “just buy disposable pans next time.” But what if cleanup took 30 seconds instead? Mastering how to put a slow cooker liner on correctly transforms your appliance from a scrubbing nightmare into your weeknight MVP. Forget wrestling with melted plastic or leaks—the right technique guarantees flawless food release every time, whether you’re batch-cooking freezer meals or serving chili at a potluck. This guide reveals the exact method that prevents dangerous melting, stops leaks cold, and turns cleanup into a one-step tug-and-toss.
Pinpoint Your Exact Liner Size Before Starting
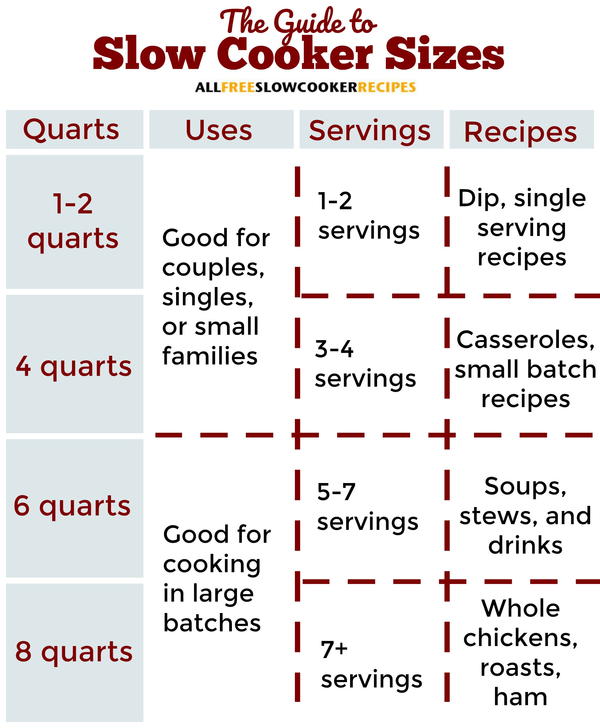
Match Liner to Quart Capacity—No Guesswork
Your slow cooker’s stamped quart number (found on the base or inside the rim) dictates liner size. Use this foolproof guide:
- 1–3 qt models: Mini liners for 2-quart dips or appetizer warmers
- 3–8 qt models: Standard liners fit 4–6 qt family cookers (70% of units)
- 8+ qt models: Jumbo liners for 8–10 qt party pots
An oversized liner bunches in the bottom, creating hot spots that burn food. Too-small liners leave ceramic exposed above the fold line, guaranteeing baked-on residue. Measure water volume if the label’s worn: Fill your empty insert with cups of water until full, then divide by 4 (e.g., 16 cups = 4 quarts).
Pro Tip: When sizes overlap (like a 3.5 qt cooker), choose the larger liner. You can neatly fold excess material over the rim—but you can’t stretch a too-small liner without tearing it.
Prepare Your Slow Cooker for Liner Installation
Unplug and Cool for 30 Minutes Minimum
Never install a liner in a warm cooker. Residual heat softens the plastic, causing it to fuse to ceramic during cooking. This creates permanent melted patches that ruin both the liner and your stoneware. If you just finished cooking, unplug the unit and wait 30 minutes minimum before proceeding.
Lock Stoneware Firmly in Base
If your insert lifts out, press it down until it clicks into place. A loose stoneware shifts during cooking, dragging the liner against heating elements. This causes punctures or melting—especially dangerous with bone-in meats that tilt the bowl.
Skip Oil or Spray—It’s Counterproductive
Unlike traditional cooking, liners release even sticky barbecue sauce without added fat. Spraying oil creates slippery spots where the liner slides down during cooking. The FDA-compliant nylon resin grips ceramic naturally when dry.
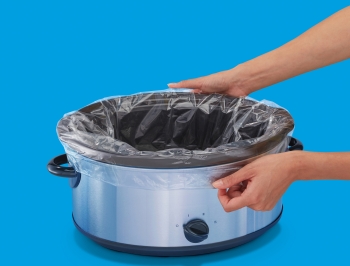
Unfold and Position the Liner Correctly
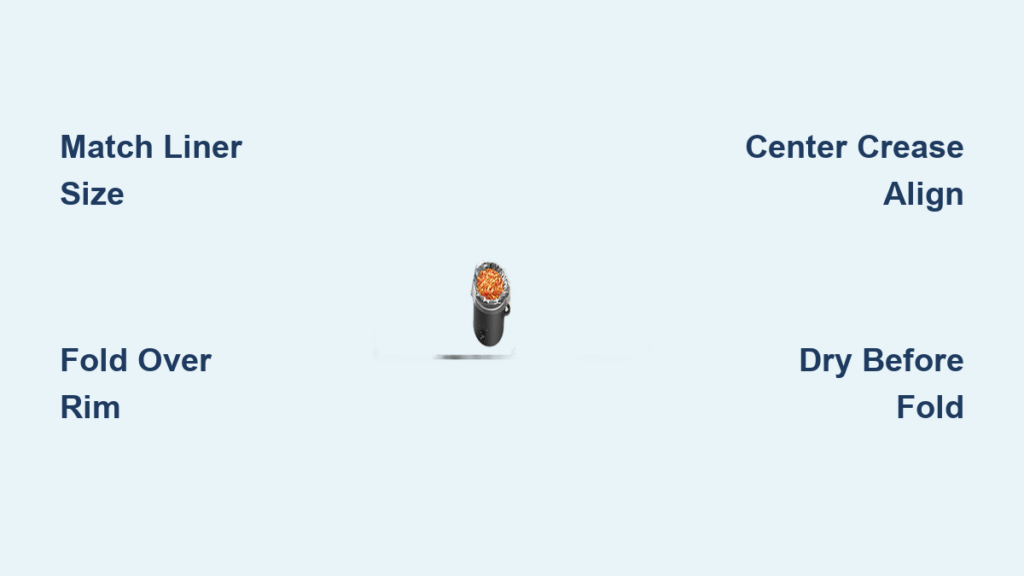
Locate the Center Crease and Align
Remove the liner from packaging and shake gently to unfold pre-pleats. Slide your hand inside and find the central crease—this is your alignment anchor. Lower the liner straight down into the bowl, matching the crease to the exact center point of the stoneware.
Why this prevents bunching: Off-center liners create one short side (exposing ceramic) and one bunched side (trapping steam). Centering ensures even wall coverage. If the liner twists as you lower it, lift and restart—forcing it causes permanent wrinkles.
Smooth Liner Against Bowl Contours
Press Bottom First, Then Sidewalls
With dry hands, smooth the liner flat against the base using circular motions from center to edge—like applying a screen protector. Eliminate large air pockets (they cause floating), but ignore minor wrinkles; food weight flattens them during cooking.
Check for Exposed Ceramic Above Fold Line
Run fingers along the top 2 inches of the sidewalls. Any visible ceramic here will bake on sauce during cooking. If exposed, lift the liner and reposition it higher. The liner must extend 1–2 inches above the highest ingredient level (e.g., 4 inches for a full pot roast).
Fold Rim Over Correctly—Avoid Melting Hazards
Fold 2–3 Inches Over Rim—Never Tuck Under
Bring excess liner straight up and over the ceramic rim to create a cuff. Critical safety step: The fold must sit on top of the rim, not between the stoneware and heating base. Trapped liner material melts against hot metal within 30 minutes, creating holes that leak food and risk electrical fire.
Test the Fold’s Security
Gently tug the folded edge all the way around. It should resist pulling but not feel stretched tight. A loose fold slips into the bowl when placing the lid, while an over-stretched fold tears during cooking. Ideal tension feels like a snug rubber band.
Load Ingredients Without Puncturing the Liner
Use Silicone Utensils and Position Bones Carefully
Sharp edges—like chicken bones or metal tongs—puncture liners instantly. Slide bone-in meats flat against the bottom (not upright), and use silicone spoons for stirring. For freezer meals, assemble ingredients in the liner, cover with the slow cooker lid, and refrigerate the entire bowl overnight.
Never refrigerate cooked food in the liner. Sealed plastic traps heat, letting food linger in the bacterial “danger zone” (40°F–140°F) for hours. Transfer leftovers to glass containers immediately after serving.
Cook Safely Without Liner Shifts
Place Lid Normally—Weight Prevents Movement
Once ingredients fill the liner (never over ⅔ capacity), set the lid in place as usual. Food weight anchors the liner, so it won’t shift during cooking. Liners handle all standard settings (LOW, HIGH, WARM) but never use on WARM-only for raw proteins—extended time in the danger zone risks foodborne illness.
Freezer-to-Slow Cooker Shortcut
For freezer meals: Twist the liner’s top closed, place in a freezer bag, and freeze. Next day, drop the frozen block (liner and all) into your pre-lined slow cooker. Always thaw completely first—partially frozen food prolongs danger zone exposure.
Cool and Remove Liner Safely
Wait 15–20 Minutes Before Handling
Never lift a hot, food-filled liner. Scalding liquid stretches the plastic, causing catastrophic spills. Serve food directly from the cooker, then let the empty liner cool until lukewarm (test with back of hand).
Gather Edges Like a Trash Bag
Grasp the folded rim and lift straight up. Pinch the top edges together to contain drips, then twist shut like a garbage bag. Toss immediately in household trash—never compost or reuse. Degraded plastic can leach chemicals during second use.
Fix These 3 Common Liner Failures
:max_bytes(150000):strip_icc()/are-those-plastic-liners-safe-to-use-in-your-crock-pot-80c26ec2c7d04977849520d815c1de70.jpg)
Liner Slides Down Mid-Cook
Cause: Wet rim or wrong size. Fix: Dry ceramic edge with towel before folding, and switch to correct quart rating. Reduce ingredients to ⅔ capacity if overfilling.
Melted Holes Near Rim
Cause: Trapped liner between bowl and base. Fix: Always fold liner over the rim—not underneath. Ensure stoneware clicks fully into the heating unit.
Leaks During Cooking
Cause: Puncture from bones or utensils. Fix: Position bones flat, use silicone tools, and verify no sharp food edges contact the liner.
Special Uses That Save Time
Cook Two Dishes Simultaneously
Place two liners side-by-side, folding each over opposite rim sections. Fill with compatible foods (e.g., chili and queso), ensuring both need identical cook times. Never use for foods with different temps (like ribs and rice pudding).
Potluck Transport Secret
Cook at home in a lined slow cooker, then transport the entire unit. At the event, lift out the liner for instant cleanup—no scrubbing someone else’s casserole residue off your stoneware.
Dessert Barrier Trick
Nest a second liner inside your main dish for cheesecake or lava cakes. The barrier prevents flavor transfer and lets you lift desserts out cleanly for plating.
Critical Safety Warnings You Must Know
Never Use Liners Outside Slow Cookers
These liners melt instantly in ovens, air fryers, microwaves, or on stovetops. The heat-resistant nylon resin (rated to 400°F) is engineered only for slow cooker temperatures. Using them elsewhere risks fire or toxic fumes.
Burn Prevention is Non-Negotiable
Always wear oven mitts when handling the lid or ceramic insert—liners provide zero heat protection. Support the entire slow cooker base when moving; never carry by the liner edges (they tear under hot weight).
Freezer Meal Danger Zone Rule
Thaw frozen liner meals completely in the refrigerator before cooking. Partially frozen food takes 2+ hours to reach safe temperatures, breeding bacteria like Salmonella in the danger zone.
Cleanup That Takes 30 Seconds Flat
Wipe, Don’t Scrub
With the liner gone, you’ll only see minor splatter on the rim and condensation on the lid. A damp cloth removes both instantly—no soaking, scrubbing, or dishwasher cycles needed. The stoneware stays pristine for next use.
Cost vs. Time Savings
A 20-pack of liners costs $5–$8 (less than takeout). Compare that to 30 minutes of daily scrubbing: At $15/hour, liners save you $7.50 per use in time alone. Plus, you avoid ruined stoneware from melted plastic disasters.
Master how to put a slow cooker liner on with these precise steps, and every meal ends with a satisfying tug-and-toss instead of sink-side despair. No more wrestling with stuck-on sauce—just effortless cleanup that makes weeknight cooking actually enjoyable. Your future self will thank you when chili night wraps up before the credits roll on The Mandalorian.


