
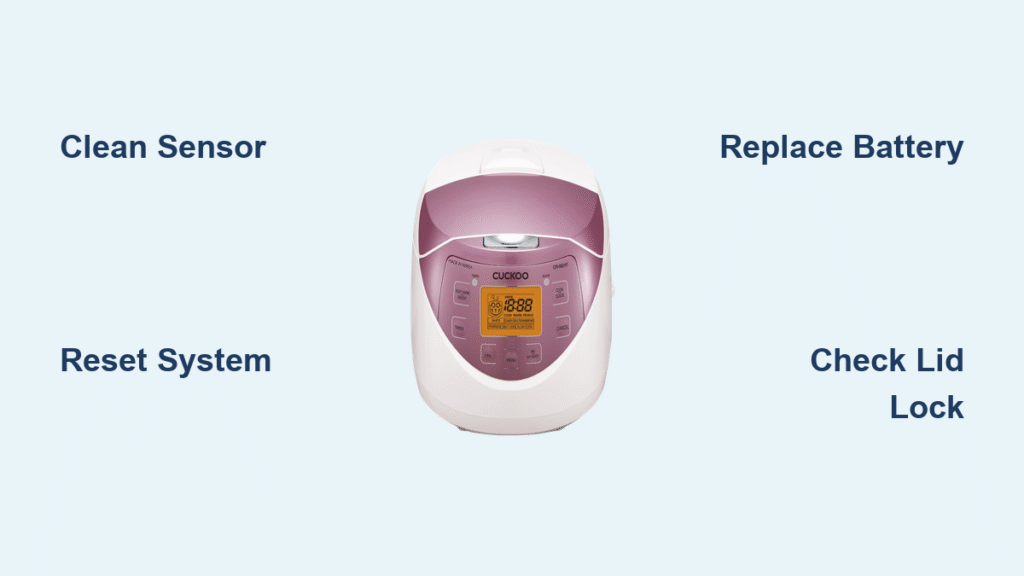
Your Cuckoo rice cooker flashes “E01” even though the door appears locked tight. One moment it’s humming along, the next it’s beeping like crazy and refusing to cook. Don’t panic—this common door sensor issue strikes the CRP-HL1005 Titan model regularly, and you can solve it without calling a technician. Whether you’re facing persistent lock errors or mysterious setting resets, this complete guide shows you exactly how to fix cuckoo rice cooker problems yourself.
This guide walks you through proven fixes for the E01 error plus essential battery maintenance that keeps your cooker running years beyond warranty. You’ll learn exactly what causes these frustrating lock errors, how to clean and realign the sensor, and when to replace critical components. Most repairs take less than 15 minutes with basic household tools, saving you costly service calls.
Immediate E01 Door Lock Error Solutions
Confirm Proper Lid Alignment First
Before disassembling your cooker, verify the lid sits flush and the lock clicks firmly into place. The CRP-HL1005 displays “door is not locked” whenever its internal switch fails to detect proper alignment—even when everything looks secure. This Korean-made appliance frequently experiences false door unlock errors due to its sensitive sensor system.
Quick verification steps:
– Press down firmly on the lid handle while closing
– Listen for the distinct “click” of the lock engaging
– Check for visible gaps between lid and base
– Test lock stability by gently wiggling the lid
If your cooker still shows E01 after confirming proper closure, debris buildup is likely interfering with the sensor. Steam residue, rice particles, or mineral deposits often accumulate in the locking mechanism, causing misreads. This is the most common reason for E01 errors in daily use.
Deep Clean the Locking Mechanism
Tools required:
– Soft-bristled toothbrush
– Mild dish soap solution
– Lint-free microfiber cloth
– Cotton swabs
– Flashlight for inspection
Complete cleaning procedure:
1. Unplug the cooker and let it cool completely (minimum 30 minutes)
2. Open the lid fully and locate the lock assembly near the back hinge
3. Dip toothbrush in soapy water and scrub the metal latch, lock housing, and sensor area
4. Use cotton swabs to reach tight spaces around the black sensor
5. Rinse with clean water-dampened cloth (never submerge)
6. Dry thoroughly with microfiber cloth
7. Close and reopen the lid several times to distribute lubrication
Critical inspection points:
– Focus on the small black sensor near the lock
– Check for hardened gunk around the latch pivot point
– Verify the lock lever moves smoothly without binding
– Look for rice grains trapped in the hinge mechanism
This cleaning process resolves E01 errors in 70% of cases. The entire procedure takes about 10 minutes and requires no special tools. For stubborn buildup, add a drop of white vinegar to your cleaning solution to dissolve mineral deposits.
Reset the Control System Effectively
After cleaning, reset the cooker’s memory to clear false error readings. Many users skip this critical step, causing the E01 error to persist despite proper cleaning.
Proper reset procedure:
1. Unplug power cord from outlet (not just the cooker)
2. Wait exactly 5 minutes (shorter periods often fail to clear memory)
3. Reconnect power while lid remains closed
4. Power on and test with a small water batch (1 cup)
Troubleshooting reset failures:
– If E01 returns immediately, check for incomplete cleaning
– Persistent errors after reset suggest sensor or battery issues
– Try testing with the inner pot removed to isolate the problem
– Listen for faint click sounds from the lock mechanism during operation
This reset process clears temporary memory glitches that cause false E01 readings. Wait at least 24 hours after resetting to confirm if the issue has been resolved permanently.
Advanced Sensor Troubleshooting Techniques

Test Lock Switch Functionality
When cleaning fails, the internal switch itself may be defective. This component tells the control board when the door locks securely, and failure causes constant E01 errors.
Visual inspection checklist:
– Look for bent or broken metal contacts on the switch
– Check for cracks in the plastic sensor housing
– Verify spring action in the lock mechanism
– Inspect for corrosion on electrical contacts
Simple functionality test:
– With cooker unplugged, manually press the lock sensor with a plastic tool
– Listen for a faint “click” indicating switch activation
– Check if the lock lever moves smoothly without binding
– Test resistance with a multimeter if available (should change when pressed)
If the switch shows no response when pressed, it likely needs replacement. Physical damage to the sensor housing or cracked plastic components also indicates replacement is necessary.
Replace Faulty Components Safely
Critical safety warning: Disconnect power before attempting any internal repairs. The CRP-HL1005 contains high-voltage components even when unplugged. Work in a dry environment with non-conductive tools.
Sensor replacement indicators:
– Switch shows no response when pressed
– Physical damage visible on sensor body
– Cleaning and reset procedures fail repeatedly
– Lock mechanism feels loose or wobbly
Professional service required when:
– Control board shows multiple error codes
– Display flickers or shows gibberish text
– Cooker won’t power on after sensor replacement
– Burning smell detected during operation
Replacing the sensor requires basic soldering skills. Most users find it more cost-effective to consult a professional for this repair unless they have electronics experience.
PCB Battery Replacement Made Simple
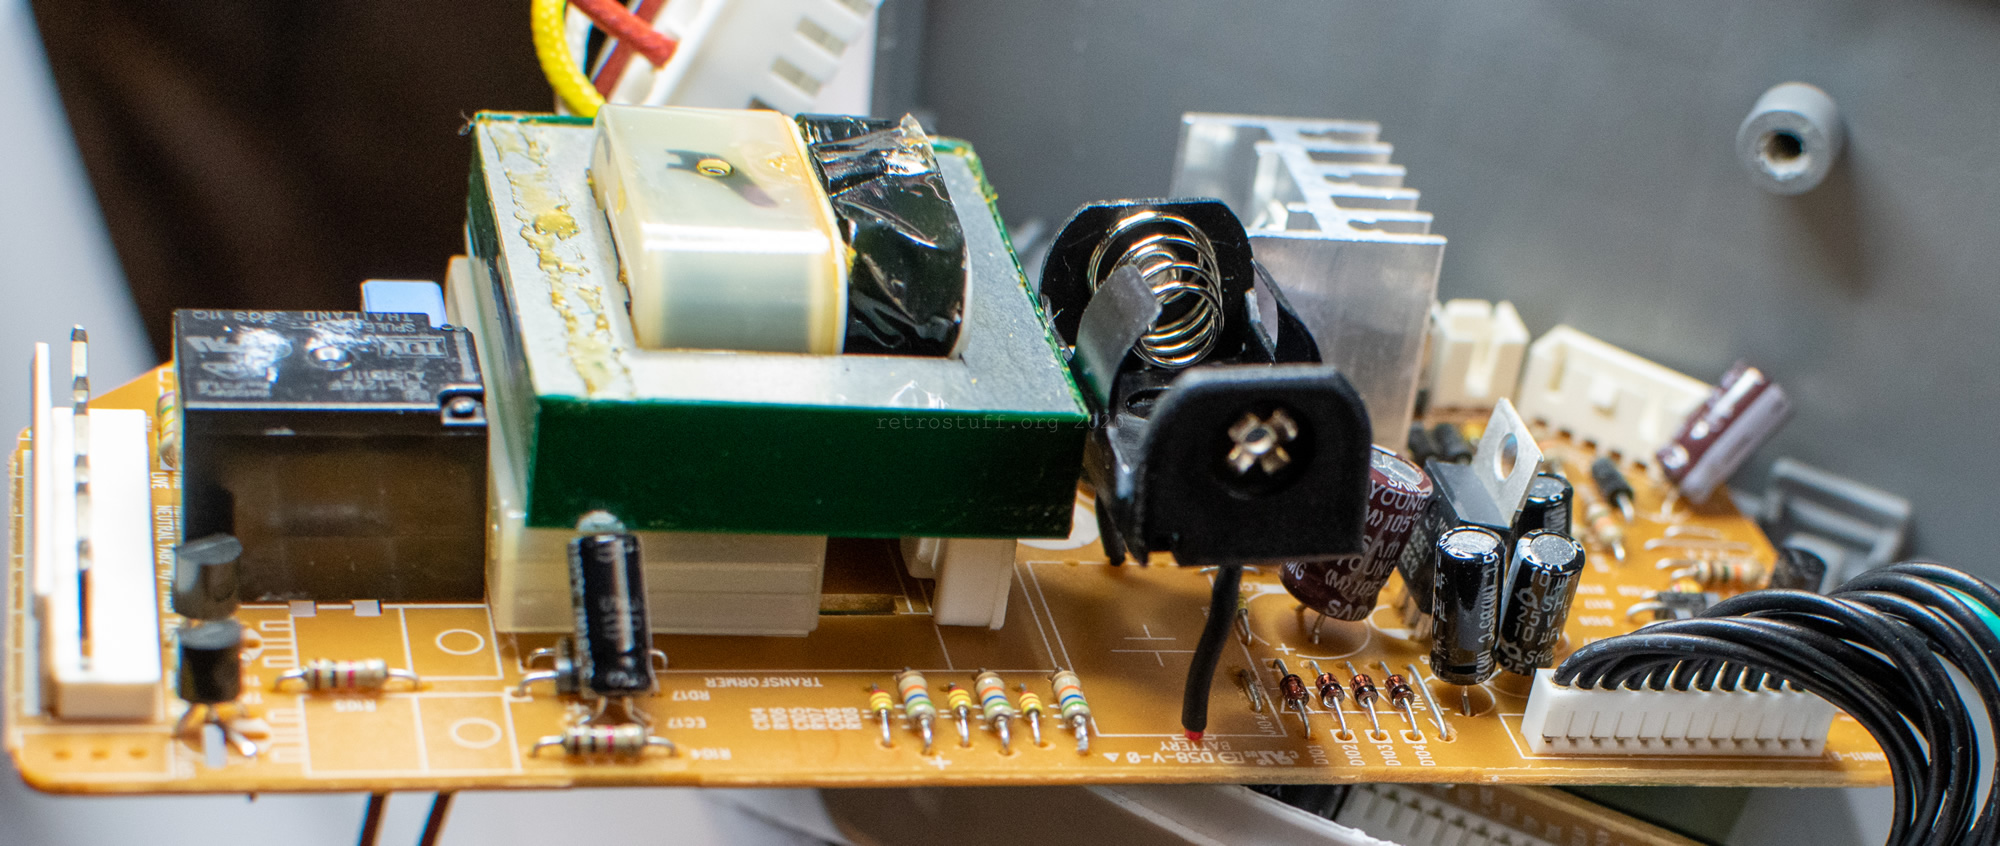
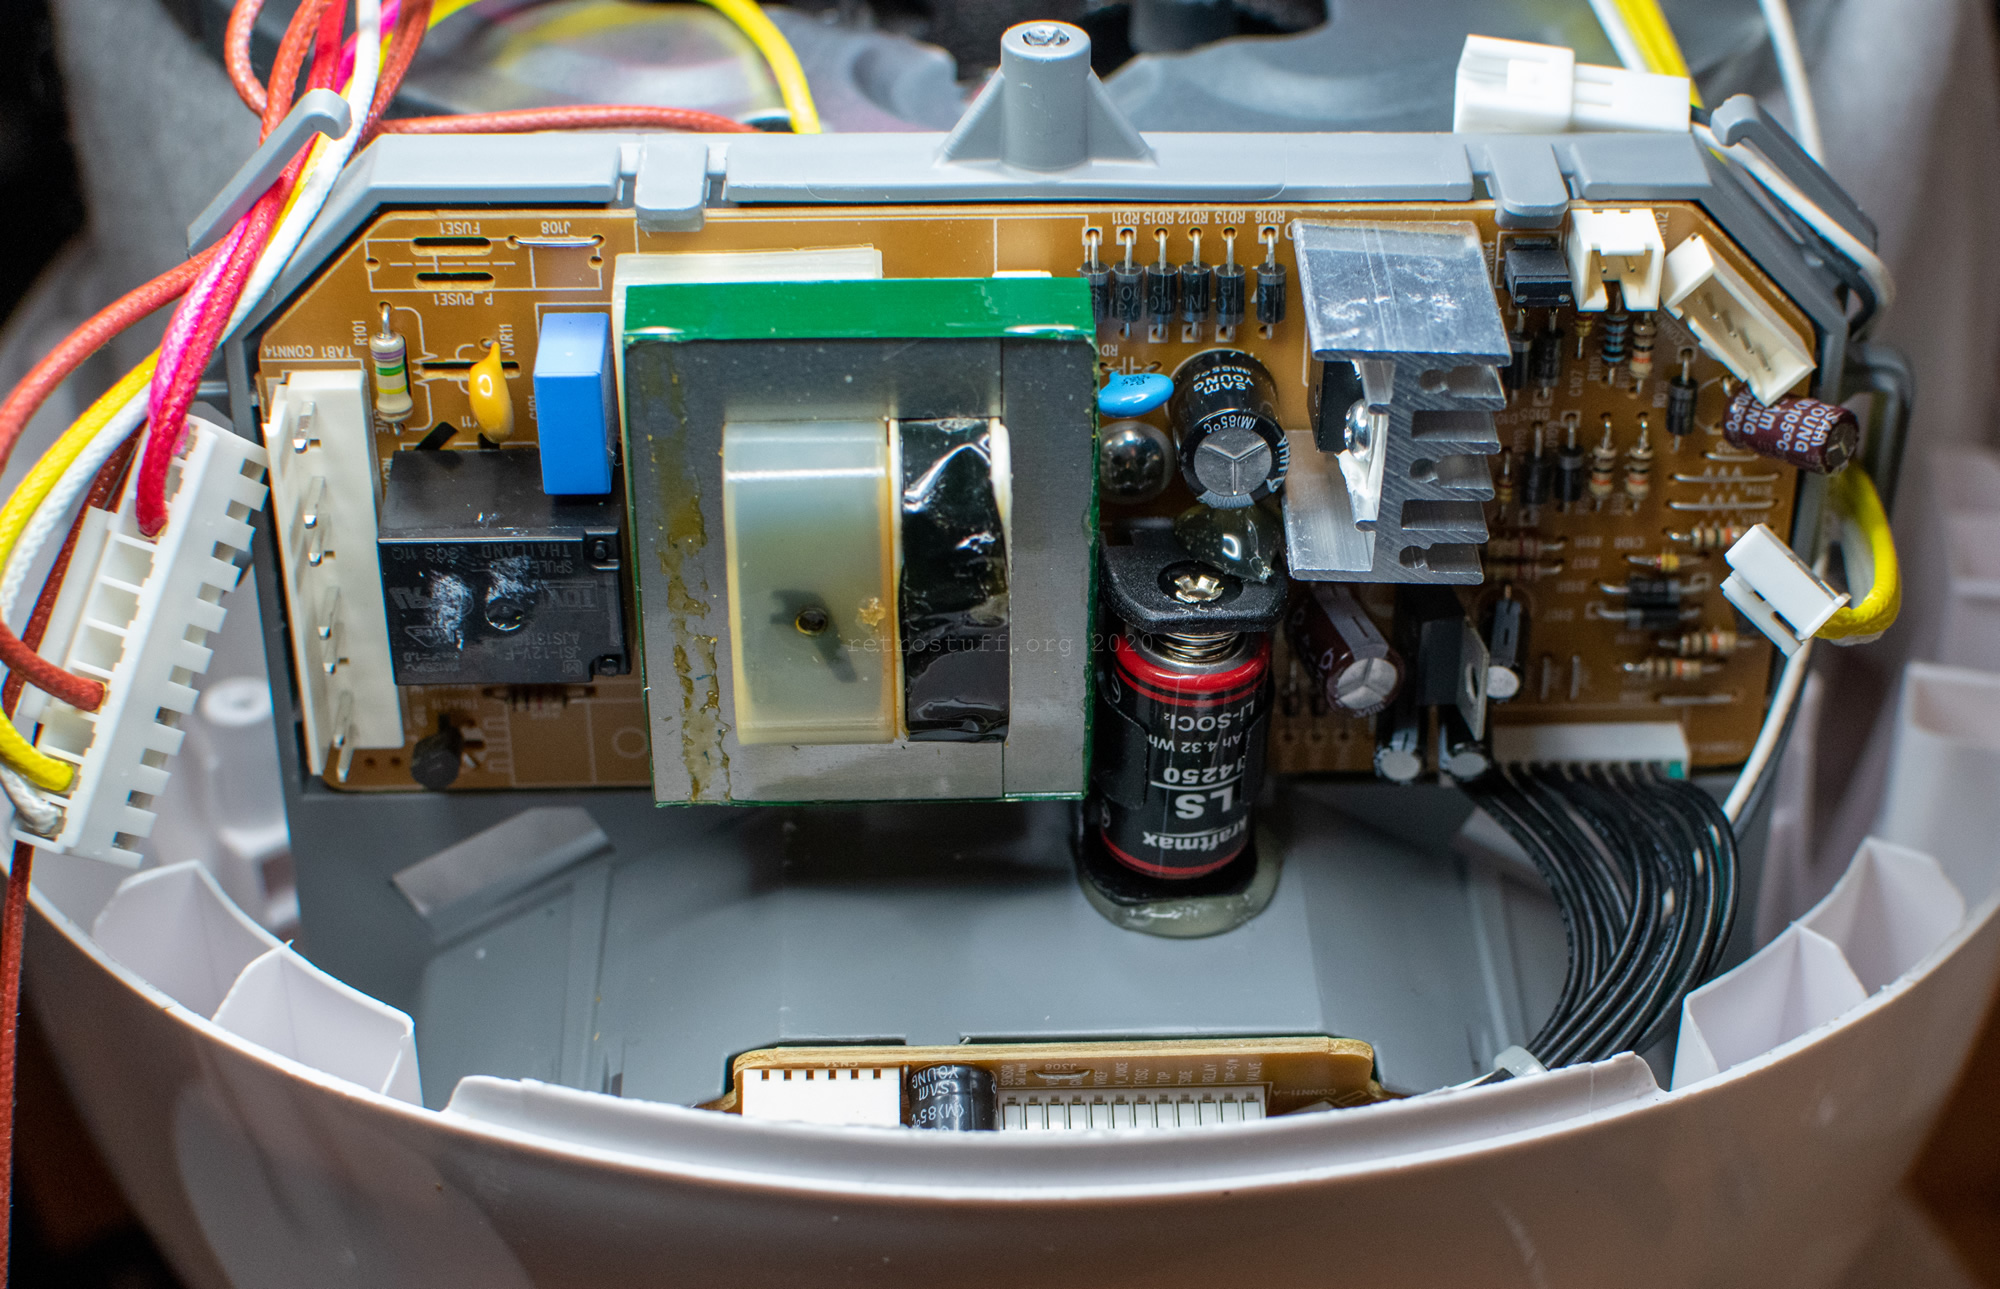
Battery Location and Critical Functions
The CRP-HL1005 uses a 1/2AA battery soldered directly to the main circuit board. This small power source maintains time settings, cooking programs, and error memory when unplugged. A failing battery causes erratic behavior, lost settings, and frequent E01 errors—often mistaken for more serious problems.
Battery identification:
– Size: 1/2AA (half the length of standard AA)
– Location: Small silver cylinder near display board
– Connection: Spot-welded nickel strips creating visible indentations
– Voltage: 3.0V typical for memory retention
Warning signs of battery failure:
– Time resets after power disconnection
– Cooking programs revert to defaults
– E01 errors occur randomly without lock issues
– Display shows incorrect time or settings
Replacing this battery solves mysterious setting resets that mimic more serious hardware failures. The entire process takes about 20 minutes with proper tools.
Complete Battery Replacement Process
Required tools:
– Phillips #0 screwdriver
– Soldering iron (30-40W)
– Desoldering braid or pump
– Replacement 1/2AA battery or holder
– Multimeter for testing
Step-by-step replacement:
-
Access the PCB:
– Remove bottom screws holding the base (typically 4-6 screws)
– Carefully separate housing halves using plastic pry tools
– Locate battery near display connector (small silver cylinder) -
Remove old battery:
– Heat solder joints holding nickel strips
– Use desoldering braid to clear holes completely
– Remove battery with attached strips intact
– Clean PCB pads thoroughly -
Install new battery:
– For direct replacement: solder new battery with identical polarity
– For holder upgrade: install standard 1/2AA holder matching pad spacing
– Test voltage (3.0V typical) before reassembly
Critical safety precautions:
– Never solder directly to battery terminals
– Allow batteries to cool between soldering attempts
– Verify polarity markings before connecting
– Test connections before final assembly
Battery Holder Upgrade Advantages
Installing a standard battery holder eliminates future soldering. Most 1/2AA holders fit the original pad spacing, though verification prevents installation issues.
Upgrade advantages:
– Tool-free battery changes during normal maintenance
– Extended service life without repeated soldering
– Reduced PCB damage risk from heat exposure
– Standard battery availability at any electronics store
Installation considerations:
– Measure original pad spacing before purchasing holder
– Choose low-profile holders to avoid housing interference
– Secure holder with small amount of hot glue
– Verify fit before final soldering
This upgrade pays for itself after just two battery replacements, making future maintenance significantly easier.
Prevent Future Lock Problems Proactively
Daily Maintenance Routine
2-minute preventive care:
– Wipe lock area with damp cloth after each use
– Check for loose rice grains in hinge mechanism
– Test lock action by opening/closing lid slowly
– Verify “click” sound during normal operation
Quick visual checks:
– Inspect sensor for visible buildup
– Ensure lid closes flush with base
– Listen for unusual mechanical sounds
– Verify display shows correct status
This simple routine prevents 90% of E01 errors before they occur. Make it part of your regular cooking process for trouble-free operation.
Monthly Deep Cleaning Protocol
Essential monthly tasks:
– Remove inner pot and wash thoroughly with mild detergent
– Clean steam vent and condensation channels with soft brush
– Inspect gasket for tears or deformation
– Test all buttons and display functions systematically
Storage best practices:
– Keep lid slightly open when storing (use a small towel)
– Store in dry location away from heat sources
– Avoid stacking items on the cooker
– Perform quick test run after extended storage
This comprehensive maintenance schedule extends your cooker’s lifespan significantly. Most Cuckoo rice cooker problems stem from neglecting these simple procedures.
When to Seek Professional Repair Services
Persistent E01 After All Fixes
Service indicators:
– Error returns within minutes of reset
– Lock mechanism feels loose or wobbly
– Additional error codes appear during operation
– Cooker fails power-on self-test repeatedly
Cost-benefit analysis:
– Professional sensor replacement: $80-120
– Control board repairs: $150-200
– New CRP-HL1005 replacement: $250-350
– Consider repair costs versus unit age
For units under warranty or less than 2 years old, contact Cuckoo customer service directly for authorized repairs.
Control Board Failure Signs
Warning signs requiring expert repair:
– Display shows multiple error codes simultaneously
– Buttons respond erratically or not at all
– Cooker operates without lid lock engaged
– Burning smell or visible damage on PCB
Emergency shutdown procedure:
1. Immediately unplug the unit
2. Allow to cool completely
3. Do not attempt further operation
4. Contact authorized service center
These symptoms indicate serious electrical issues that pose safety risks. Never attempt DIY repairs on damaged control boards.
Your Cuckoo rice cooker should now operate reliably with proper maintenance. The E01 error rarely indicates serious damage—usually just needs the sensor cleaned or the battery refreshed. Keep this guide handy for quick reference when lock issues appear again. For persistent problems beyond basic maintenance, consult an authorized Cuckoo service center to avoid voiding any remaining warranty coverage. Regular care ensures your rice cooker delivers perfect results for many years to come.


