
That stubborn crust on your slow cooker’s heating element isn’t just an eyesore—it’s actively sabotaging your meals. When food residue and mineral deposits coat the heating surface, your crockpot works harder, cooks unevenly, and may even shut down completely. Whether you’re battling dried chili from last week’s dinner or mysterious brown stains that won’t budge, knowing how to clean slow cooker heating element properly will restore even cooking and extend your appliance’s life by years.
Most home cooks reach for steel wool or harsh scrubbers that scratch the element’s protective coating, accelerating future buildup. Instead, you’ll discover gentle methods professionals use to dissolve stubborn residue without damaging the heating surface. These proven techniques work for every major brand—from Crock-Pot to Instant Pot slow cookers—and take less than 30 minutes once you know the right approach. By the end of this guide, you’ll confidently tackle any buildup while keeping your slow cooker operating at peak efficiency.
Stop Cleaning Your Slow Cooker Element Until You Read This
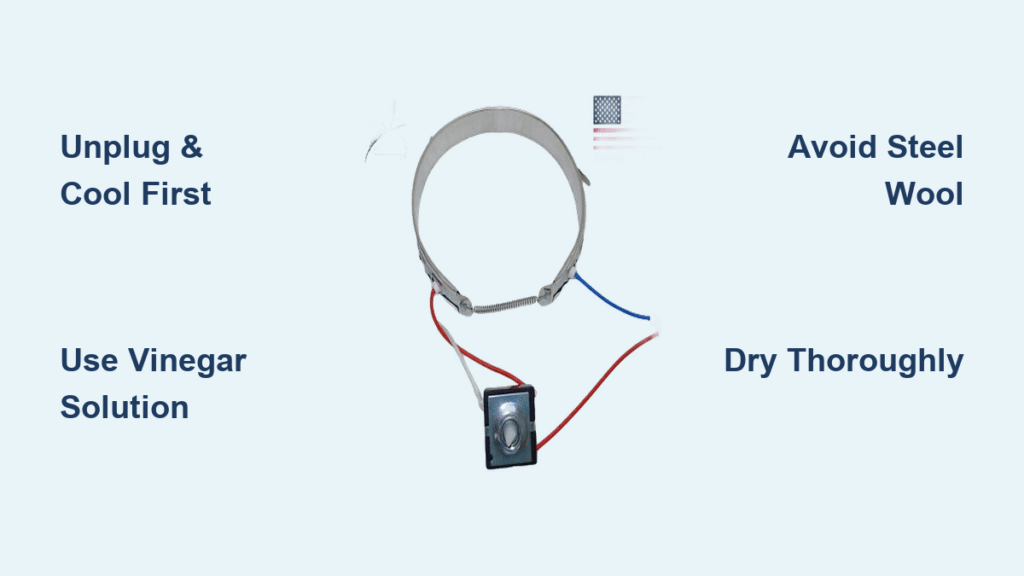
Unplug and Verify Complete Cooling First
Never attempt slow cooker element cleaning while the appliance retains any warmth. Place the back of your hand against the exterior base—if you detect even slight heat, wait another 30 minutes. The heating element stores thermal energy longer than the ceramic insert, creating serious burn risks during cleaning. This safety step is non-negotiable regardless of how urgent your cleaning needs seem.
Prepare Your Cleaning Station Properly
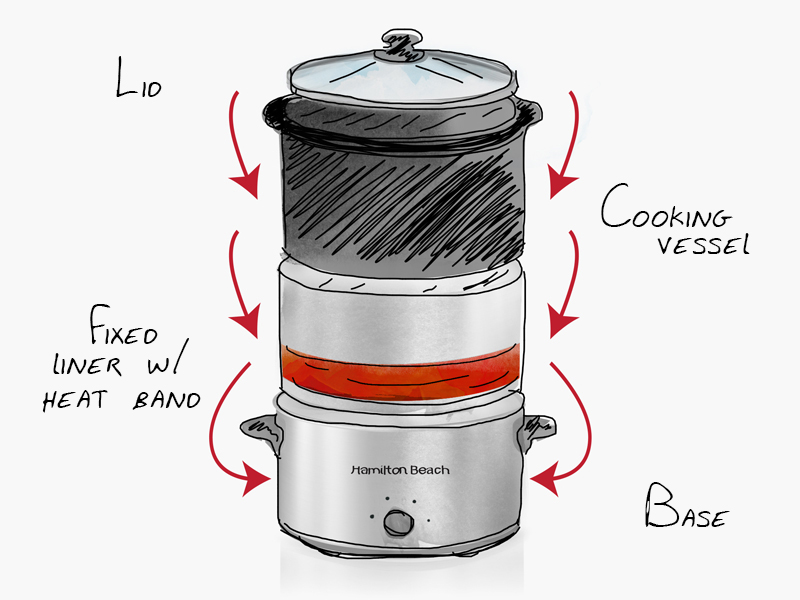
Set up near your sink with the slow cooker base centered on a folded towel. The towel prevents scratches when you flip the base upside down, while sink proximity makes rinsing effortless. Remove both the ceramic insert and glass lid completely—these require separate cleaning methods that could contaminate your heating element workspace. Keep paper towels and a small bowl for cleaning solutions within easy reach before starting.
Electrical Safety Check Before Adding Liquids
Before introducing any moisture, inspect the power cord and heating element housing for cracks, exposed wires, or signs of previous liquid damage. Even minor damage becomes critical when adding cleaning solutions near electrical components. If you spot compromised insulation or corrosion, stop immediately—your safety outweighs any cleaning benefits. Damaged units require professional repair or replacement rather than DIY cleaning attempts.
Identify Exactly What’s Coating Your Heating Element
Determine Buildup Type for Targeted Cleaning
Examine your heating element closely to identify three common residue types: white mineral deposits from hard water (feels chalky), brown protein stains from overcooked food (smells slightly burnt), or black carbonized patches from boil-overs (feels rough). Each requires different cleaning approaches—using vinegar for mineral deposits versus baking soda for organic stains prevents wasted effort and potential damage from mismatched solutions.
Recognize Your Element Design Before Proceeding
Most modern slow cookers use either exposed metal heating bands that wrap around the interior base or a flat heating plate beneath a thin metal shield. Exposed elements allow direct access for cleaning, while shielded designs require removing small screws around the base perimeter first. Never force shield removal—consult your manual if unsure. Attempting to clean through protective shields often causes more damage than the buildup itself.
Assess Damage Level Before Cleaning Begins
Gently run your finger across the element surface to evaluate buildup severity. Raised, crunchy deposits respond well to soaking methods, while smooth but discolored surfaces typically need only mild cleaning. Most importantly, check for bubbling or peeling of the metal coating—if present, no cleaning method will restore functionality and replacement becomes necessary. Cleaning damaged elements risks electrical shorts during future use.
Gather Only These Safe Cleaning Supplies for Your Element
Approved Cleaning Solutions That Won’t Damage Components
- White vinegar: Breaks down stubborn mineral deposits without harsh chemicals
- Baking soda paste: Lifts organic stains through gentle chemical reaction
- Dish soap: Cuts light grease residue when diluted properly
- Lemon juice: Natural degreaser for routine maintenance cleaning
Essential Tools That Protect Your Heating Element
- Soft toothbrush: Reaches crevices without scratching protective coating
- Microfiber cloth: Provides lint-free polishing without leaving fibers
- Plastic scraper: Safely removes chunks without damaging metal surfaces
- Cotton swabs: Enables precision cleaning around electrical connections
Dangerous Items That Ruin Slow Cooker Elements
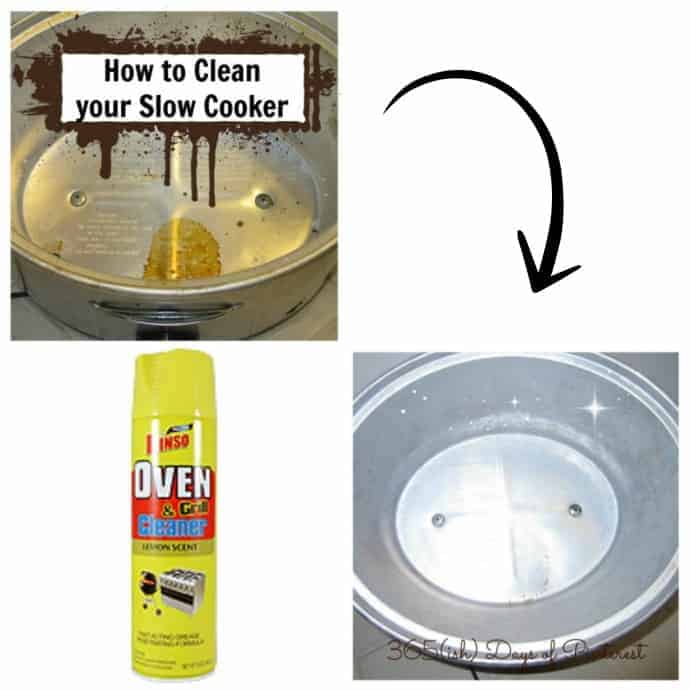
Never use steel wool, metal scrubbers, or abrasive cleaners—these scratch the protective coating and accelerate future buildup. Similarly, avoid oven cleaner or other harsh chemicals that can seep into electrical connections and cause permanent damage. Even “non-scratch” kitchen sponges often contain hidden abrasives that compromise your element over time.
Proper Slow Cooker Element Cleaning Process Step-by-Step
Remove Loose Debris Before Adding Liquids
Flip your slow cooker base upside down on your towel-covered counter. Using a plastic scraper or old credit card, gently lift any loose debris from the heating element surface. Work in one consistent direction to avoid grinding particles deeper into the element. This dry removal step prevents scratching during wet cleaning and significantly reduces the effort needed in subsequent stages.
Apply Vinegar Solution for Mineral Deposit Removal
Mix equal parts white vinegar and warm water in a spray bottle, then liberally coat the heating element surface. Let the solution sit undisturbed for 15 minutes—the acid dissolves mineral deposits without scrubbing. For severe buildup, place vinegar-soaked paper towels directly on problem areas and cover with plastic wrap to prevent premature evaporation. The extended contact time dramatically improves results without additional effort.
Treat Organic Stains with Baking Soda Reaction
After vinegar treatment, sprinkle baking soda over persistent brown stains. The chemical reaction between vinegar residue and baking soda lifts organic material through gentle effervescence. Using your soft toothbrush, gently scrub in small circular motions with minimal pressure. Rinse thoroughly with a damp microfiber cloth to remove all residue—leftover baking soda can burn during next use, creating unpleasant odors.
Final Drying Protocol to Prevent Electrical Damage
Wipe the element with a clean, dry microfiber cloth until no moisture remains visible. Pay special attention to crevices where water hides near electrical connections. Allow the base to air-dry for at least 2 hours before reassembling—never skip this step. Incomplete drying creates short-circuit risks that could permanently damage your appliance or create safety hazards.
Fix These Common Slow Cooker Element Cleaning Failures
Eliminate Permanent-Looking Black Carbon Spots
For stubborn black marks that resist standard cleaning, create a thick paste of 2 tablespoons baking soda with 1 teaspoon water. Apply directly to problem areas and let sit for 30 minutes before gentle toothbrush scrubbing. These spots often indicate previous overheating—if they don’t improve after two treatments, the element likely needs replacement. Continuing to use a severely carbonized element risks electrical failure during cooking.
Dissolve Hard Water Deposits Without Scrubbing
White chalky buildup from hard water requires extended acid exposure. Soak paper towels in pure white vinegar and lay them over deposits for 60 minutes. The continuous moisture contact dissolves minerals that brief spraying misses. Remove towels and wipe clean with minimal pressure—aggressive scrubbing damages the element surface. Repeat monthly to prevent permanent scaling.
Remove Invisible Grease Film That Attracts Dust
Over time, cooking vapors create an invisible grease film that attracts dust and accelerates buildup. Mix one drop of dish soap with one cup warm water and apply with a microfiber cloth. This cuts through grease without harsh chemicals. Rinse thoroughly with clean water and dry immediately—soap residue burns during next use, creating unpleasant flavors in your food.
Prevent Future Buildup With These Simple Habits
Daily Maintenance That Takes 30 Seconds
After each use, while the cooker is still slightly warm (not hot), wipe the heating element with a damp cloth. This daily habit prevents 90% of buildup issues by removing residue before it hardens. For spills during cooking, immediately turn off the cooker, let it cool completely, and clean the spill—dried food becomes exponentially harder to remove later.
Maintain Proper Liquid Levels During Cooking
Always maintain at least 1 cup of liquid in your slow cooker during operation. Dry cooking causes food to burn directly onto the heating element, creating permanent stains. When adapting recipes, add extra broth or water to account for evaporation during long cooking times—this simple adjustment prevents most severe buildup cases.
Store Your Slow Cooker to Prevent Moisture Damage
Store your slow cooker with the lid slightly ajar to prevent moisture buildup inside the unit. If storing long-term, place a paper towel between the insert and base to absorb humidity and prevent odor transfer. Proper storage prevents corrosion that mimics food buildup and complicates future cleaning efforts.
When Cleaning Fails: Replacement vs Repair Decision Guide
Recognize Critical Damage Requiring Replacement
Replace your slow cooker immediately if the heating element shows blistering, peeling coating, or visible corrosion. These signs indicate the protective barrier has failed, creating serious electrical hazards. Similarly, if heating becomes uneven or the unit repeatedly shuts off during cooking, internal damage likely exists beyond cleaning’s scope—continuing to use it risks fire or electrical shock.
Verify Cleaning Success Before Reassembling
After cleaning, test your element’s functionality by heating 2 cups of water on low for 60 minutes. Properly cleaned elements produce even simmering without hot spots or unusual burning smells. If performance hasn’t improved, repeat the vinegar soak method before considering replacement. Many users give up after one attempt when stubborn buildup requires two treatments.
Calculate Long-Term Value of Cleaning vs Replacement
New slow cookers range from $30-150 depending on features. If your unit is over 5 years old and requires extensive cleaning efforts, replacement often provides better value. However, regular maintenance can extend appliance life to 10+ years—making proper cleaning techniques a worthwhile investment for newer models. Consider your usage frequency when making this decision.


