
The aroma of tender pot roast or hearty chili filling your home after a long workday—that’s the magic of your crock pot slow cooker how to use properly. Yet far too many people relegate these versatile appliances to the back of their cabinets after one disappointing “dump and go” experiment. Mastering your slow cooker isn’t about complicated techniques; it’s understanding the unique cooking science behind this countertop essential. By the end of this guide, you’ll know exactly how to prevent mushy vegetables, avoid dry meat, and consistently create restaurant-quality meals with minimal effort.
Whether you’re using a classic Crock-Pot brand model or a Hamilton Beach alternative, the fundamentals remain the same. Forget what you’ve heard about just throwing ingredients in and hoping for the best—proper slow cooker technique involves strategic liquid ratios, precise fill levels, and understanding how your specific model distributes heat. Let’s transform your relationship with this kitchen workhorse from frustration to flawless meal creation.
Why Your Crock Pot Isn’t Just a “Set It and Forget It” Appliance
Crock Pot vs. Generic Slow Cooker: What Actually Matters
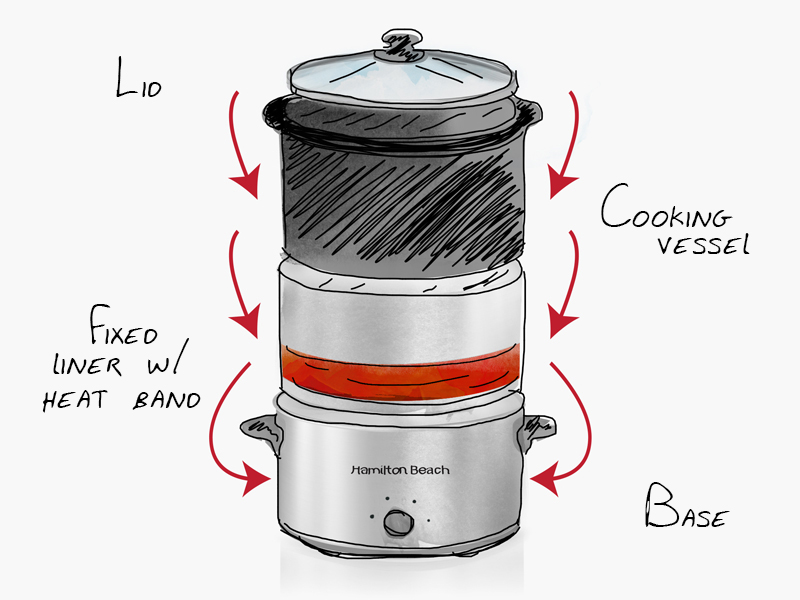
Crock-Pot is a specific brand name that became synonymous with slow cookers, much like Kleenex for tissues. Your Hamilton Beach, KitchenAid, or All-Clad unit functions identically through moist heat cooking in a sealed vessel. What truly matters isn’t the brand but how the heating element operates—quality models heat from both bottom and sides for even cooking, while cheaper metal versions often heat only from below, requiring strategic food placement.
The #1 Reason Your Slow Cooker Meal Failed
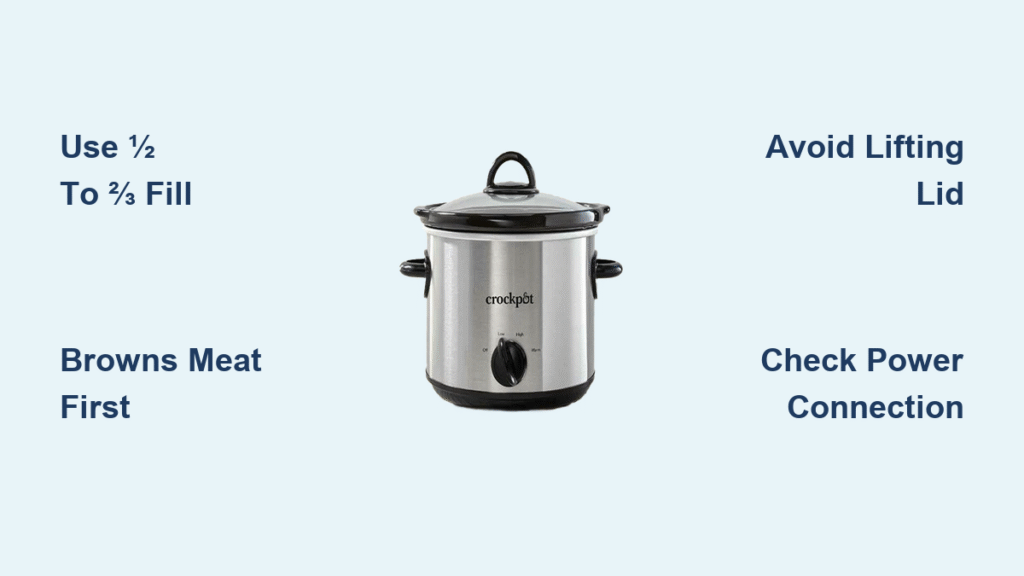
You probably didn’t verify power connection before walking away. This simple oversight causes more ruined dinners than any other mistake. Always confirm your crock pot slow cooker how to use properly begins with checking for indicator lights or feeling for warmth within 10 minutes of starting. If your unit lacks indicator lights, place your hand near the base—genuine heat should be noticeable within this timeframe.
Perfect Fill Levels for Flawless Results Every Time
The ½ to ⅔ Full Sweet Spot
Never fill your slow cooker below the halfway mark or above two-thirds capacity. Under-filling causes food to cook too fast and potentially burn, while over-filling extends cooking time dramatically and creates messy overflows. This sweet spot ensures proper heat circulation and prevents both burning and spillage disasters.
Vegetable Expansion Warning
Remember that vegetables release significant moisture during cooking—potatoes and carrots can double in volume. When preparing soups or stews, start with less liquid than traditional recipes suggest since the tight-fitting lid prevents evaporation. Begin with half the liquid amount from stove-top recipes and adjust based on your results.
Temperature Settings Decoded for Perfect Timing
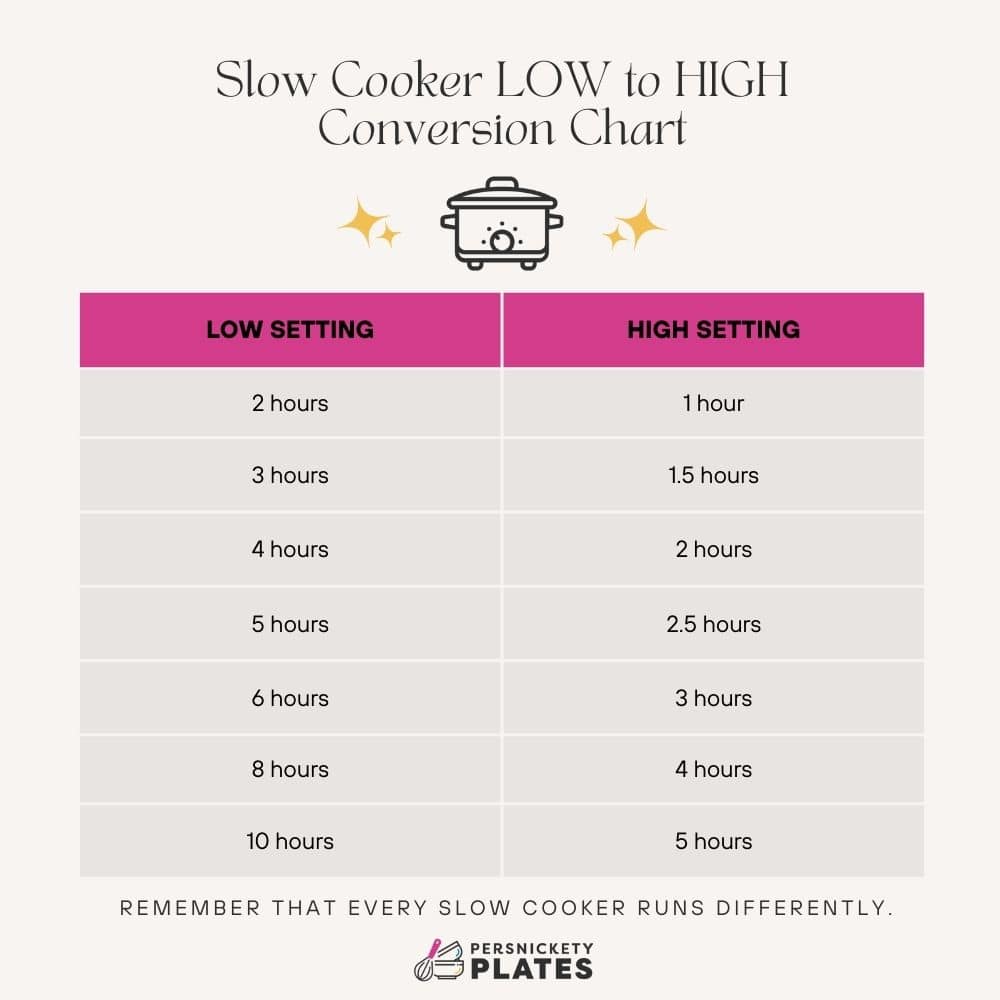
Low vs. High: When to Use Each Setting
Low Setting (200°F) delivers superior results for 6-8 hour cooks, breaking down connective tissues in tough cuts like chuck roast. High Setting (300°F) works for time-crunched 3-4 hour meals but risks overcooking delicate ingredients. Always switch to Warm Setting after cooking completes to maintain safe temperatures without further cooking.
Stovetop Recipe Conversion Made Simple
Convert any traditional recipe using this foolproof formula:
– 15-30 minutes stovetop = 1-2 hours on high OR 4-6 hours on low
– 30-60 minutes stovetop = 2-3 hours on high OR 6-8 hours on low
– 1-2 hours stovetop = 3-4 hours on high OR 8-10 hours on low
Lid Management Secrets Professionals Don’t Want You to Know
Why Every Lid Lift Adds 20 Minutes
Each time you lift the lid, your crock pot loses significant heat, adding 15-20 minutes to total cooking time. Resist the urge to check—trust the process. If absolutely necessary, use models with viewing windows or transparent inserts rather than removing the lid completely.
The Dangerous Lid Lock Myth
Never lock the lid during cooking—these mechanisms exist solely for transportation to potlucks. Locked lids create dangerous pressure buildup in slow cookers, which operate at atmospheric pressure, not high pressure like Instant Pots. This critical safety mistake causes more avoidable accidents than any other slow cooker error.
Advanced Preparation Techniques That Transform Results
Meat Browning: The 5-Minute Game Changer
Skip the step of browning ground beef in a skillet before adding to your slow cooker at your flavor’s peril. This quick sear caramelizes proteins, creating complex flavors and preventing excess grease pooling at the bottom. For chicken breasts or pork tenderloin (lean cuts), reduce cooking time by 1-2 hours to prevent dryness.
Vegetable Layering Strategy
Place root vegetables like potatoes and carrots at the bottom where heat is most intense, with meat layered on top. Caramelize onions for 5 minutes on the stovetop before adding to deepen their flavor profile—other vegetables can go directly in without pre-cooking for maximum convenience.
Size Selection Guide for Your Household Needs
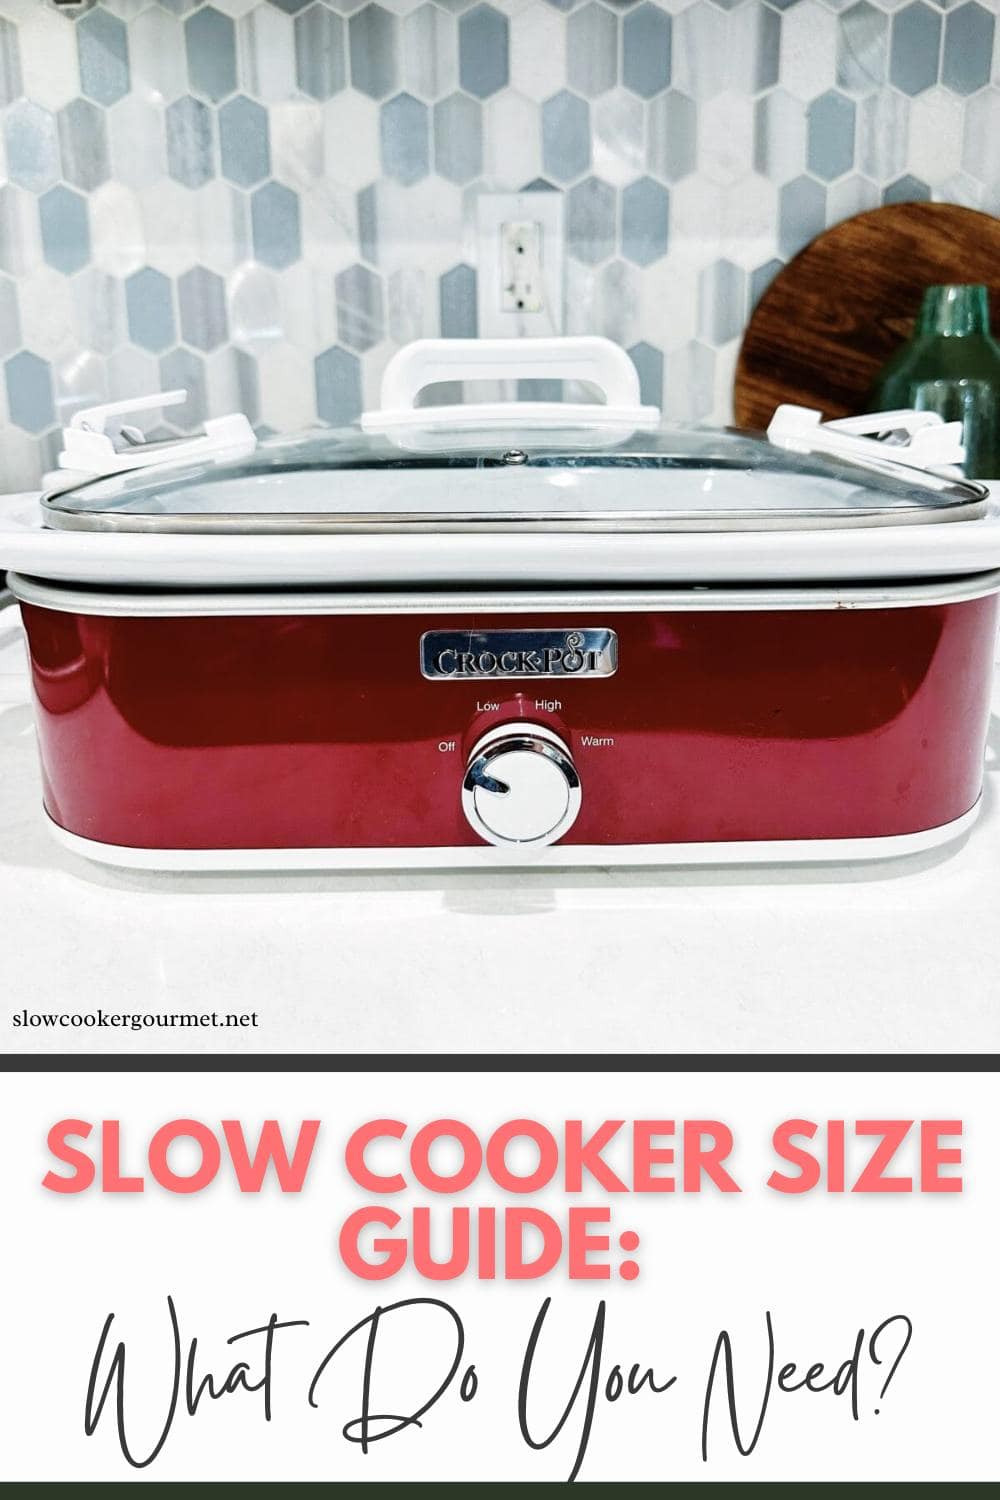
Choosing the Right Capacity
Select based on your regular cooking needs:
– 3-quart: Ideal for single servings or small side dishes
– 4-quart: Perfect for 2-3 people with modest leftovers
– 5-6 quart: Family standard for 3-4 people with generous portions
– 7-quart: Essential for meal preppers, large families, or party cooking
Must-Have Features Checklist
Prioritize models with automatic warm functions that switch from cooking to warming when time expires. Locking lids prove invaluable for potluck transportation, but remember these locks are never used during actual cooking. The Crock-Pot Cook and Carry series (4-quart or 6-quart) offers the best balance of features for most households.
Foolproof Beginner Recipes to Build Confidence
5-Ingredient Magic Combinations
Start with these guaranteed-success recipes:
– Mississippi Pot Roast: Chuck roast + ranch mix + au jus + pepperoncini + butter
– Garlic Parmesan Chicken: Chicken breasts + garlic + parmesan + cream cheese + pasta
– Sausage and Peppers: Italian sausage + bell peppers + onions + marinara + hoagie rolls
Chicken Mastery in 4 Hours or Less
These chicken dishes work every time with minimal monitoring:
– Fiesta Chicken: Chicken, black beans, corn, salsa, cream cheese
– Crack Chicken: Chicken, ranch seasoning, cream cheese, bacon, cheddar
– Garlic Butter Chicken: Chicken thighs, garlic, butter, chicken broth, Italian seasoning
Smart Storage Strategies for Leftover Success
Safe Cooling and Storage Protocol
Transfer leftovers to meal prep containers within 2 hours of cooking completes. Refrigerated meals stay fresh for 5 days, while frozen portions maintain quality for 6 months. Cook large batches of shredded chicken or beef on weekends—these proteins incorporate easily into salads, wraps, or quick dinners throughout the week.
Freezer Meal Revolution
Prep ingredients in reusable freezer bags for up to 3 months. Popular freezer-ready meals include meatloaf mix, minestrone soup base, and pulled pork marinades. Transfer frozen contents directly to the crock pot, adding 1-2 extra hours to cooking time—no thawing required.
Critical Mistakes That Ruin Slow Cooker Meals
Overfilling with liquid—vegetables release moisture during cooking, often doubling your liquid volume. Start with less and adjust as needed.
Stirring during cooking—lifting the lid disrupts the cooking process more than any benefit stirring provides.
Using lean meats on long cooks—chicken breasts and pork tenderloin dry out on extended low settings; choose thighs or shoulder cuts instead.
Final Pro Tips for Slow Cooker Mastery
Your crock pot slow cooker how to use properly begins with understanding your specific unit’s quirks. Start with simple 5-ingredient recipes to build confidence, then gradually experiment with more complex dishes. The removable ceramic insert on most models can be safely placed in your oven (up to 400°F) for browning tops or finishing dishes—just verify your specific brand’s guidelines first.
Reynolds BPA-free slow cooker liners revolutionize cleanup for messy dishes like chili or dips. Simply lift out and discard after cooking. For regular cleaning, fill the insert with hot soapy water immediately after emptying to prevent stuck-on residue. Remember: the best slow cooker meal is the one you’ll actually make consistently. Master these fundamentals, and you’ll wonder how you ever managed busy weeknights without this indispensable kitchen companion.


