
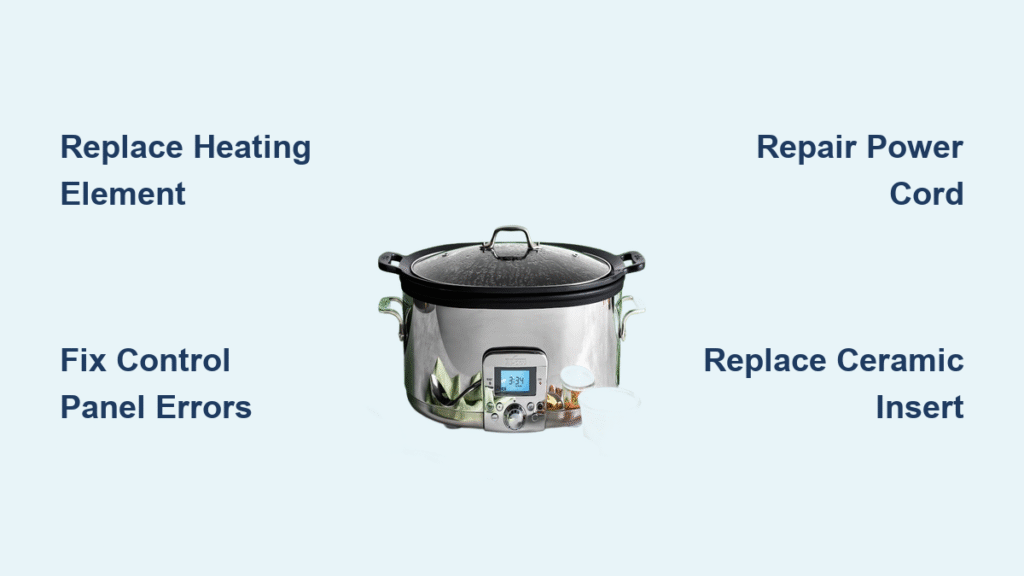
Your All-Clad slow cooker just died mid-braise, leaving tonight’s dinner plans in jeopardy. Before you rush to replace your $300 kitchen investment, know that 90% of slow cooker failures can be fixed with basic tools and a little know-how. This comprehensive All-Clad slow cooker repair guide reveals exactly how to diagnose and fix the most common issues—saving you hundreds compared to buying new.
Whether your unit won’t heat, displays error codes, or has a cracked ceramic insert, you’ll find specific solutions for your exact problem below. Most repairs take less than 2 hours and cost under $60 in parts. Let’s get your culinary workhorse back in action.
Why Your All-Clad Slow Cooker Suddenly Stopped Heating
Diagnosing Heating Element Failure
When your slow cooker stops generating heat, you’re likely facing a burned-out heating element—the most common failure point across all All-Clad models. Start by checking for these telltale signs:
- Electrical burning smell during operation
- Significantly longer cooking times despite correct settings
- Visible discoloration or damage on the heating element
- Partial heating where only the bottom warms while sides stay cool
Critical safety check: If you notice smoke or burning smells, stop using the unit immediately and unplug it. Continuing to operate a damaged heating element creates fire hazards.
Testing Your Heating Element with a Multimeter

Grab your multimeter and follow these steps to confirm element failure:
- Unplug the unit and remove the base screws (usually 4-6 Phillips head screws)
- Set your multimeter to resistance (Ω) mode
- Touch probes to the element terminals
- Check your reading against these standards:
- 15-50 ohms: Healthy element (model dependent)
- OL reading: Open circuit (failed element)
- Below 10 ohms: Short circuit requiring replacement
Pro tip: For 6.5-quart models (SD700450), expect 300W/600W elements, while 7-quart units (99009) typically use 400W/800W configurations. Always match wattage exactly when replacing.
How to Replace Your All-Clad Slow Cooker Heating Element
Essential Tools You’ll Need
- Phillips head screwdriver
- Multimeter for testing
- Wire strippers
- Heat-resistant wire nuts
- Replacement heating element (OEM part AC-HE6QT-EL or AC-HE7QT-EL)
Important: Never substitute generic elements without verifying exact wattage and voltage specifications—using incorrect parts creates serious fire risks.
Step-by-Step Element Replacement
-
Disassemble the base: Remove all housing screws and carefully separate the halves. Take photos of wire connections before disconnecting anything.
-
Remove the failed element: Disconnect wiring while noting positions, then remove mounting screws securing the element. Clean contact surfaces with fine sandpaper.
-
Install the new element: Apply thermal compound to the new element’s contact surface. Position it correctly and secure with original screws before reconnecting wires.
-
Test before final assembly: Check resistance matches specifications, then perform a water test for 30 minutes before full reassembly.
Troubleshooting tip: If your new element fails immediately, check for blocked ventilation holes or thermostat issues causing overheating.
Fixing All-Clad Control Panel Errors and Malfunctions
Decoding Error Messages on Your Display
Your slow cooker’s cryptic error codes actually provide precise diagnostic information:
- E1: Open thermal sensor circuit – requires sensor replacement
- E2: Shorted thermal sensor – immediate sensor replacement needed
- E3: Control board communication failure – likely needs board replacement
- E4: Over-temperature condition – check thermostat and ventilation
Urgent action: If you see E3 or E4 codes repeatedly, stop using the unit immediately—these indicate serious safety issues.
Repairing Moisture-Damaged Control Boards

Steam infiltration causes most control panel failures. Here’s how to revive a water-damaged board:
- Remove the control panel and inspect for white corrosion on connectors
- Clean gently with 90% isopropyl alcohol and cotton swabs
- Reflow solder joints on display connectors using a soldering iron
- Replace blown capacitors (typically 470µF 16V)
- Apply conformal coating to prevent future moisture damage
Warning: If you’re uncomfortable with electronics work, skip this repair—control board replacements typically cost $65-85 and require professional installation.
Power Cord and Electrical Repair Safety Protocol
When to Replace vs. Repair Your Cord
Never attempt to repair a frayed or damaged cord—complete replacement is mandatory for safety. Look for these red flags requiring immediate cord replacement:
- Exposed internal wires
- Burn marks on the plug or cord
- Bent or loose plug prongs
- Melting sensation when touched during operation
Safe Cord Replacement Procedure
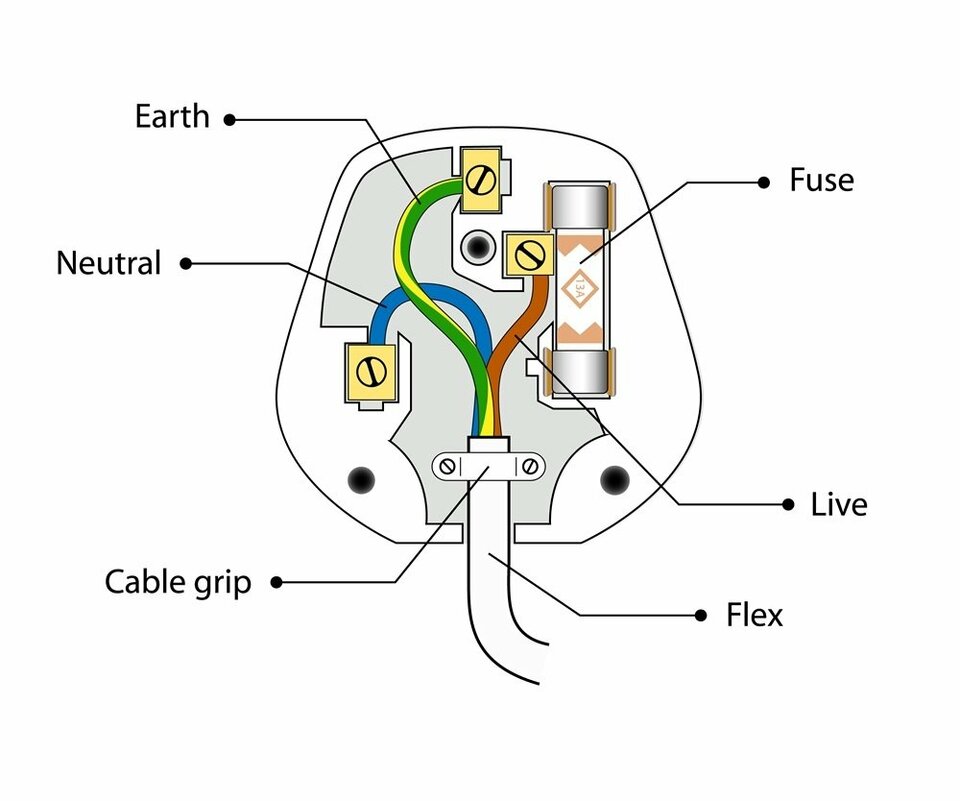
- Cut the old cord, leaving 2 inches as a reference
- Strip 1/2 inch insulation from new 16 AWG appliance cord
- Connect wires correctly:
– Black (hot) → L terminal
– White (neutral) → N terminal
– Green/bare → chassis ground screw - Secure the strain relief clamp to prevent future damage
Critical step: Always test ground continuity after electrical repairs—this safety feature prevents electrocution risks.
Ceramic Insert and Lid Repair Solutions
Replacing Cracked or Damaged Inserts
Important reality check: Cracked ceramic inserts cannot be repaired—replacement is your only safe option. OEM part numbers vary:
- 6.5-quart: AC-INS6QT ($45-55)
- 7-quart: AC-INS7QT ($55-75)
Pro warning: Aftermarket inserts often fit poorly, creating dangerous hot spots and uneven cooking. Always verify compatibility before purchasing.
Fixing Loose or Broken Lid Handles
Most All-Clad lids use either screw-mounted or epoxy-attached handles. For epoxy mounts:
- Clean surface thoroughly with alcohol
- Apply high-temperature epoxy sparingly
- Position handle precisely and clamp for 24 hours
- Test securement before first use
Safety note: Never use a lid with a loose handle—hot contents could spill causing severe burns.
Repair vs. Replace Decision Guide
When DIY Repair Makes Financial Sense
Fix it yourself if:
– Your unit is under 5 years old
– Repair cost is less than 60% of replacement price
– You own a high-end 7-quart+ model
– You’re comfortable with basic electrical work
Cost reality: Professional service typically runs $125-200, while DIY repairs cost $35-85 in parts plus your time.
When to Call Professionals or Replace
Seek expert help when:
– Unit is under warranty (1-2 years coverage)
– Multiple components have failed simultaneously
– You see signs of electrical fire damage
– Control board requires programming
Smart move: Current 7-quart All-Clad models retail for $250-350, making most single-component repairs worthwhile investments.
Preventive Maintenance That Extends Your Slow Cooker’s Life
Weekly Care Routine
- Wipe heating base with damp cloth (never immerse)
- Check power cord for damage
- Clear vent holes with toothpick
- Ensure ceramic insert sits fully seated
Storage Best Practices
- Store with lid inverted to prevent seal compression
- Keep in dry location (avoid basement storage)
- Coil power cord loosely—never wrap tightly
- Avoid stacking heavy items on top
Pro tip: Never operate your slow cooker empty or with less than 1/2 fill—this causes premature element failure through overheating.
Your All-Clad slow cooker represents a significant kitchen investment worth preserving. By following these specific repair techniques, you can address most common failures safely and effectively. Always prioritize safety—when in doubt about electrical components, professional service protects both your warranty coverage and personal safety.
Remember: Regular maintenance prevents most failures. Clean vent holes monthly, check cord integrity weekly, and never subject your ceramic insert to thermal shock. With proper care, your All-Clad slow cooker can deliver perfect braises and stews for many years to come—no expensive replacement required.


