

Your All-Clad slow cooker sits cold on the counter, dinner plans hanging in limbo while hungry family members wonder what happened to tonight’s meal. Maybe the display stays dark despite being plugged in, or perhaps it powers on but refuses to heat. Whatever the symptom, a broken slow cooker disrupts more than just meal prep—it throws off your entire routine and leaves you scrambling for alternatives.
The good news? Most All-Clad slow cooker failures fall into predictable patterns with clear solutions. Before you panic about expensive repairs or replacements, let’s systematically diagnose and fix the issue. This guide walks through every common failure point, from simple power problems to complex heating element failures, so you can get your reliable appliance back in action.
Power Connection Failures That Stop Your Slow Cooker Cold

Verify Electrical Supply Before Assuming Appliance Failure
Start with the most basic check that many overlook. Unplug your All-Clad slow cooker and test the outlet with a known working appliance like a phone charger or lamp. If the test device doesn’t power on, your outlet has likely tripped its circuit breaker or GFCI protection. Locate your electrical panel and reset the appropriate breaker, or press the reset button on the outlet itself if it’s a GFCI type. Many kitchen circuits have multiple GFCI outlets where tripping one affects others downstream.
Identify Dangerous Power Cord Damage Signs
Examine the entire length of your slow cooker’s power cord for potential hazards. Look carefully for cuts, kinks, or melted spots along the cord’s surface. Gently flex the cord near both the plug and appliance connections—if you see exposed wiring or feel internal breaks while flexing, stop using the appliance immediately. Damaged cords create serious electrical hazards and require professional replacement or complete unit replacement for safety compliance.
Test Circuit Stability with Alternative Outlets
Voltage fluctuations can prevent proper startup without tripping breakers. Try your All-Clad slow cooker in a different outlet on a separate circuit, preferably in another room. If it works elsewhere, your kitchen circuit may be overloaded or experiencing voltage drops during peak usage times. Consider running the slow cooker on a dedicated circuit if you frequently experience electrical issues during meal preparation.
Display Panel Malfunctions That Leave You Guessing
Diagnose Complete Display Failure Systematically
When your All-Clad’s display stays completely dark despite power checks, the issue typically lies deeper than simple connection problems. First, ensure the unit sits on a level surface—some models incorporate safety tilt switches that automatically cut power when improperly positioned. Next, verify that the removable cooking insert sits perfectly aligned in the base, as even slight misalignment can prevent crucial electrical contact between components.
Fix Intermittent Display Flickering Issues
Flickering displays usually indicate loose internal connections rather than complete component failure. With the unit unplugged, gently press around the display panel’s edges while observing the screen. If pressing temporarily restores function, the display ribbon cable needs reseating. This requires careful disassembly and should only be attempted if you’re comfortable working with small electronics and have proper tools to avoid damaging delicate components.
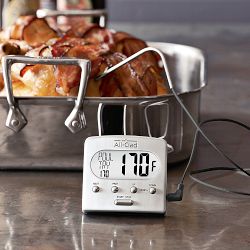
Decode All-Clad Error Codes for Targeted Repair
All-Clad slow cookers communicate specific failure points through error codes. Three rapid beeps followed by “E1” indicates a temperature sensor problem. “E2” suggests the heating element isn’t responding correctly. “E3” points to control board communication errors. Document your exact error pattern before proceeding—this information determines whether you need to replace a $15 sensor or a $100 control board.
Temperature Problems That Ruin Your Recipes
Diagnose Insufficient Heating Without Guesswork
If your All-Clad slow cooker runs but food stays lukewarm, check the temperature setting first—someone may have accidentally switched to “warm” mode. Next, verify you’re using the original manufacturer’s insert, as third-party alternatives often don’t make proper thermal contact with the heating plate. Fill the insert with 4 cups of water, set to high, and monitor temperature rise—water should reach 190°F within 2 hours for proper function.
Stop Overheating Before It Damages Components
Excessive heat usually stems from blocked ventilation pathways. Ensure your slow cooker sits on a heat-resistant surface with at least 6 inches clearance on all sides. Remove any items stored around the base that might restrict airflow. Clean accumulated dust from the bottom vents using compressed air or a soft brush—this simple maintenance prevents thermal runaway that damages internal components over time.
Solve Uneven Cooking With Precision Testing
Hot spots that scorch food while other areas remain cold typically indicate partial heating element failure. Test by filling the insert with 4 cups of water and running on high for 2 hours. Use an instant-read thermometer to check temperature at 4-5 spots across the bottom. Variations exceeding 15°F between measurement points confirm the heating element needs replacement before attempting further cooking.
Lid and Seal Issues That Extend Cooking Times
Fix Improper Lid Fit Without Replacement

Warped lids prevent proper sealing, causing significant heat loss and extended cooking times. Check for visible warping by placing the lid upside-down on a flat surface. Any rocking or gaps indicate replacement need. Also inspect the rubber seal around the lid’s edge—clean it thoroughly with warm, soapy water to restore flexibility before deciding on replacement. Proper seals should feel pliable, not brittle or cracked.
Eliminate Steam Leakage at the Source
Persistent steam escaping from the lid’s edge compromises cooking efficiency. Clean the seal groove thoroughly with a soft toothbrush, then inspect for embedded food particles or damage. Replace seals showing any cracks, tears, or permanent deformation. Test seal integrity by placing the lid on the cold insert, then lifting by the handle—if it holds without sliding off, the seal is functioning properly.
Timer and Programming Glitches That Disrupt Cooking Cycles
Reset Control Panel to Clear Electronic Glitches
Electronic glitches often resolve with a complete hard reset. Unplug the slow cooker, wait 5 minutes for residual power to dissipate, then hold the power button for 30 seconds while unplugged. This drains stored power from the control board’s capacitors. Plug back in and test basic functions—this simple procedure fixes 60% of programming issues without further intervention.
Bypass Faulty Timers with Manual Mode
When programmed functions fail but basic operation works, bypass the timer system entirely. Press and hold the “manual” or “cook” button for 3 seconds until the display shows basic temperature settings. If manual mode works reliably while programmed functions don’t, the timer module requires replacement—a $40 part that takes 20 minutes to install for those comfortable with basic appliance repair.
Component Testing Methods for Accurate Diagnosis
Test Heating Element With Multimeter Verification
With the unit unplugged and completely cool, access the bottom panel (typically secured by 6-8 screws). Locate the heating element terminals and use a multimeter set to resistance (ohms). A healthy element reads 15-50 ohms—anything showing infinite resistance indicates an open circuit requiring element replacement. Remember to disconnect power before testing and handle components carefully to avoid creating new problems.
Verify Temperature Sensor Functionality
Find the temperature probe (small metal rod near the heating element) and disconnect its wiring harness. Test resistance across the sensor terminals with your multimeter. At room temperature, expect 10,000-12,000 ohms. Readings outside 5,000-15,000 ohms indicate sensor failure—a $15 part that’s easily replaceable once diagnosed correctly.
Cleaning and Maintenance Fixes That Prevent Future Failures
Deep Clean Heating Plate for Optimal Performance
Food residue on the heating plate creates hot spots and poor thermal transfer. Unplug the unit and let it cool completely. Use a plastic scraper to remove stubborn food buildup, then clean with a paste of baking soda and water. Never use metal scrubbers—they scratch the surface and worsen heating problems over time. Regular cleaning prevents gradual performance decline that mimics component failure.
Restore Electrical Contacts Between Insert and Base
The electrical contacts between your All-Clad’s cooking insert and base accumulate grime over time. Clean both sets of contact points using cotton swabs dipped in 90%+ isopropyl alcohol. Ensure complete drying before reassembly—this simple maintenance prevents intermittent power issues that mimic more serious component failures.
When to Seek Professional Repair or Replacement
Your All-Clad slow cooker represents a significant kitchen investment, and most issues resolve with systematic troubleshooting. Start with simple power and connection checks, then progress through component testing as needed. When professional repair exceeds half the replacement cost (typically $100+ for All-Clad models), consider upgrading to a newer model with enhanced features and warranty coverage.
Remember, safety always comes first. Never operate a slow cooker with visible damage, unusual smells, or exposed wiring. When in doubt, consult All-Clad’s customer service or a qualified appliance repair technician—they can often diagnose issues over the phone before you invest time in unnecessary disassembly. Most common problems have straightforward solutions that get your slow cooker back to creating perfect meals with minimal downtime.


