
Your multi-cooker has been hiding a secret weapon: it’s actually one of the most versatile slow cookers you can own. While many home cooks reach for their dedicated slow cooker for Sunday roasts and weeknight stews, your multi-cooker can deliver superior results with one crucial technique. The key isn’t simply pressing the “slow cook” button—it’s mastering the sauté-first method that professional kitchens rely on for deep, complex flavors.
This guide reveals the exact steps to transform your multi-cooker into a slow-cooking powerhouse. You’ll learn how to achieve fork-tender meats, deeply infused sauces, and restaurant-quality flavors that traditional slow cookers simply cannot match—all while reducing your cleanup time significantly.
Master the Sauté-First Method for Superior Flavor Development

The secret to exceptional multi-cooker slow cooking starts before you ever select the slow cook function. Professional kitchens discovered that combining the sauté function with slow cooking creates superior results through caramelization and fond development—processes traditional slow cookers skip entirely.
Build Your Flavor Foundation During Sauté Phase
Start by selecting the high-heat sauté setting on your multi-cooker. This critical 5-10 minute phase is where flavor magic happens:
- Heat oil over medium-high heat until shimmering (about 1 minute)
- Add aromatic vegetables (onions, carrots, celery) and cook for 5-6 minutes until edges caramelize
- Bloom spices by adding them to hot oil for 30-60 seconds to release essential oils
- Brown tomato paste for 2-3 minutes until it darkens slightly and develops nutty notes
- Sear meats in batches when applicable, creating rich fond on the pot bottom
Pro tip: Grate carrots instead of slicing them during this phase. The increased surface area releases natural sugars faster, adding subtle sweetness without extra ingredients.
Perfect Transition from Sauté to Slow Cooking
Once your ingredients reach a rolling boil, immediately execute these critical steps:
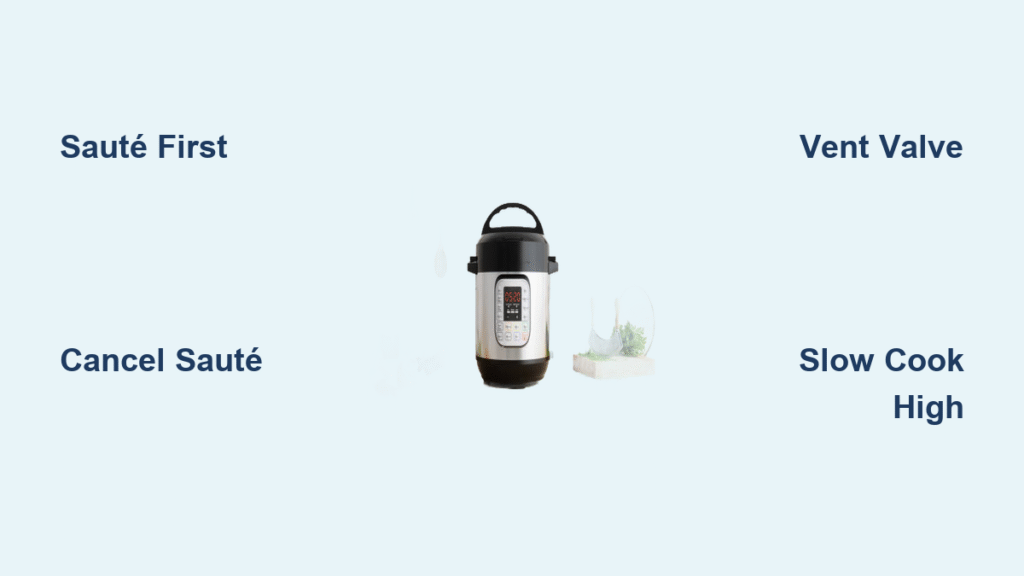
- Press cancel to stop the sauté function (this is non-negotiable for proper temperature control)
- Secure lid with valve set to “venting” position—never sealed for slow cooking
- Select slow cook and choose “high” or “more” setting depending on your model
- Set time for 5-7 hours for meat-based dishes requiring connective tissue breakdown
Warning: Skipping the cancel step can cause your multi-cooker to continue heating, potentially scorching ingredients before slow cooking properly begins.
Temperature Control Secrets for Consistent Results

Multi-cookers behave fundamentally different than traditional slow cookers due to their heating technology. Understanding these differences prevents common pitfalls like tough meat or bland sauces.
Why Traditional Slow Cooking Fails in Multi-Cookers
Traditional slow cookers gradually heat ingredients over 2-3 hours. Your multi-cooker follows the same pattern, which creates a dangerous temperature zone where proteins seize up before connective tissues break down. The initial high-heat sauté phase jumps past this problematic zone, starting the collagen breakdown process immediately.
Valve Positioning Rules for Authentic Slow Cooking
Always set your pressure valve to venting during slow cooking. This allows natural steam escape, mimicking traditional slow cooker evaporation rates. Sealing the valve creates unintended pressure that speeds cooking by 30-40% and dramatically alters final texture—perfect for pressure cooking, disastrous for slow cooking.
Professional-Tested Beef and Chickpea Stew Recipe

This kitchen-tested recipe demonstrates perfect multi-cooker slow cooking technique with foolproof results every time.
Ingredients:
– 2 lbs beef chuck, cut into 2-inch pieces
– 1 large onion, diced
– 3 carrots, grated (not sliced)
– 3 cloves garlic, minced
– 2 tbsp tomato paste
– 1 can chickpeas, drained
– 2 cups beef broth
– Spice blend: 1 tsp each cumin, coriander, smoked paprika
Method:
1. Sauté phase: Brown beef in batches (3-4 minutes per batch), remove. Sauté onion and grated carrots 6 minutes. Add garlic and spices, cook 1 minute. Add tomato paste, cook 2 minutes until darkened.
2. Deglaze pot by adding ¼ cup broth and scraping up all browned bits
3. Return beef to pot with chickpeas and remaining broth
4. Bring to boil, then cancel sauté function
5. Switch to slow cook high for 7 hours with valve venting
6. Finish with 2 tbsp lemon juice and fresh cilantro
Results: Restaurant-quality stew with meltingly tender beef, deeply infused sauce, and complex spice notes that develop during the slow cooking phase.
Time Management Strategies for Busy Schedules
Multi-cooker slow cooking offers true “set it and forget it” convenience without compromising quality. Once you complete the 5-10 minute sauté phase, your dish requires zero monitoring for up to 7+ hours.
Optimal Timing for Weekday Cooking
- Morning routine: Complete sauté phase before work (6 minutes active time)
- Set slow cook for 7 hours on high
- Return home to fully cooked, restaurant-quality meal
Pro tip: Prepare your sauté ingredients the night before. In the morning, you’ll need just 6 minutes of active cooking before heading to work—no more last-minute meal prep stress.
Texture and Flavor Advantages Over Traditional Slow Cookers
When properly executed, multi-cooker slow cooking produces results that surpass traditional methods in both texture and flavor complexity.
Meat Texture Comparison After 6 Hours
- Beef chuck: Fork-tender in multi-cooker vs. still slightly firm in traditional
- Chicken thighs: Fall-apart tender with richer flavor in multi-cooker
- Pork shoulder: More consistent shreddability throughout the cut
Flavor Development Differences
- Deeper fond development from initial searing (impossible in traditional slow cookers)
- Spice integration through blooming phase creates more complex flavor profiles
- Single-pot cooking preserves all fond and flavor compounds that would be lost transferring between pans
- No flavor dilution from multiple cooking vessels
Device-Specific Settings Guide for Popular Models
Multi-cooker models vary significantly in their slow cooking labels and features. Here’s how to navigate your specific device:
Model-Specific Settings Translation
- Instant Pot: “More” = High, “Normal” = Medium, “Less” = Low
- Ninja Foodi: “High” = High, “Medium” = Medium, “Low” = Low
- Crock-Pot Express: “High” = High, “Low” = Low
Critical Function Sequence (Universal)
- Sauté (high heat setting)
- Cancel (essential transition step)
- Slow cook (select appropriate temperature)
- Vent (valve position – never sealed)
Troubleshooting Common Multi-Cooker Slow Cooking Issues
Dry or Tough Meat
Cause: Skipping sauté phase or using sealed valve position
Fix: Always complete sauté phase and ensure valve is venting—not sealed
Bland, Underdeveloped Flavors
Cause: Adding spices directly to slow cooking liquid without blooming
Fix: Bloom spices in hot oil during sauté phase for 30-60 seconds before adding liquids
Overcooked Vegetables
Cause: Adding delicate vegetables at the beginning of cooking
Fix: Add soft vegetables (zucchini, peas, spinach) during last 30 minutes of cooking
Burn Notice During Slow Cooking
Cause: Insufficient liquid or stuck-on food particles
Fix: Always deglaze pot after sauté phase by adding liquid and scraping bottom thoroughly
Advanced Flavor-Building Techniques
Layered Flavor Construction Process
Professional chefs use this sequence for maximum impact:
1. Fat rendering: Start with bacon or pancetta for base flavor
2. Aromatics: Onion, carrot, celery (the “holy trinity”)
3. Spices: Toast whole spices first, then ground
4. Umami boosters: Tomato paste, anchovy paste, soy sauce
5. Liquid additions: Deglaze with wine or broth before slow cooking
Finish Strong with Brightening Elements
The final 10 minutes of cooking are crucial for balanced flavor:
– Acid: Add lemon juice, vinegar, or wine to cut richness
– Fresh herbs: Stir in cilantro, parsley, or chives for freshness
– Texture elements: Top with toasted nuts or crispy fried onions
Your Next Steps for Multi-Cooker Slow Cooking Mastery
Start with simple recipes like beef stew or chicken thighs to master the sauté-then-slow technique. Once comfortable, branch into more complex dishes like osso buco or coq au vin. The skills transfer directly—every recipe benefits from the enhanced flavor development this method provides.
Remember: your multi-cooker isn’t just a pressure cooker with a slow cook button. It’s a complete cooking system that, when used correctly with the sauté-first method, delivers slow-cooked results with deeper flavors and better textures than traditional slow cookers can achieve. The reduced cleanup and time savings make this technique perfect for busy weeknights while still delivering restaurant-quality meals your family will love.
Final tip: Keep a dedicated slow cooking notebook tracking your sauté times, valve positions, and results. Within just 3-4 uses, you’ll develop an intuitive understanding of how your specific multi-cooker behaves during slow cooking—unlocking consistent, exceptional results every time.


