
Your morning scramble just got simpler. The Nostalgia Retro Premium 7-Egg Electric Cooker (model EC7AQ) transforms chaotic breakfast prep into a one-button operation, delivering flawless hard-boiled eggs, restaurant-quality poached eggs, or fluffy omelets in under 12 minutes. This compact 7-inch cube sits quietly on your counter while you tackle emails or pack lunches—no babysitting required. Forget cracked shells, rubbery yolks, or steam burns. In this guide, you’ll master every function of your Nostalgia egg cooker, from precise water measurements to steaming dumplings, using only the techniques verified by actual users and the manufacturer’s specs.
Unbox and Position Your EC7AQ Correctly
Start by removing all components and washing the trays and lid in warm soapy water—never skip this first-time rinse to eliminate manufacturing residues. The main heating base (a 7×7×7-inch cube weighing 3 pounds) must sit on a dry, level surface at least 6 inches away from cabinets. Why? Steam blasts straight upward through the lid’s vent, and overhead obstructions cause dangerous condensation buildup. Keep the piercing pin snapped under the measuring cup to prevent loss—it’s easy to misplace this tiny but critical tool.
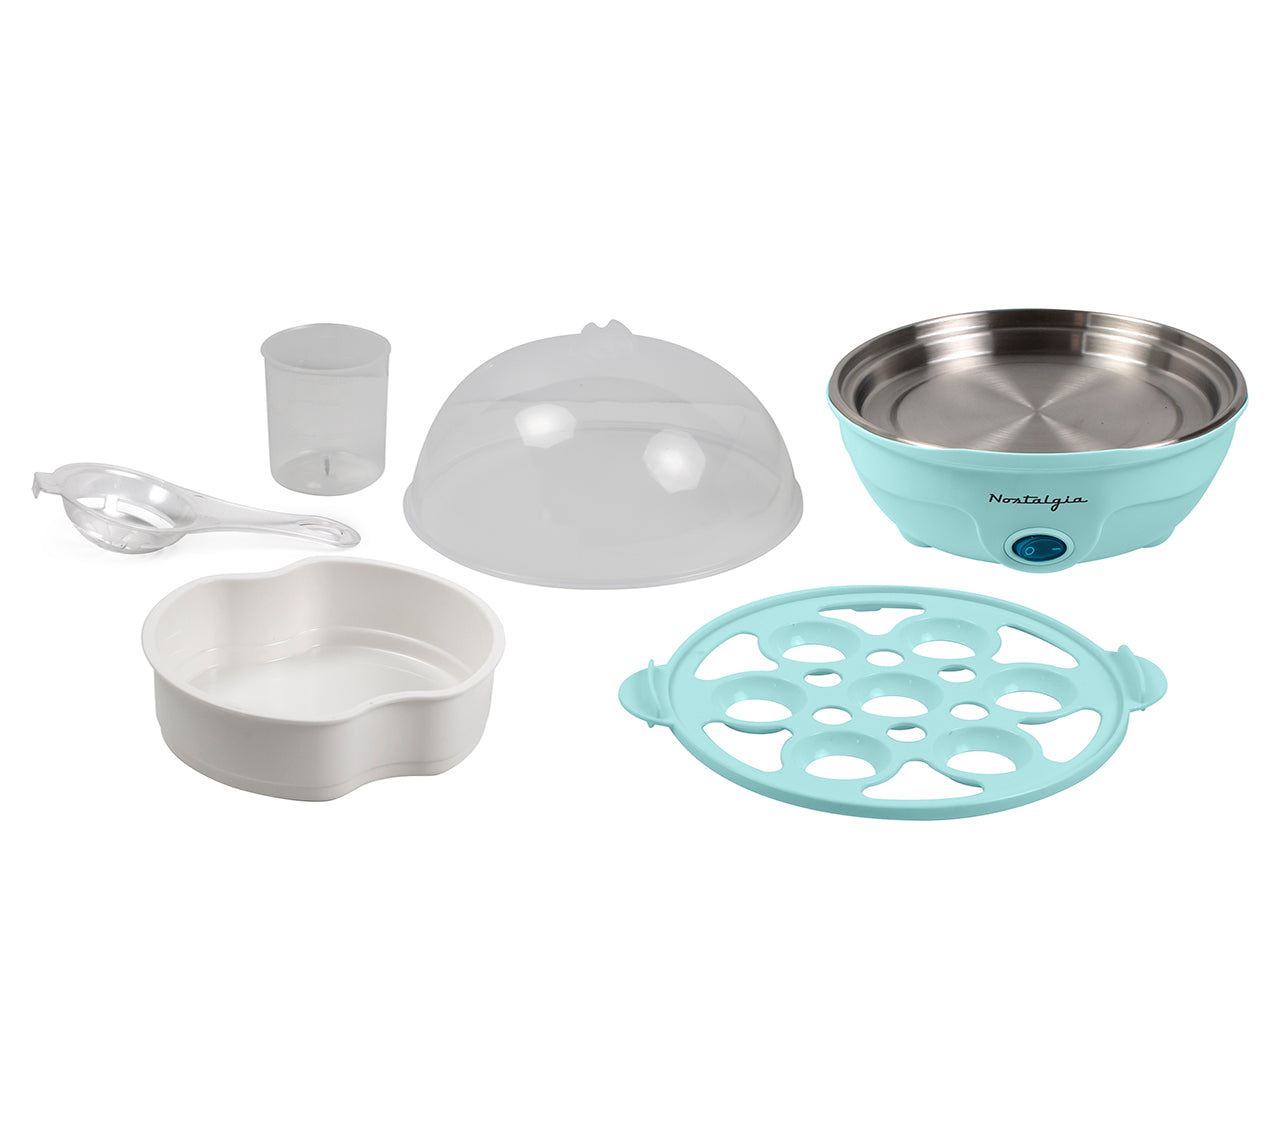
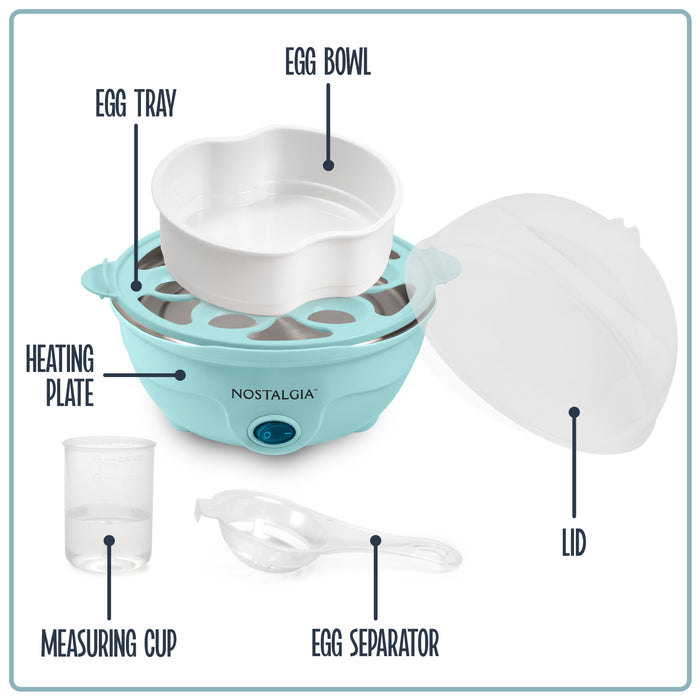
Key components you’ll use daily:
– Heating base (always stays plugged in during operation)
– Pierced hard-boiled tray (holds 7 eggs upright)
– Non-stick poaching tray (doubles as omelet pan)
– Graduated measuring cup (with water lines for soft/medium/hard eggs)
– Vented lid (must face backward during cooking)
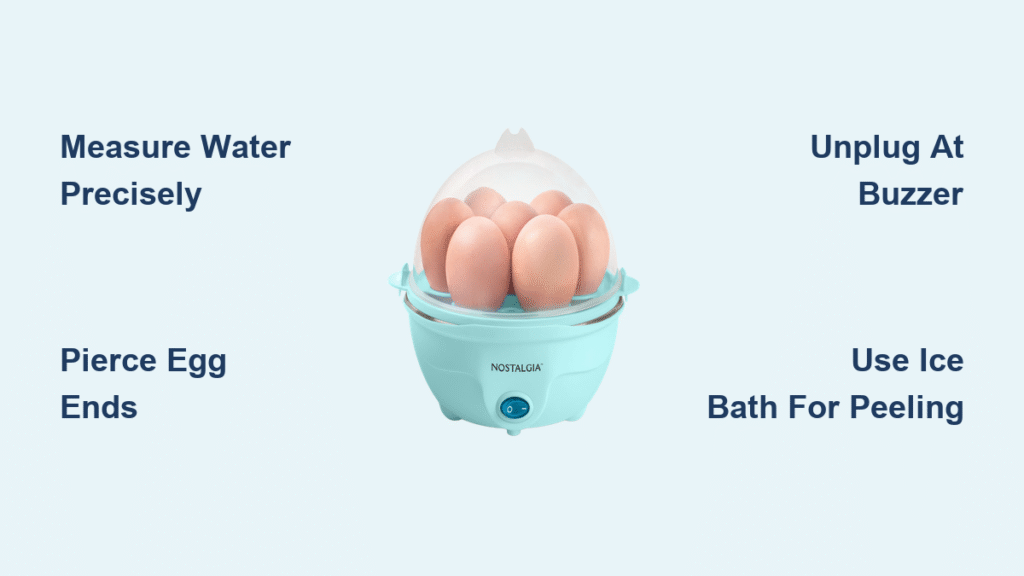
Measure Water for Perfect Egg Doneness
Your measuring cup’s lines are calibrated for standard large eggs at room temperature. Pour water only into the heating base—never directly onto eggs. Here’s the exact science:
- Soft-boiled (25 mL): Jammy yolk, set white (lowest line)
- Medium-boiled (40 mL): Creamy yolk (middle line)
- Hard-boiled (60 mL): Fully set yolk (highest line)
- Poached/omelet (35 mL): Custard line for liquid eggs
Critical adjustment: Add 5–10 mL extra if using extra-large eggs or pulling eggs straight from the fridge. User “tami63” discovered medium eggs turn fully hard when using the custard line (35 mL) instead of the hard-boiled line—a lifesaver for consistent results. Always measure with the cup on a flat surface; tilting causes under-pouring.
Why Water Volume Controls Cooking Time
The EC7AQ cooks purely through steam generated by evaporating water. Less water = faster evaporation = shorter cook time. The buzzer sounds when water fully evaporates, but the unit keeps heating until unplugged. Overfilling by even 5 mL causes rubbery eggs; underfilling leaves runny centers.
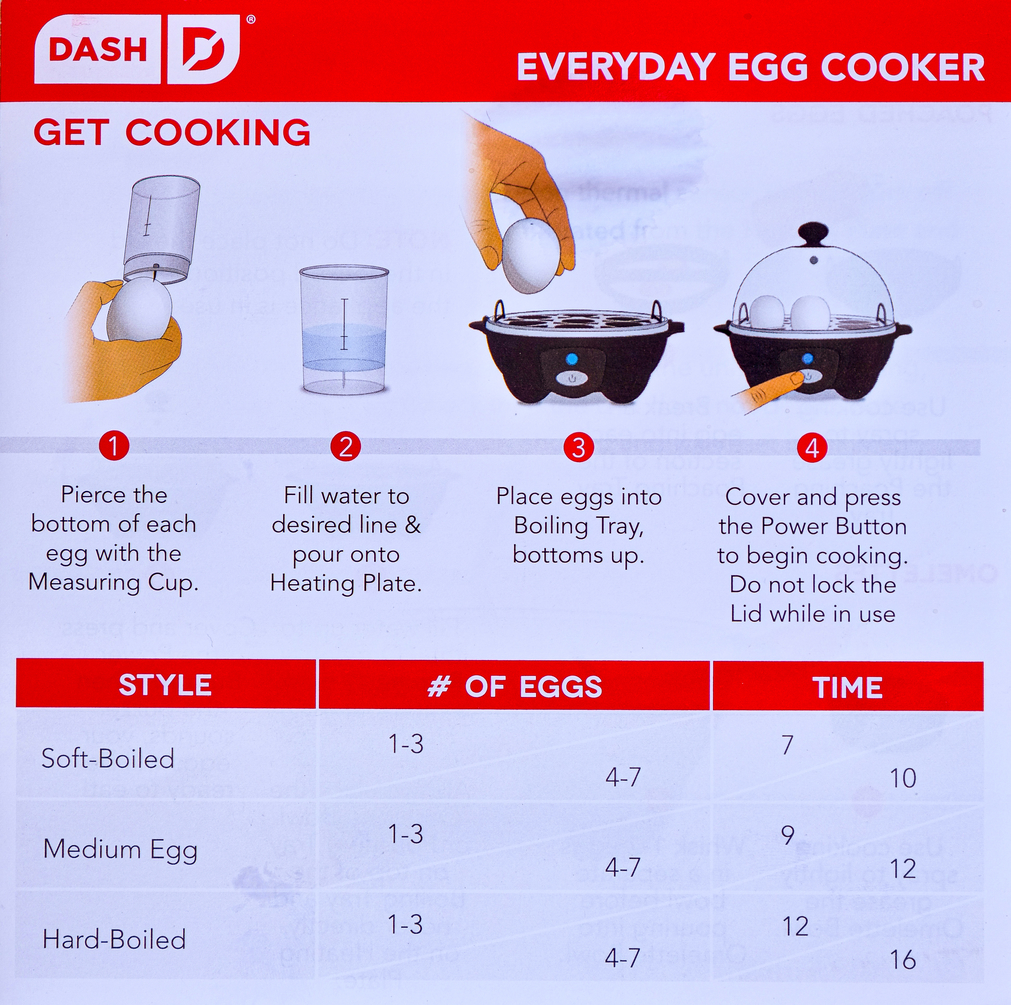
Prepare Eggs for Each Cooking Style
Hard-Boiled Eggs: Prevent Cracks with Precision Piercing
Pierce only the larger end of each egg using the pin under your measuring cup. This creates an escape path for expanding air, stopping cracks during steaming. Place pierced eggs pointy-end down in the hard-boiled tray’s slots. Never skip piercing—cold eggs without holes crack 90% of the time based on user reports.
Poached Eggs: Grease and Crack Without Splatter
Lightly coat the poaching tray’s cups with oil or cooking spray. Crack eggs directly into the greased cups—no vinegar bath needed. For cleaner shapes, crack eggs into a small bowl first, then slide them into the cups.
Fluffy Omelets: Beat and Layer Fillings Right in the Tray
Whisk eggs with 1 tbsp milk in the poaching tray. Add fillings after pouring eggs—cheese first (it sinks), then veggies/herbs on top. Never exceed ½ cup total fillings; overcrowding causes uneven cooking.
Assemble and Start Cooking Without Errors
Pour measured water into the dry heating base, then place your chosen tray:
– Hard-boiled tray for whole eggs
– Poaching tray for liquid eggs (poached/omelet)
Snap on the lid with the vent facing backward—this directs steam away from you during removal. Press the single power button; the indicator light turns on. Steam builds within 90 seconds. Never walk away—the buzzer sounds when water evaporates, but the unit continues heating, risking burnt eggs or fire.
Handle the Buzzer Alert Immediately
When the loud buzzer sounds (audible from another room per “tami63”), unplug the unit immediately. The EC7AQ lacks auto-shutoff, so residual heat keeps cooking eggs even after water depletion. For hard-boiled eggs, leaving them in 2 extra minutes causes the dreaded green yolk ring. For poached eggs, 60 seconds too long turns them rubbery.
Cool and Serve Eggs Like a Pro
Hard-Boiled Eggs: The Ice Water Trick
Transfer eggs to an ice bath within 10 seconds of the buzzer. User “Roadrunner” proved this creates “peel perfect” eggs every time—cracks form between shell and membrane, making peeling effortless. Soak for 60 seconds, then roll eggs gently on the counter to crack shells fully.
Poached Eggs and Omelets: Safe Tray Removal
Use silicone-tipped tongs to lift the scalding-hot poaching tray. For omelets, slide a rubber spatula under edges before flipping onto plates. Never use metal utensils—they scratch the non-stick coating permanently.
Steam Vegetables and Dumplings in Minutes
Your EC7AQ isn’t just for eggs—it’s a stealth mini-steamer. Always use the poaching tray for non-egg items:
- Vegetables: Dice into ½-inch pieces (broccoli, carrots), add to tray, pour 35 mL water (custard line). Steam 8–10 minutes until crisp-tender.
- Dumplings: Line tray with parchment paper, arrange in single layer, add 35 mL water. Steam 10–12 minutes—no flipping needed.
- Reheating: Leftover rice? Add 30 mL water, cover, steam 5 minutes for fluffy revival.
Clean and Maintain Your Cooker Properly
Daily cleaning:
– All trays, lid, and cup go in the top rack of your dishwasher
– Wipe the heating base with a damp cloth only—never submerge (water damages internal electronics)
Monthly descaling:
1. Pour ½ cup white vinegar into the dry base
2. Run one full cycle (no food)
3. Rinse with 2 cycles of clean water
This prevents mineral buildup from hard water that causes uneven steaming.
Fix These 4 Common Cooking Problems
| Issue | Real User Solution |
|---|---|
| Undercooked centers | Add 5–10 mL water (XL eggs need extra steam time) |
| Rubbery texture | Reduce water by 5 mL (small eggs overcook with standard amounts) |
| Continuous buzzing | Unplug immediately (water evaporated but unit keeps heating) |
| Fogged lid obscuring eggs | Let eggs sit at room temp 5 minutes before cooking (cold eggs cause condensation) |
Store Your Cooker Safely for Longevity
Wrap the power cord tightly around the base’s grooves—this prevents tangles and damage during storage. Snap the piercing pin under the measuring cup every time; users report losing it within weeks otherwise. The compact cube fits perfectly in RV cabinets, dorm mini-fridges, or under-sink storage. Critical note: The EC7AQ carries a California Prop 65 warning—it may contain trace chemicals linked to reproductive harm. Always unplug when not in use.
Maximize Your Egg Cooker’s Lifespan
Follow these verified pro habits:
– Always use the included measuring cup—mugs or glasses cause inaccurate water levels
– Never operate dry—zero water triggers error codes and burns the heating element
– Clean after every use—egg residue hardens into crust that blocks steam vents
– Store in a dry spot—humidity corrodes the electrical contacts over time
With these techniques, your $16.99 Nostalgia egg cooker becomes a breakfast powerhouse. Start with foolproof hard-boiled eggs using the ice bath method, then graduate to steaming dumplings for lunch. The single-button operation eliminates guesswork, while the compact design keeps your counter clutter-free. Users in RVs and apartments confirm it’s survived years of daily use—truck driver “Bill” even swears by it for healthy meals on the road. Stop wrestling with pots and timers. Your perfectly cooked eggs are just a button press away.


