
Tired of rubbery hard-boiled eggs or poached eggs that fall apart? Your ceramic egg cooker solves these frustrations with precision cooking that delivers consistent results—no guesswork required. This compact appliance uses ceramic heating elements to distribute heat evenly, eliminating hot spots that ruin delicate eggs. Whether you need soft-boiled eggs for ramen, flawless poached eggs for brunch, or meal-prep hard-boiled eggs, mastering how to use a ceramic egg cooker transforms your morning routine. In this guide, you’ll discover exact water measurements, pro timing techniques, and troubleshooting fixes to achieve café-quality eggs in minutes.
Unlike stovetop methods, ceramic egg cookers automate the process by converting precise water amounts into perfect steam pressure. The non-stick ceramic surface prevents sticking while gentle heat ensures even cooking from edge to center. With the right setup and measurements, you’ll never face green yolks or cracked shells again. Let’s unlock your appliance’s full potential with actionable steps you can implement today.
Unbox and Set Up Your Ceramic Egg Cooker Correctly
Essential Components Checklist
Before cooking, verify your kit includes: the main ceramic base with power cord, removable egg tray (holds 6-7 eggs), calibrated measuring cup with soft/medium/hard markings, piercing pin, and clear lid with steam vent. Missing pieces? Consult your manual—most brands offer replacement parts for lost measuring cups or pins.
First-Time Setup Steps
- Wash the egg tray, lid, and measuring cup in warm, soapy water; rinse thoroughly to prevent mineral spots.
- Place the base on a heat-resistant counter with 4+ inches of clearance on all sides for ventilation.
- Uncoil the power cord fully—never wrap it around the unit during storage to avoid damage.
- Plug in the cooker and confirm the indicator light activates (unplug immediately after testing).
Critical safety step: Never operate the cooker dry. Always add water before placing eggs to prevent overheating the ceramic element. Keep hands clear of the steam vent during operation—the escaping vapor exceeds 212°F (100°C).
Master Exact Water Measurements for Perfect Eggs

Decoding the Calibrated Measuring Cup
Your cup’s markings directly control doneness:
– Soft-boiled: Fill to lowest line (25–30ml) for runny yolks
– Medium-boiled: Middle line (35–40ml) for jammy centers
– Hard-boiled: Top line (45–50ml) for fully set yolks
– Poached: Dedicated poach line (usually 35ml)
Pro tip: Place the cup on a flat surface and check water levels at eye height. Viewing from above creates surface tension illusions that add 5ml extra—enough to overcook soft eggs.
Water Measurement Pitfalls to Avoid
Using too much water causes prolonged steaming that toughens whites. Too little risks scorching. If you lose the measuring cup, a standard shot glass (30ml) works for soft-boiled eggs—but verify results with one test egg first. Always pour water directly onto the heating plate, not into egg wells.
Perfect Soft-Boiled Eggs in 8 Minutes
Step-by-Step Soft-Boil Method
- Pierce shells: Insert the pin 1mm deep into the large end of each egg to release air pressure.
- Load correctly: Place eggs pierced-end down in the tray—this directs expanding air away from the yolk.
- Add water: Pour to the soft-boiled line (25–30ml) onto the heating plate.
- Cover securely: Align the lid’s steam vent opposite the handle to direct vapor away from you.
- Start cooking: Press the power button; expect a 6–8 minute cycle.
Cooling and Peeling Secrets
When the timer stops, immediately transfer eggs to cold tap water for 30 seconds. This halts cooking while keeping yolks molten. Peel under running water starting at the large end—where the air pocket creates natural separation. For ramen-style eggs, skip the ice bath and peel while warm.
Eliminate Green Yolks with Foolproof Hard-Boiled Eggs
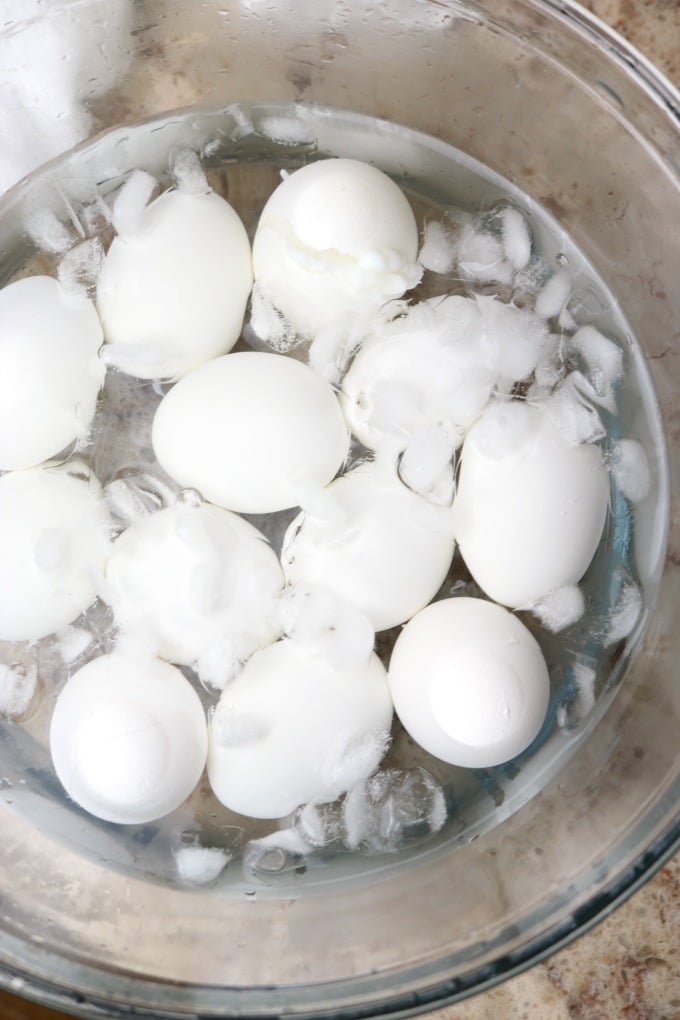
The Ice Bath Method That Works
Pierce and load eggs as for soft-boiled, but fill to the hard-boiled line (45–50ml). After the 12–15 minute cycle, plunge eggs into an ice bath for 5–10 minutes. This rapid cooling:
– Prevents sulfur rings (green yolks)
– Shrinks the egg slightly for effortless peeling
– Stops residual heat from overcooking
Batch-cooking rule: Never exceed 7 eggs. Overcrowding causes uneven heat distribution. Store unpeeled hard-boiled eggs submerged in water in the fridge for up to 7 days—change the water daily to prevent odor absorption.
Restaurant-Quality Poached Eggs Without Vinegar
Grease-Free Poaching Technique
- Lightly butter the ceramic poaching cups—even non-stick surfaces need this for clean release.
- Crack one room-temperature egg per cup (cold eggs cause uneven setting).
- Add water to the poach line (≈35ml); cover and start the cooker.
- For runny yolks: Cook 7 minutes. Jammy centers: 9 minutes. Firm yolks: 11 minutes.
Flawless Removal Trick
Slide a silicone spatula around the cup’s edge, then invert it onto toast. No swirling water vortices or vinegar required—the enclosed steam environment sets whites perfectly. For brunch crowds, undercook poached eggs by 1 minute, then reheat in warm water for 30 seconds before serving.
Fluffy Scrambled Eggs with Zero Stick
Foolproof Scramble Formula
- Grease the ceramic tray or dedicated scramble insert.
- Whisk 2–4 eggs with salt/pepper in a jug; pour into the cooker.
- Add only 5–10ml water to the base for gentle steaming.
- Stir gently every 2–3 minutes with a silicone spatula for 8–10 minutes total.
Flavor boost: Press fresh herbs into the greased tray before adding eggs, or fold in shredded cheese during the last minute. Never add milk directly to the cooker—it dilutes steam and causes rubberiness.
Fix 4 Common Ceramic Egg Cooker Problems
Cracked Shells During Cooking
Why it happens: Unpierced shells trap expanding air, or fridge-cold eggs hit sudden steam.
Fix: Always pierce the large end 1mm deep, and let refrigerated eggs warm 15 minutes before cooking.
Rubbery or Overcooked Whites
Why it happens: Excess water prolongs steaming, or the lid isn’t sealed.
Fix: Reduce water by 5ml and ensure the lid clicks shut. For high altitudes (3,000+ ft), add 5ml water and 1 minute cook time.
Shells Sticking During Peeling
Why it happens: Fresh eggs (<7 days old) have lower pH that binds membrane to shell.
Fix: Use eggs aged 7–10 days, or extend ice baths to 5 minutes for hard-boiled eggs.
White Mineral Buildup on Heating Plate
Why it happens: Hard water leaves calcium deposits after repeated cycles.
Fix: Run a descaling cycle with 50ml white vinegar; wipe clean when cool. In hard-water areas, descale bi-weekly.
Extend Your Cooker’s Lifespan with Smart Maintenance
Daily Cleaning Protocol
- Unplug and cool 5 minutes before handling.
- Lift the tray straight up—tilting spills starchy water onto the heating element.
- Wash tray/lid in warm soapy water; dry completely to prevent spots.
- Wipe the base with a damp cloth—never submerge it.
Monthly Deep Clean
Fill the base with equal parts water and white vinegar. Run a full cycle, discard the liquid, then run a plain water cycle to rinse. This dissolves mineral deposits that cause uneven heating.
Storage Best Practices
Store with the lid slightly ajar to prevent moisture buildup. Coil the cord loosely—never wrap it tightly around the base. Never stack heavy items on the ceramic tray, as impacts cause hairline cracks.
Quick-Reference Cooking Chart
| Egg Style | Water Amount | Time | Cooling Method | Best For |
|---|---|---|---|---|
| Soft-Boiled | 25–30ml | 6–8 min | 30-sec cold water | Ramen, salads |
| Medium-Boiled | 35–40ml | 9–11 min | 1-min ice bath | Egg salads |
| Hard-Boiled | 45–50ml | 12–15 min | 5-min ice bath | Meal prep snacks |
| Poached | 35ml | 7–11 min | None | Eggs Benedict |
| Scrambled | 5–10ml | 8–10 min | None | Quick breakfasts |
Mastering how to use a ceramic egg cooker means perfect eggs on demand—no more watching pots or guessing doneness. Remember these three keys: pierce every shell, measure water precisely, and always use the ice bath for boiled eggs. For high-altitude cooking, increase water by 5ml and time by 1 minute. Store hard-boiled eggs unpeeled in water for weekly meal prep, and descale monthly with vinegar. Within days, you’ll wonder how you ever cooked eggs without this appliance. Ready for flawless results? Plug in your cooker, grab your measuring cup, and make your first perfect egg today.


