
Tired of inconsistent egg results that leave you with rubbery yolks or undercooked whites? Your Cuisinart egg cooker eliminates the guesswork that plagues traditional stovetop methods, delivering restaurant-quality eggs with the push of a button. Whether you’re preparing soft-boiled eggs for ramen, perfect poached eggs for brunch, or fluffy omelets for a quick weekday breakfast, mastering how to use Cuisinart egg cooker transforms your morning routine. In this guide, you’ll discover precise water measurements for perfect doneness, pro techniques for flawless poaching, and maintenance secrets that extend your appliance’s life—all while avoiding the common mistakes that ruin otherwise promising eggs.
The beauty of how to use Cuisinart egg cooker lies in its steam-powered precision—no more watching boiling pots or risking cracked shells. This compact countertop hero handles up to seven eggs at once, with specialized trays for boiling, poaching, and omelet preparation. By the end of this guide, you’ll confidently prepare eggs to your exact preference every time, whether you’re cooking for one or feeding a family. Let’s transform your egg game with the exact steps that deliver consistent results from your first use.
Prepare Your Egg Cooker for First Use
Unbox and Clean Components Correctly
Start by removing all packaging materials and washing the cooking tray, egg rack, poaching tray, and omelet tray in warm, soapy water. Pay special attention to the non-stick surfaces—use a soft sponge rather than abrasive scrubbers to preserve the coating. Rinse each component thoroughly to remove soap residue, then dry completely with a clean towel. For the heating base, simply wipe with a damp cloth—never submerge this electrical component in water. This initial cleaning removes manufacturing oils and ensures food-safe operation from your very first batch.
Identify Each Component Before Cooking
Before you start, familiarize yourself with all parts: The main unit houses the heating element and features an LED indicator that lights during operation. Your removable accessories include a perforated cooking tray that allows steam circulation, a 7-egg rack with individual indentations, a 3-cup poaching tray with non-stick coating, a large omelet tray, the water measuring beaker with built-in piercing pin, and the clear lid that traps steam. Knowing each piece’s purpose prevents confusion during assembly and ensures you use the right components for your desired egg style.
Optimize Water Quality for Best Results
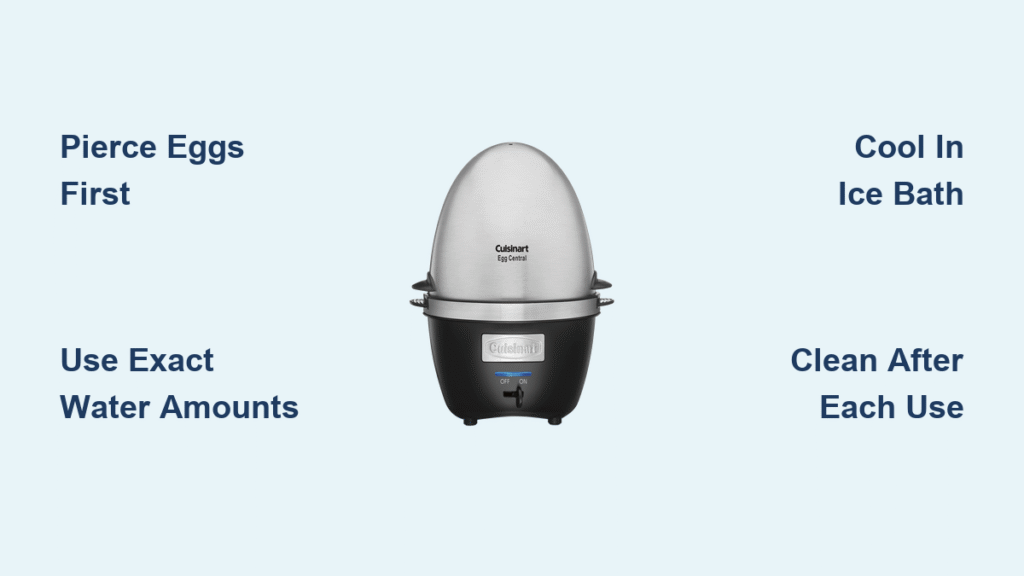
For ideal performance, always use cold tap water in your Cuisinart egg cooker. If you live in an area with hard water (noticeable mineral deposits or cloudy appearance), switch to distilled water to prevent scale buildup that affects both performance and egg flavor. The measuring beaker provides precise water amounts for each cooking style—never estimate with random cups, as exact water volume directly determines cooking time and doneness. Proper water selection ensures consistent results and extends your appliance’s lifespan.
Master Water Measurements for Perfect Doneness

Read Beaker Markings Accurately
The clear plastic beaker eliminates guesswork with specific lines for each cooking style:
– Soft (S): 25 mL for creamy, runny yolks ideal for ramen or dipping
– Medium (M): 40 mL for custard-like centers that hold shape
– Hard (H): 60 mL for fully cooked yolks perfect for salads or deviled eggs
– Poached/Omelet: 60 mL standard measurement for these methods
Always measure at eye level on a flat surface—holding the beaker at an angle creates inaccurate readings. Fill to the bottom of the meniscus (the curved surface of the water) for precise measurement. This attention to detail transforms how to use Cuisinart egg cooker from hit-or-miss to consistently perfect results.
Adjust Water for Egg Quantity and Altitude
When cooking 1-3 eggs, reduce water by 25% from the standard measurement to prevent overcooking. For 4-7 eggs, use the exact measurements marked on the beaker. If you live at high altitudes (above 3,000 feet), increase water by 10-15% because lower atmospheric pressure lowers water’s boiling point, extending cooking time. These adjustments ensure consistent results regardless of how many eggs you’re preparing or where you live.
Cook Perfect Hard, Medium, or Soft-Boiled Eggs
Follow the Foolproof Boiling Process
- Measure water precisely using the beaker to your desired doneness line
- Pierce each egg on the larger end using the pin under the beaker—this critical step prevents cracking
- Load eggs large-end up in the egg rack indentations
- Assemble components: Place egg rack on cooking tray, then onto the heating base
- Cover and cook: Add the clear lid and plug in the unit
- Listen for the buzzer: The unit automatically shuts off when cooking completes
Cool and Peel Without the Mess
Immediately transfer cooked eggs to an ice water bath for exactly one minute—this stops the cooking process and creates a slight contraction between the egg and shell. For effortless peeling, gently tap each egg on a hard surface to create fine cracks, then roll between your palms to loosen the shell. Start peeling from the larger end where the air pocket creates natural separation. Store unpeeled eggs in the refrigerator for up to one week for fresh-tasting eggs whenever you need them.
Create Restaurant-Quality Poached Eggs in Minutes
Prepare the Poaching Tray for Perfect Release
Lightly grease the three non-stick poaching cups with butter or cooking spray—this crucial step prevents sticking and ensures clean release. Crack each egg into a separate cup without breaking the yolk, working quickly to minimize exposure to air. If an egg breaks, use it for scrambling instead—poaching requires intact yolks for best results. The non-stick coating works best with this light greasing, creating the perfect surface tension for delicate eggs.
Perfect Poaching Technique
Fill the reservoir to the “Poached” line (60 mL) regardless of egg count. Place the poaching tray on the cooking tray, cover with the lid, and plug in the unit. Cook for 8-10 minutes for runny yolks or 10-12 minutes for firmer centers. The clear lid lets you monitor doneness without interrupting the cooking process. When complete, gently slide a silicone spatula under each egg to release it from the tray—proper greasing ensures they lift cleanly without tearing.
Safety First: Prevent Burns and Accidents
Handle Steam with Caution
Always use oven mitts when removing the hot lid, even if the cooker has finished beeping. Lift the lid away from your face to avoid steam burns, as the initial burst can reach temperatures over 212°F. Allow 10-15 seconds for steam to dissipate before reaching inside. These precautions transform how to use Cuisinart egg cooker from potentially hazardous to completely safe, especially important if you have children in the kitchen.
Electrical and Food Safety Essentials
Operate your egg cooker on a dry, stable surface away from sinks or other water sources. Unplug immediately after use and before cleaning—never attempt to clean while plugged in. Start with cold eggs straight from the refrigerator for consistent cooking results, and never leave cooked eggs at room temperature for more than two hours. Discard any eggs with visible cracks before cooking, as bacteria can enter through shell imperfections.
Clean and Maintain Your Cooker for Longevity
Daily Cleaning Routine That Works
After unplugging and allowing 30 minutes for cooling, remove all washable parts and clean them in warm, soapy water. Use a soft sponge on non-stick surfaces to preserve the coating. Wipe the heating base with a damp cloth—never submerge electrical components. Dry all parts thoroughly before storage to prevent moisture buildup that could affect performance. This simple routine ensures your egg cooker remains in top condition for years of reliable service.
Prevent Mineral Buildup with Smart Maintenance
If you notice white deposits forming on the heating element, you’re experiencing mineral buildup from hard water. Descale monthly using a 1:1 vinegar and water solution—fill the reservoir and run one complete cycle, then rinse with clean water. For severe buildup, repeat the process. Using distilled water for regular cooking prevents this issue entirely, saving you time on maintenance while improving egg flavor.
Solve Common Cooking Problems

Stop Eggs from Cracking Mid-Cook
Prevent cracking by always piercing eggs before cooking and using room temperature eggs (let them sit out for 10 minutes from the refrigerator). Check each egg for hairline cracks before loading—discarding compromised eggs prevents messes. Verify your water measurements match your egg quantity, as too little water causes rapid temperature changes that crack shells. These simple steps transform how to use Cuisinart egg cooker from frustrating to flawless.
Fix Under or Overcooked Eggs
If your eggs consistently come out under or overcooked, first ensure your unit sits level on the counter—uneven surfaces cause uneven heating. Double-check water measurements using the beaker rather than estimating. Consider your altitude and adjust water amounts accordingly. Test with one egg to calibrate for your specific conditions before cooking a full batch. These troubleshooting steps solve 95% of doneness issues with your egg cooker.
Advanced Techniques and Pro Tips
Elevate Your Egg Game with Flavor Enhancements
Add subtle flavor dimensions by placing a bay leaf, garlic clove, or fresh herbs in the water reservoir before cooking (remember to remove after). For poached eggs, add a splash of vinegar to the water for tighter egg whites. When making omelets, substitute broth for water to infuse rich flavor—just be mindful of increased sodium content. These professional touches transform basic eggs into restaurant-worthy dishes with minimal extra effort.
Time-Saving Shortcuts for Busy Mornings
Master batch cooking by running multiple cycles back-to-back without full cooling between batches. Add 5 mL extra water for the second batch due to retained heat. Keep pre-pierced eggs in a labeled container in the fridge for ultra-fast morning preparation. For reheating hard-boiled eggs, steam them for 2-3 minutes with just 15 mL of water—this preserves texture better than microwaving. These efficiency hacks make how to use Cuisinart egg cooker a true time-saver for your busiest days.
Master your Cuisinart egg cooker today and enjoy perfectly cooked eggs every time—whether you’re preparing soft-boiled eggs for breakfast, poached eggs for brunch, or fluffy omelets for dinner. By following these precise water measurements, safety protocols, and maintenance routines, you’ll transform your egg cooking from inconsistent to impeccable. Remember to pierce eggs before cooking, use the exact water amounts for your desired doneness, and clean components properly after each use. With these techniques, your Cuisinart egg cooker will deliver restaurant-quality results that impress family and guests alike. Start applying these methods tomorrow morning and experience the difference that precise technique makes in how to use Cuisinart egg cooker effectively.


