That sinking feeling when you crack open another batch of rubbery hard-boiled eggs or runny soft-boiled disasters? The Chefman egg cooker solves this breakfast nightmare—but only if you know its hidden water measurement system and timing secrets. Forget guessing games: this guide reveals exactly how to cook perfect soft, medium, or hard-boiled eggs in 6-18 minutes, plus flawless poached eggs and omelets. Within 15 minutes of reading this, you’ll consistently pull restaurant-quality eggs from this countertop hero.
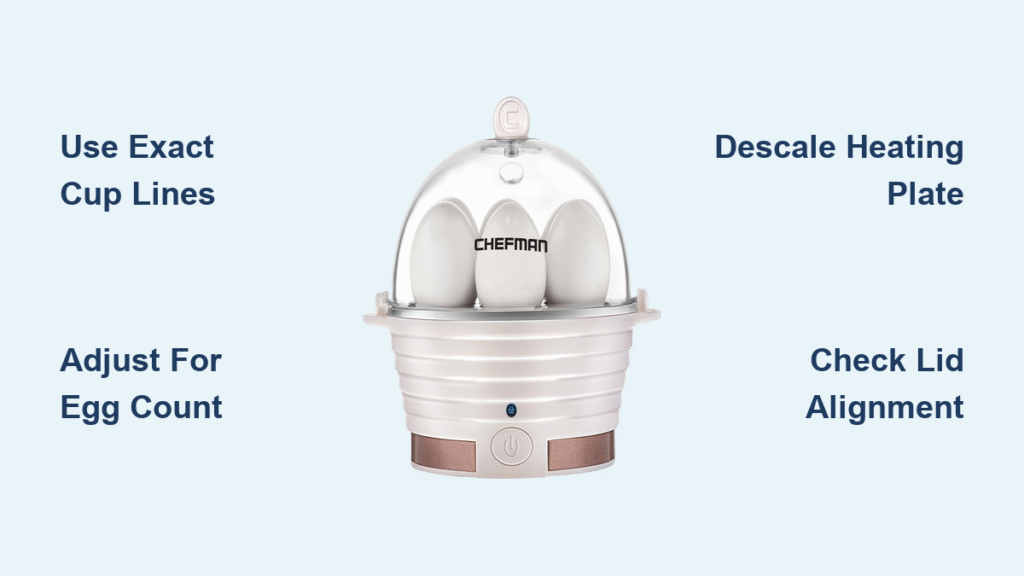
Set Up Your Chefman Egg Cooker Correctly (First-Time Only)
Skip this critical 10-minute setup and you’ll battle mineral spots and inconsistent results forever. Wash the lid, poaching tray, and egg tray in hot soapy water before first use—never submerge the electrical base. Wipe the base with a damp cloth only. Distilled water is non-negotiable for spot-free shells; tap water’s minerals cause harmless but ugly brown staining. Assemble the dry parts: place the egg tray over the base, secure the lid, and plug into a wall outlet. Your cooker is now primed for precision cooking.
Pro tip: Store all accessories inside the unit when not in use. This keeps the lid, trays, and measuring cup organized and prevents misplacing the essential egg pin tool.
Cook Perfect Hard-Boiled Eggs in 18 Minutes Flat
Water Measurement: The Secret to Yolk Consistency
The included measuring cup has specific lines for soft, medium, and hard-boiled eggs—but here’s what the manual doesn’t emphasize: use the exact line matching BOTH egg count AND desired doneness. One measurement works for 1-6 eggs. Fill to the “HARD” line for fully set yolks, “MEDIUM” for jammy centers, or “SOFT” for runny yolks. Pour cold water directly onto the heating plate—not into the egg tray.
Hard-boiled egg sequence:
1. Place cooker on heat-resistant surface away from stovetops
2. Remove lid and lift out egg tray using the included tool
3. Pour measured water onto heating plate
4. Load room-temperature eggs (pointed end down) into tray
5. Secure lid, plug in, and press power button
6. When water fully evaporates (16-18 minutes for hard-boiled), the buzzer sounds
7. Immediately transfer eggs to ice water—this stops cooking and prevents green rings
Timing Cheat Sheet for Foolproof Results
| Doneness | Water Line | Total Time | Critical Tip |
|---|---|---|---|
| Soft (runny yolk) | SOFT | 6-9 min | Use room-temp eggs for consistent results |
| Medium (jammy center) | MEDIUM | 10-13 min | Add 1 minute at high altitudes |
| Hard (fully set) | HARD | 16-18 min | Older eggs peel 40% easier |
Why timing varies: Refrigerated eggs add 1-2 minutes versus room-temperature eggs. Extra-large eggs need slightly more time. Altitude above 3,000 feet requires 1-2 extra minutes.
Master Poached Eggs Without Breaking a Yolk

Foolproof Poaching Technique
Fill to the “OMELET/POACHED” line—this single water measurement works for both methods. Grease the poaching wells thoroughly with butter or non-stick spray; skipping this causes 90% of poaching failures. Crack one cold egg per well (max 2), position the tray on the rack, and start cooking. The magic happens in exactly 7 minutes: steam gently cooks eggs without water contact.
Critical removal step: After the buzzer sounds, unplug immediately. Wait 30 seconds for eggs to set, then slide a silicone spatula under each egg. They’ll release cleanly if properly greased. Never use metal utensils—they scratch the non-stick coating.
Make Single-Serve Omelets in Under 7 Minutes
3-Ingredient Omelet Hack
Same water level as poaching—fill to “OMELET/POACHED.” Grease both wells before adding beaten eggs. For fluffy results, whisk 1 egg per well with 1 tbsp milk or water. Pour mixture into wells, assemble cooker, and press start. After 6 minutes, let omelets rest 30 seconds before removal—they continue cooking off-heat.
Flavor boost: Add shredded cheese or diced veggies after pouring eggs. The steam cooks fillings perfectly without sogginess. Fold omelets in half while warm for restaurant presentation.
Avoid These 5 Costly Cooking Mistakes

Water Measurement Errors That Ruin Eggs
Overcooked eggs happen when you use too much water or ignore the buzzer. Reduce water by 1 tablespoon if yolks consistently overcook. Undercooked soft eggs need 30-60 extra seconds—simply add a splash of water and restart. Mineral spots appear from tap water; switch to distilled immediately.
Critical temperature mistake: Mixing refrigerated and room-temperature eggs causes uneven cooking. Always bring eggs to room temp for 5-10 minutes before cooking.
Egg Selection Secrets Chefs Swear By
Test freshness with the saltwater float test: 1 tsp salt per cup water. Fresh eggs sink; old eggs float. Use 7-10 day old eggs for hard-boiling—they peel effortlessly. Always buy refrigerated eggs and store them pointed-end down to preserve quality.
Stop Cooking Instantly for Perfect Results
Ice Bath Protocol for Flawless Eggs
Never skip the ice bath—it’s the difference between rubbery and tender eggs. Fill a bowl with ice water before starting. When the buzzer sounds, transfer eggs immediately using the removal tool. Soak for 5 minutes for easy peeling. Skipping this causes green sulfur rings around yolks.
Peeling pro move: Gently roll cooled eggs on the counter to crack shells, then peel under cold running water. The water seeps between membrane and egg, preventing chunks from sticking.
Clean Your Chefman Egg Cooker Like a Pro
5-Step Daily Cleaning Routine
- Unplug and cool completely (10 minutes minimum)
- Remove all trays and wash in hot soapy water
- Wipe heating plate with vinegar-soaked paper towel (1 tbsp white vinegar dissolves mineral deposits)
- Clean base exterior with damp cloth only—never immerse
- Dry thoroughly before storage to prevent mold
Weekly deep clean: For stubborn deposits, leave vinegar on heating plate for 5 minutes before wiping. Never use abrasive pads—they destroy the non-stick surface.
Safety Rules That Prevent Serious Injuries
Non-Negotiable Safety Practices
- Never immerse the base—electrical shock risk is severe
- Always use the removal tool—heating plate reaches 212°F (100°C)
- Place on stable surface—keep 12+ inches from stovetops
- Unplug before adding water—prevents accidental activation
- Supervise children—steam vents can cause burns
Electrical warning: The polarized plug fits one way only. Forcing it risks fire. Use only UL-listed extension cords if needed—the short cord prevents tripping.
Troubleshoot These 4 Common Problems Fast

Immediate Fixes for Cooking Failures
| Problem | Why It Happens | Instant Fix |
|---|---|---|
| Eggs overcooked | Too much water or delayed removal | Reduce water by 1 tbsp next time |
| Soft eggs too runny | Cold eggs or low altitude | Add 60 seconds; use room-temp eggs |
| Mineral spots on shells | Tap water minerals | Switch to distilled water immediately |
| Uneven cooking | Mixed egg sizes/temps | Use uniform eggs at room temperature |
Pro optimization: Pierce the large end of each egg with the included pin tool before cooking. This releases air and prevents cracking. Never exceed 6 eggs—the unit won’t generate enough steam.
Warranty Protection You Must Activate
Register at chefman.com/register within 30 days to extend your warranty by 3 months (total 15 months coverage). The standard 1-year warranty covers heating element failures and manufacturing defects—but voids if you:
– Use abrasive cleaners
– Immerse the base in water
– Ignore mineral buildup
– Operate with damaged cords
Support tip: Have your model number (found on base) and receipt ready when calling 888-315-6553. Most issues are resolved with proper water measurement adjustments.
Final tip: Master hard-boiled eggs first using room-temperature eggs and distilled water. Once you nail consistent results in 16-18 minutes, advance to poaching. Within one week, you’ll cook perfect eggs on demand—no more guessing games. Remember: the buzzer means immediate action, not “I’ll get to it.” Transfer those eggs to ice water the second it sounds, and you’ll never serve chalky yolks again.