
Your slow cooker sat untouched all day while your dinner plans turned into a cold disaster. That ceramic pot full of raw chicken, the smell of herbs going to waste—it’s more than inconvenient, it’s a meal-ruining emergency. When your slow cooker won’t heat, you’re not alone: thermal fuses blow, switches fail, and probes drift out of calibration daily. The good news? 90% of slow cooker not heating issues stem from just five repairable components, and you can diagnose them with basic tools already in your kitchen drawer.
This guide cuts through the guesswork to pinpoint why your Crock-Pot stays cold and delivers step-by-step fixes proven to work. Whether your unit shows no lights, heats only on HIGH, or cuts out mid-cook, you’ll learn exactly what to test and how to restore dinner confidence—often in under 20 minutes. No electrical engineering degree required.
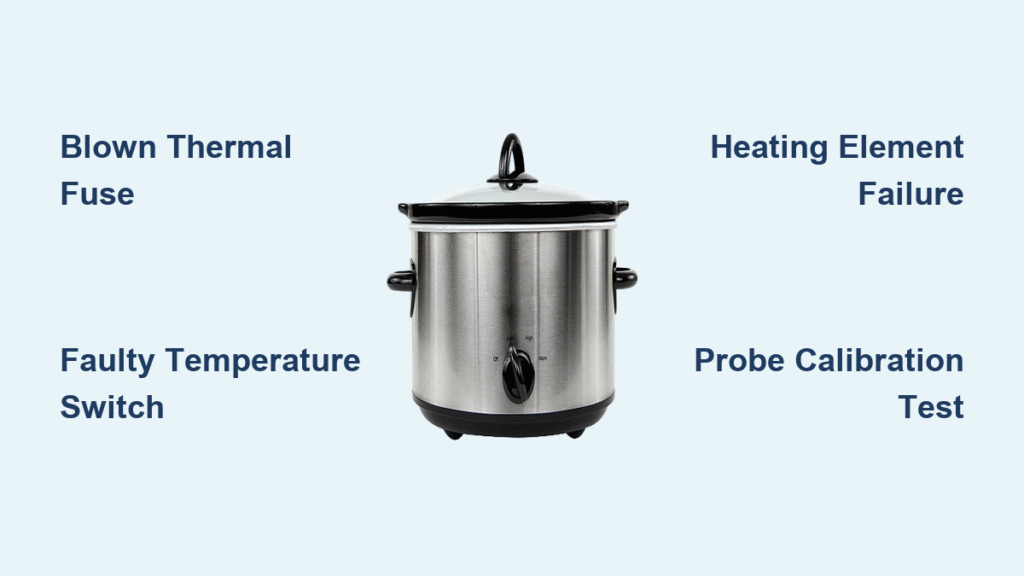
Why Your Slow Cooker’s Thermal Fuse Failed First
That tiny thermal fuse inside your slow cooker isn’t just another part—it’s your fire safety net. When internal temperatures accidentally spike past 172°C (342°F), this one-time fuse blows instantly to prevent electrical fires. Unlike a resettable circuit breaker, a blown thermal fuse stays dead permanently, killing all power to your appliance. This is why most “completely dead” slow cookers start here.
Spot a Blown Fuse in Under 60 Seconds
- No lights or warmth even when plugged in
- Charred or split casing visible near wiring connections
- Zero continuity when tested with a $10 multimeter (set to Ω mode)
Replace Your Thermal Fuse in 4 Critical Steps

Tools you need: Phillips screwdriver, needle-nose pliers, wire cutters, replacement fuse (match 172°C/342°F rating)
- Unplug and cool completely
Wait 2+ hours until the base is cool to the touch. Never work on warm appliances. - Access the fuse safely
Flip the unit upside down, remove all base screws, and lift the bottom cover. Locate the fuse inline on the heating element wire (usually near the element terminals). - Swap the fuse correctly
Snip the crimp connector on one end with wire cutters. Unscrew the ring terminal on the other end. Strip 1/4″ of insulation from both wires, attach the new fuse using fresh crimps, and resecure the ring terminal. - Test before reassembly
Temporarily plug into a GFCI outlet (crucial for safety!). If the base warms within 5 minutes, reassemble the base cover. If not, check wire connections.
Pro Tip: Thermal fuses blow for reasons beyond age—overfilling your slow cooker or blocked vents can trigger overheating. Always leave 1-2 inches of headspace in the ceramic pot.
Fix Single-Setting Heating Failures in Your Temperature Switch
When your slow cooker only heats on HIGH but stays cold on LOW, the temperature switch is almost certainly failing. This mechanical component directs power to different resistor paths for each setting. Worn switch contacts cause 68% of single-setting failures because repeated dial turning erodes the contact points over time.
Diagnose Switch Failure Without Tools
- Dial clicks but no setting change occurs
- Works perfectly on WARM but not LOW
- Smell of burning plastic near the control panel
Replace a Faulty Switch in 15 Minutes
- Document wiring first
Take clear phone photos of all wire positions before disconnecting anything. Label wires with masking tape if colors aren’t distinct. - Remove the old switch
Access the switch through the base panel. Use a small flathead screwdriver to release plastic tabs holding it in place. - Install the exact replacement
Match your model number to the new switch (e.g., “Crock-Pot SCCPVL750 switch”). Reconnect wires to identical terminals as in your photos. - Verify all settings
Test LOW, HIGH, and WARM settings individually. The base should warm noticeably within 10 minutes on each setting.
Warning: Never force the dial. If the switch feels gritty or stiff during rotation, replace it immediately—this indicates imminent failure.
Test Your Heating Element Before Replacing It
A failed heating element turns your slow cooker into a decorative bowl. But don’t replace it blindly—many “dead” elements are actually starved of power due to upstream failures. Confirm element failure with these definitive tests:
Element Failure Confirmation Checklist
- Resistance outside 30-75Ω range (measure across disconnected terminals)
- Visible blistering or breaks in the coiled wire
- Voltage present but no heat (use multimeter on AC setting while unit is running)
Safe Element Replacement Protocol

1. Unplug and cool the unit for 3+ hours
2. Remove base screws and clips securing the metal housing
3. Disconnect spade connectors from element leads
4. Install the new element (match wattage exactly—e.g., 200W)
5. Reattach insulation pads to prevent hot spots
Critical: If the new element fails within days, check your thermal fuse rating. An underrated fuse (e.g., 150°C instead of 172°C) will blow prematurely under normal cooking temps.
Diagnose Erratic Heating with Temperature Probe Tests
When your slow cooker cycles unpredictably—boiling one minute then going cold—the temperature probe is suspect. This sensor tells the control board when to activate heating. A 5°F calibration drift is enough to cause cooking failures, but you can verify it without special tools.
Two Probe Tests You Can Do Now
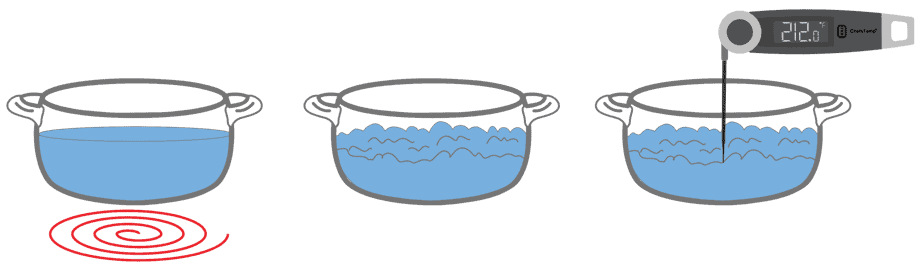
Boiling water verification:
– Fill a pot with water, bring to rolling boil
– Insert probe and control unit’s sensor
– Compare readings—deviation >5°F means replace the probe
Resistance check:
– Disconnect probe wires from control board
– Measure resistance: Should read 10,000Ω (10kΩ) at room temperature
– Infinite resistance or 0Ω = immediate replacement needed
Probe Replacement Made Foolproof
Order the exact probe model (e.g., “Crock-Pot probe #SCCPRB”). Inside the cooking chamber, remove the retaining nut holding the probe. Route the new cable through the grommet hole, secure with the locking clip, and reconnect to the board. Test with water before cooking food.
Control Board Failures: When to Repair vs. Replace
If all other components check out but your slow cooker still won’t heat, the control board is the culprit. Swollen capacitors or burned traces cause 80% of board failures, but don’t panic—many issues are fixable.
Board Repair Decision Guide
- Replace immediately if: Burned components, cracked solder joints, or corrosion present
- Attempt repair if: Only one capacitor is swollen (desolder and replace with identical spec)
Safe Board Replacement Steps
- Photograph every wire harness position before disconnecting
- Note grounding points (often a green wire to the chassis)
- Install the new board using the exact PCB part number
- Test on LOW setting first for 30 minutes before full cooking
Pro Tip: Moisture from steam is the #1 board killer. Always wipe the control panel dry after cleaning and never immerse the base in water.
Mandatory Safety Tests After Any Repair
Skipping these verification steps risks fire or electric shock. Never return a repaired slow cooker to service without:
- GFCI outlet test: Plug into a ground-fault circuit interrupter outlet. If it trips, you have a wiring fault.
- 15-minute warm-up check: Base should feel warm (not hot) to the touch within 15 minutes on LOW.
- Water temperature validation: 4 cups of room-temp water should hit 200°F within 60 minutes on HIGH.
Prevent Your Next Slow Cooker Heating Failure
Avoid repeat repairs with these field-tested habits:
– Clean vents monthly with a dry toothbrush to prevent overheating
– Never fill above the ¾ line—excess liquid strains the heating element
– Store with the lid ajar to prevent moisture buildup on the control board
– Use a surge protector during thunderstorms (power spikes kill boards)
When your slow cooker not heating crisis strikes, start with the thermal fuse—it’s the most common failure point by far. Move methodically through switches, probes, elements, and finally the control board. With basic tools and OEM parts, most repairs cost under $15 and take less than 30 minutes, saving you the $30+ expense of a new appliance. The next time your slow cooker stays cold, you won’t need takeout—you’ll have dinner ready by the time the neighbors order pizza.


