Picture this: it’s 7 AM, you’re racing out the door, and dinner is already simmering away in your sleek metallic red Chefstyle slow cooker. Eight hours later, you return to a perfectly tender 4-pound roast that falls apart at the touch of a fork. That’s the magic of mastering your chef style slow cooker how to use—and you’re about to learn exactly how to achieve these results every single time. This manual 4.5-quart workhorse doesn’t have fancy digital displays or preset programs, but what it lacks in technology, it makes up for in reliability and simplicity. Whether you’re a busy parent, meal prep enthusiast, or cooking novice, this guide will transform you into a slow cooking pro using your Chefstyle manual slow cooker.
Unpack and Prep Your Chefstyle Slow Cooker Correctly
Before you start creating mouthwatering meals, your new slow cooker needs proper preparation. This crucial first step ensures food safety and optimal performance for years to come. Skipping this could lead to uneven cooking or premature wear on your appliance.
Remove Packaging and Clean Components Thoroughly
Start by removing all stickers from the metallic red exterior and protective films on the glass lid. The ceramic cooking vessel and glass lid are dishwasher-safe—place them on the top rack for effortless cleaning. For hand washing, use warm, soapy water with a non-abrasive sponge to protect the ceramic surface. Never submerge the stainless-steel base; instead, wipe it clean with a damp cloth and dry immediately to prevent water spots that could damage the finish over time.
Verify Critical Safety Components Before First Use
Examine the ceramic insert for any hairline cracks or chips under bright light—these can cause uneven heating. Ensure the glass lid fits snugly without wobbling, as a loose seal creates steam leaks that extend cooking time. Test the three-position dial (LOW/HIGH/WARM) to confirm it turns smoothly between settings with distinct clicks. Only proceed when all components pass inspection—your safety depends on this simple verification step.
Optimize Temperature Settings for Perfect Results
Your Chefstyle slow cooker’s three manual settings are deceptively simple. Understanding their precise functions prevents common cooking disasters like dry meat or undercooked beans. The key is matching your recipe to the right setting based on time available and ingredient type.
LOW Setting Secrets for All-Day Tenderizing
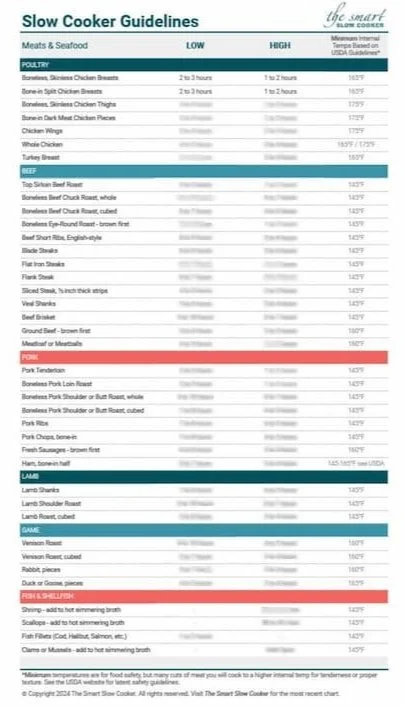
The LOW setting maintains a gentle 190-200°F simmer ideal for breaking down collagen in tough cuts. Use this for 6-10 hour cooks—perfect for starting meals before work. A 4-pound beef roast transforms into fork-tender perfection in 8-10 hours on LOW, while boneless chicken becomes juicy and shreddable in 6-7 hours. Pro tip: Never start frozen meats on LOW—they stay in the danger zone too long; thaw first.
HIGH Setting Hacks for Last-Minute Meals
When time is tight, HIGH delivers faster cooking at 300°F with a more vigorous simmer. This setting cuts cooking time roughly in half: dried beans soften completely in 4-5 hours, while soups reach serving temperature in 3-4 hours. Remember the Chefstyle unit effectively cooks most recipes in as little as 4 hours on HIGH, but never leave it unattended for more than 5 hours to prevent scorching.
WARM Setting for Flawless Serving
Once your meal reaches perfect doneness (165°F for poultry, 145°F for beef), switch to WARM to hold food safely for up to 2 hours. This prevents that dreaded dry, overcooked texture while keeping food out of the bacterial danger zone (40-140°F). Critical mistake: Never use WARM for initial cooking—it won’t bring food to safe temperatures quickly enough.
Execute Flawless Cooking with Strategic Layering
Follow this precise workflow to achieve consistent, restaurant-quality results every time you use your chef style slow cooker how to use. Proper layering prevents the most common slow cooker failures: overcooked edges with raw centers.
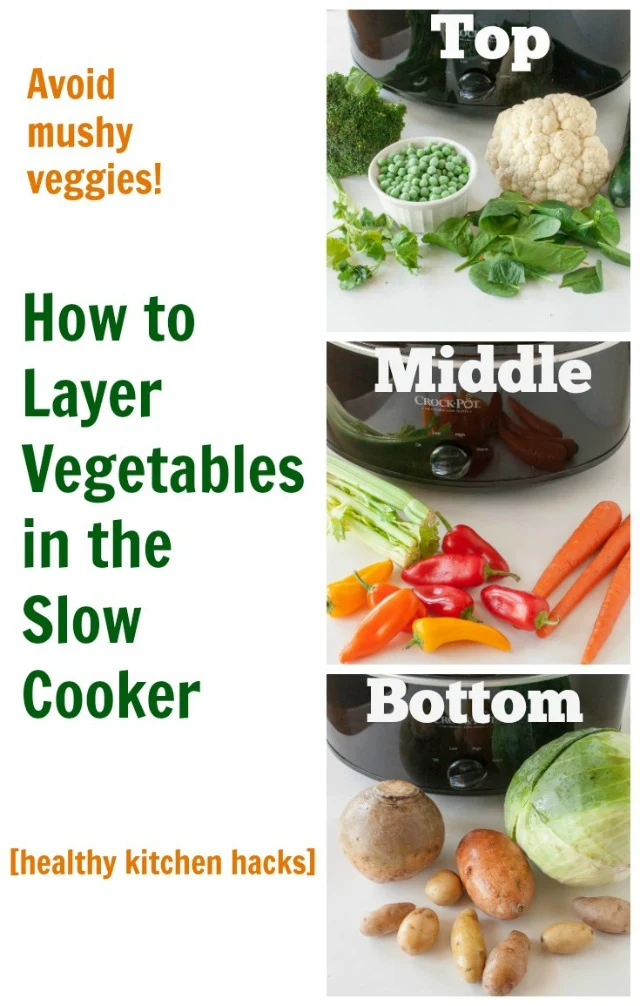
Position Ingredients for Even Heat Distribution
Place dense root vegetables like potatoes and carrots at the bottom where they’ll cook in direct contact with the heat source. Position proteins in the middle layer—never on top where they’ll dry out. Add quick-cooking vegetables like bell peppers or zucchini on top during the last hour. This layering technique ensures everything finishes cooking simultaneously without mushy edges.
Add Precise Liquid Amounts to Prevent Burning
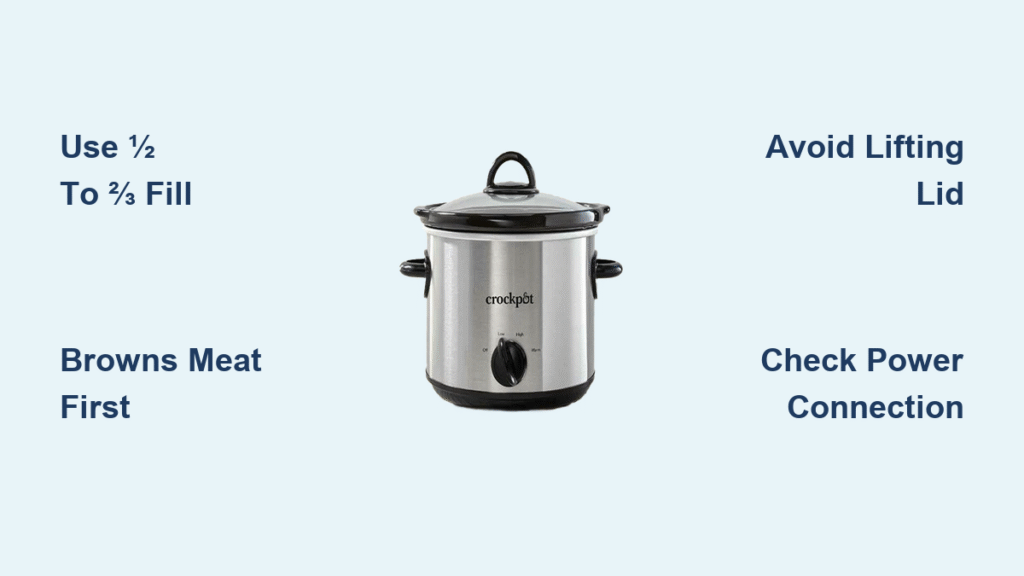
Every successful slow cooker meal needs ½ to 1 cup of liquid—broth, water, wine, or sauce—to prevent drying and facilitate even heat transfer. Visual cue: Liquid should cover at least one-third of ingredients but never exceed the ¾ fill line. For thick stews, use tomato-based liquids that won’t evaporate too quickly. Too little liquid causes scorching; too much dilutes flavors.
Maintain Correct Fill Levels for Optimal Circulation
Your 4.5-quart vessel performs best when filled between ½ and ¾ full. An overfilled cooker leads to undercooked centers and potential overflow, while insufficient food causes overcooked edges and burning. Time-saver: For small batches, add extra liquid and reduce cook time by 25%—but never fill below the ½ mark.
Troubleshoot Common Chefstyle Slow Cooker Problems
Even simple appliances present challenges. Diagnose and fix these frequent issues in under 5 minutes using only what’s in your kitchen.
Fix Overcooked Edges and Undercooked Centers
If you notice dry, overcooked edges with a cold center, you’ve likely overfilled the vessel or added insufficient liquid. Immediately add ½ cup broth and stir gently. For next time: reduce ingredient volume by 20% and verify you’re using LOW for 8+ hours for large roasts. Critical check: Ensure the ceramic insert sits flush in the base—any gap causes uneven heating.
Stop Lid Steam Leakage Immediately
A rattling lid or visible steam leakage usually indicates misalignment. Turn off the cooker, reposition the glass lid to sit flush, and ensure no food debris blocks the seal. The clear glass design allows progress checks without lifting—resist peeking, as each lift adds 15-30 minutes to cook time and disrupts temperature stability.
Rescue Undercooked Food Without Starting Over
When food remains undercooked after the recommended time, check two things: verify you selected HIGH instead of LOW for time-crunched meals, and confirm ingredients were cut uniformly. For last-minute fixes: chop food smaller, add ¼ cup hot water, and cook uncovered on HIGH for 30-60 minutes while monitoring closely.
Clean and Store Your Slow Cooker for Longevity
Proper maintenance extends your appliance’s lifespan by years and prevents flavor transfer between meals. Never skip these critical post-cooking steps.
Cool Down and Remove Components Safely
Always unplug your Chefstyle slow cooker and let it cool completely before cleaning—this prevents thermal shock that can crack the ceramic insert. Once cool (about 1 hour), remove the ceramic vessel and glass lid. Warning: Never place a hot ceramic insert in cold water—it will shatter.
Eliminate Stubborn Residue Without Damage
For stuck-on food, fill the ceramic insert with warm, soapy water and let it soak for 15-20 minutes. Use a soft sponge—never steel wool or abrasive cleaners that scratch the ceramic. For baked-on grease, add 2 tablespoons baking soda to the soak water. The stainless-steel base cleans with a vinegar-dampened cloth to remove water spots.
Store Components to Prevent Damage
Store your slow cooker with the lid offset or ajar using a folded paper towel to prevent trapped moisture and odors. Coil the power cord neatly using any integrated storage clips. Keep in a dry location between 50-90°F—extreme temperatures can warp the manual dial mechanism over time.
Elevate Your Dishes with Pro Chefstyle Techniques
Transform basic recipes into extraordinary meals with these chef-developed methods specifically for manual slow cookers.
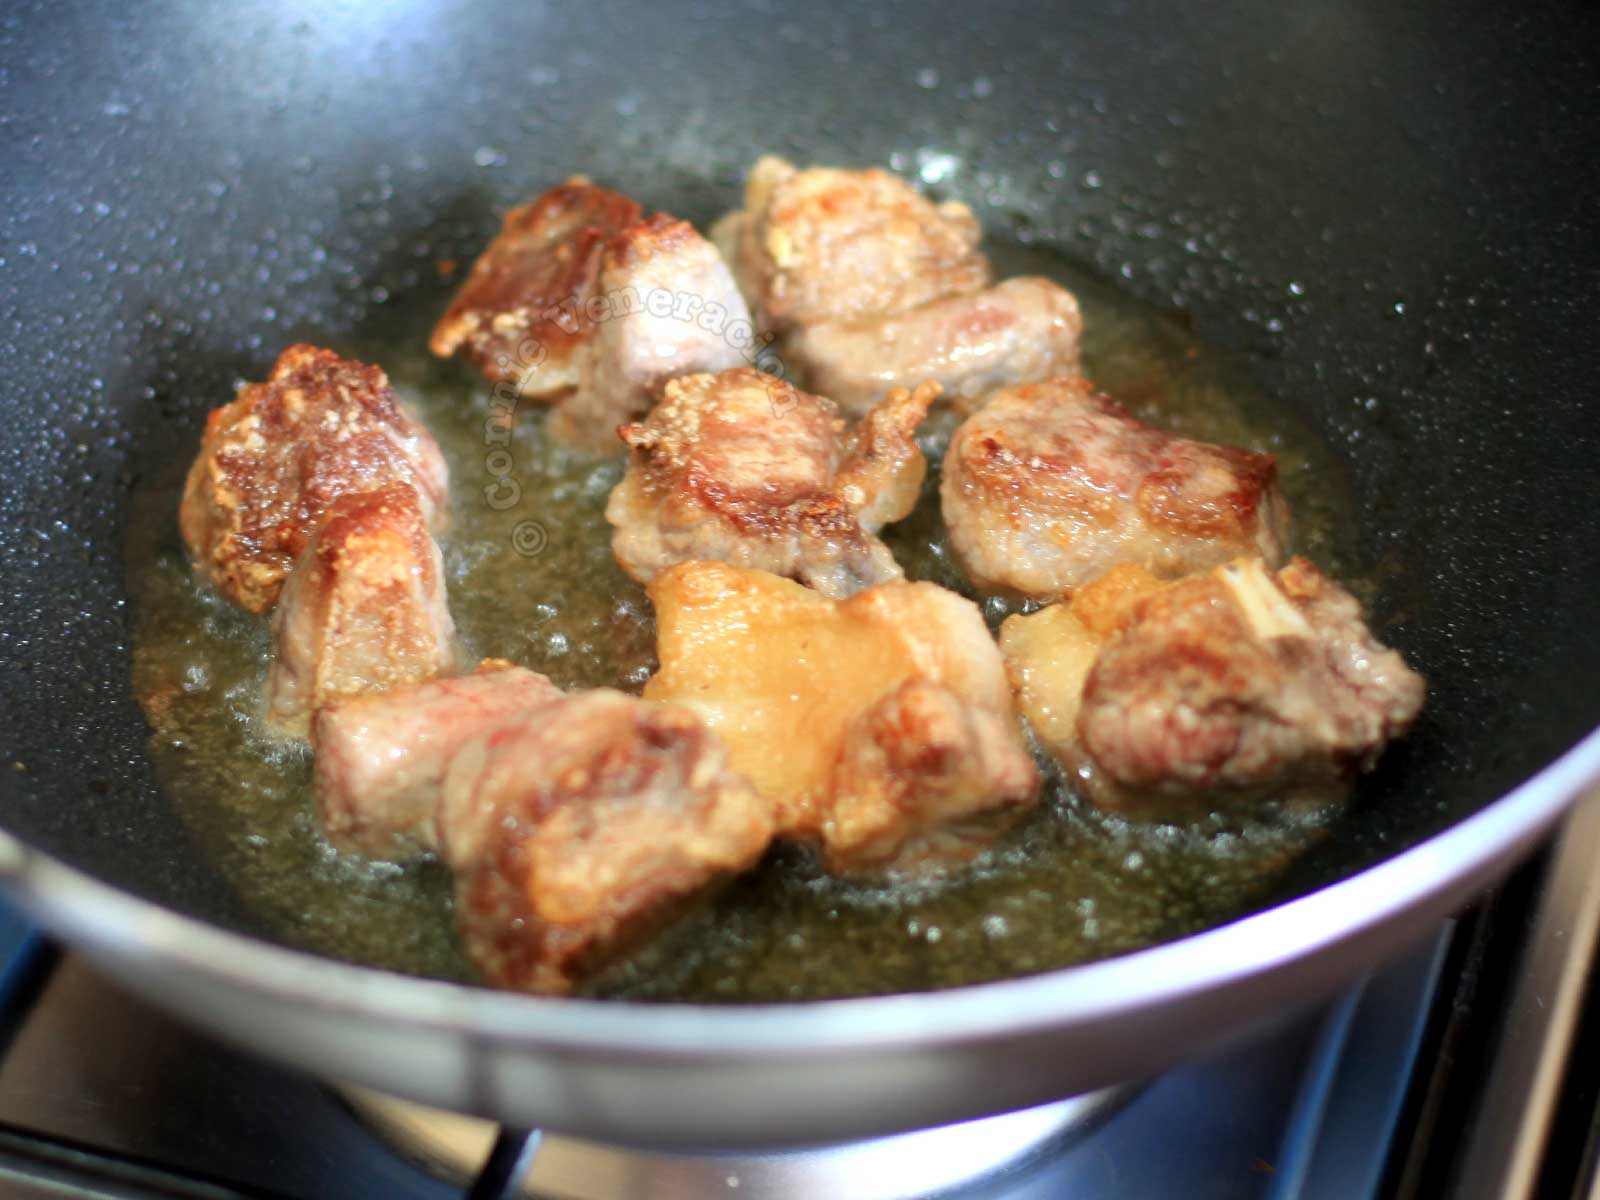
Maximize Flavor Through Strategic Browning
Brown meats in a separate skillet before adding to the slow cooker—this Maillard reaction creates complex flavors no slow cooker can achieve alone. Deglaze the skillet with broth, scraping up browned bits, then pour this “fond” into your cooker. Time-saver: Brown proteins the night before and refrigerate; add straight from fridge in the morning.
Perfect Sauce Consistency Every Time
For thicker sauces without flour lumps: remove the lid during the final 30 minutes on HIGH to evaporate excess moisture. Alternatively, transfer 1-2 cups of cooking liquid to a saucepan, reduce by half on the stovetop, then return to the slow cooker. Critical timing: Add dairy products and seafood only during the final 30 minutes to prevent curdling.
Safety Protocols for Stress-Free Slow Cooking
Operating your chef style slow cooker how to use safely ensures years of delicious meals without incident. These often-overlooked rules prevent common hazards.
Countertop Placement That Prevents Disasters
Position your metallic red cooker on a stable, heat-resistant surface at least 6 inches from walls and water sources. Keep it clear of countertop edges where it could be knocked over. The integrated side handles remain cool during operation, but never carry a full cooker—the ceramic insert can shift and spill scalding contents.
Non-Negotiable Food Safety Practices
Never operate with an empty or cracked ceramic insert—it will overheat and shatter. Always ensure food reaches safe internal temperatures using a meat thermometer. Critical rule: The WARM setting is for serving only—never use it to reheat cold food or cook from raw, as it keeps food in the bacterial danger zone.
Your Chefstyle slow cooker transforms affordable ingredients into extraordinary meals through the simple magic of low, slow heat. Master these techniques, and you’ll create everything from hearty stews to tender roasts with minimal effort. The metallic red beauty on your counter isn’t just an appliance—it’s your secret weapon for stress-free, delicious meals that taste like you spent hours in the kitchen. Remember the golden rule: always add ½-1 cup liquid, fill between ½-¾ full, and switch to WARM immediately when done. Now unplug that takeout app—you’ve got this.