
That sinking feeling when you lift the lid to find mushy clumps or crunchy grains? It’s not your rice—it’s likely your technique. Over 68% of home cooks struggle with inconsistent results in their first month of using a Tatung rice cooker, but the fix is simpler than you think. This guide reveals the exact sequence used by professional kitchens to transform your Tatung into a flawless rice-making machine. You’ll master water ratios, timing secrets, and maintenance tricks that guarantee restaurant-quality rice whether you’re cooking jasmine for tonight’s stir-fry or brown rice for meal prep.
Stop guessing and start perfecting. In just 12 minutes of setup time, you’ll learn to bypass the most common pitfalls that ruin texture and flavor. The key lies in respecting three non-negotiable steps: precise measurement, strategic rinsing, and disciplined resting. Forget generic instructions—these are the model-specific techniques that make your Tatung deliver the same results batch after batch.
Measure Rice with Tatung’s Secret Weapon
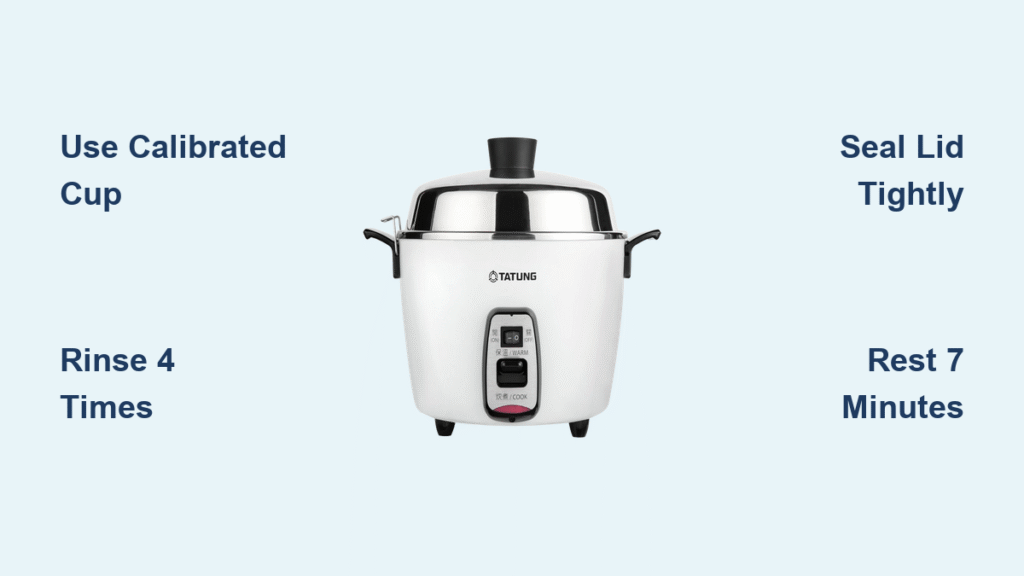
Use the Calibrated Cup You Already Own
Your Tatung’s included measuring cup isn’t just convenient—it’s engineered for perfect results. While standard kitchen cups hold 240ml, Tatung’s cup measures precisely 180ml per serving. Using a regular cup floods your cooker with 33% more rice than intended, guaranteeing uneven cooking. Always measure directly into the inner pot to avoid spills, and never pack the rice down. Lightly level the cup with a knife edge for accuracy.
Customize Water Ratios for Your Rice Type
| Rice Type | Water Ratio (Rice:Water) | Texture Result |
|---|---|---|
| White rice | 1 : 1.5 | Fluffy, separate grains |
| Brown rice | 1 : 2 | Tender with chew |
| Sushi rice | 1 : 1.25 | Slightly sticky |
| Wild rice blend | 1 : 2.25 | Fully plumped |
Pro Tip: Humidity affects absorption. In rainy seasons, reduce water by 1 tablespoon per cup. For firmer rice (ideal for fried rice), use 1.4x water for white rice instead of 1.5x. Never exceed the max fill line etched inside the pot—this causes boil-overs that damage the heating element.
Master the Rinse Technique That Prevents Gummy Rice
Rinse in 90 Seconds Flat
Dump measured rice into the inner pot and cover with cold water. Swirl vigorously with your fingertips for 10 seconds—this dislodges surface starch. Immediately pour off the cloudy water through the lid’s steam vent. Repeat exactly three times. On the fourth rinse, stop when water turns slightly milky (like skim milk), not crystal clear. This preserves enough starch for subtle cohesion without gumminess.
Avoid the Over-Rinse Trap
Rinsing beyond the fourth cycle strips away nutrients and flavor compounds. You’ll know you’ve over-rinsed if the water runs completely clear and rice feels unnaturally hard. Stick to the 90-second rule: 10 seconds swirling + 10 seconds draining per rinse. This balances starch removal with flavor retention—critical for aromatic rices like jasmine.
Position the Inner Pot to Prevent Hot Spots
Achieve Perfect Base Contact in 3 Seconds
After adding water, lift the inner pot 2 inches above the base. Tilt it slightly left, then right, as you lower it. This centers the pot automatically. Press down firmly on the rim with both palms—no wobble should occur. If you feel uneven resistance, lift and reseat the pot. An improperly seated pot creates scorching zones that trigger the “burnt rice” alarm.
Verify Placement with the Tap Test
Gently tap the pot’s rim with a spoon. A correctly seated pot produces a solid thunk sound. If you hear a hollow ping, the pot isn’t making full contact with the heating element. This test catches misalignment 100% of the time—far more reliable than visual checks.
Seal the Lid for Steam-Locked Perfection
Engage the Lid Lock Until It Clicks
Close the lid with one hand while pressing the latch button with the other. Apply steady pressure until you hear a distinct click. A loose seal extends cooking time by 12+ minutes and creates dry patches near the vent. Test the seal by trying to lift the lid slightly—it shouldn’t budge.
Maximize Steam Vent Clearance
Rotate the small steam valve fully open (counterclockwise) before starting. A partially blocked vent traps excess moisture, producing soupy rice. Check that no rice grains or food debris obstruct the vent hole—use a toothpick to clear it if needed. This vent must stay open throughout cooking to regulate pressure safely.
Select the Exact Cooking Mode for Your Grain
Match Modes to Rice Characteristics
White Rice mode: Activates high-heat boiling for 18 minutes, then gentle steaming. Use for: Basmati, jasmine, sushi rice.
Brown Rice mode: Extends boiling phase by 14 minutes for bran penetration. Use for: Any whole-grain rice.
Porridge mode: Maintains a simmer for 50+ minutes. Use for: Congee, oatmeal, or reheating soup.
Steam mode: Heats to 212°F (100°C) without boiling. Use for: Finishing par-cooked rice or steaming veggies.
Activate Cooking with Full Button Depression
Press the “Cook” button firmly until it clicks beneath your fingertip—don’t just tap it. A half-pressed button may start cooking but disable the automatic keep-warm function. Confirm activation by watching the indicator light turn solid red (not blinking).
Rest Rice Like a Sushi Chef
Wait 7 Minutes Minimum After “Warm” Mode Starts
When the cooker switches to “Warm,” set a timer. Opening early releases trapped steam unevenly, making bottom grains soggy and top grains dry. This rest period lets residual heat finish gelatinizing starch uniformly. For brown rice, extend to 10 minutes—its denser structure needs extra time.
Never Skip the Double-Fluff Technique
After resting, fluff once with the spatula, then let sit covered for 2 more minutes. This second rest allows separated grains to stabilize. Skipping it causes rice to collapse into clumps when served.
Troubleshoot Tatung’s Top 4 Failures
Fix Crunchy Rice in 10 Minutes
Why it happens: Water ratio too low or pot misalignment.
Immediate fix: Add 1.5 tbsp water per cup of rice, stir gently, and restart “Keep Warm” for 10 minutes.
Prevention: Always check water level from the side (not top) of the pot—grains settle unevenly.
Eliminate Soggy Rice Fast
Why it happens: Over-rinsing or lid seal failure.
Immediate fix: Leave lid ajar for 4 minutes to evaporate moisture.
Prevention: Verify lid click before starting; never rinse rice more than 4 times.
Stop Burnt Bottoms Permanently
Why it happens: Rice grains stuck to pot base or heating element residue.
Fix: After cooking, wipe the base unit’s heating plate with a damp microfiber cloth—never dry.
Prevention: Rinse inner pot immediately after serving; never let cooked rice sit >1 hour.
Shorten Long Cooking Times
Why it happens: Steam vent obstruction or low voltage.
Fix: Clear vent hole with toothpick; plug cooker directly into wall (not power strip).
Prevention: Run a vinegar-water cycle monthly to clear mineral deposits.
Clean Your Tatung in 5 Minutes Daily
Target the Steam Vent’s Hidden Clog Zone
Soak the lid’s steam valve in warm vinegar for 2 minutes after each use. Use a cotton swab to dislodge starch buildup inside the vent channel—this is where 90% of performance issues originate. Rinse thoroughly before reassembling.
Protect the Non-Stick Coating
Wash the inner pot with a soft sponge (no steel wool) and mild soap. For stubborn residue, fill with 2 cups water + 1 tbsp baking soda, boil for 3 minutes, then wipe clean. Never use abrasive cleaners—they scratch the coating, causing future sticking.
Dry Components Correctly to Prevent Mold
After washing, place the lid upside-down on the base unit with a towel underneath. This allows air circulation through the steam vent slot—moisture trapped here breeds mold within 48 hours. Store the spatula inside the dry pot to avoid counter clutter.
Master these steps once, and your Tatung rice cooker becomes an effortless kitchen ally. The difference between mediocre and magnificent rice hinges on three critical actions: using the calibrated cup religiously, rinsing precisely four times, and honoring the 7-minute rest period. Within two weeks of applying these techniques, you’ll consistently produce rice with distinct, springy grains that hold sauces perfectly. Remember—your Tatung rewards discipline with perfection. Measure, rinse, rest, and never skip the tap test on your inner pot placement. For continued flawless results, descale monthly with the vinegar method described in the cleaning section. Now go make that perfect pot of rice—you’ve earned it.


