
That gleaming Cuckoo rice cooker on your counter isn’t just another appliance—it’s engineered precision designed to eliminate rice failures forever. If you’ve ever battled mushy jasmine rice or crunchy brown grains, this Korean-engineered marvel uses smart sensors and pressure control to deliver restaurant-quality results consistently. You’ll unlock everything from fluffy weekday white rice to nutrient-boosted GABA brown rice, plus hidden functions that transform it into a steamer and slow cooker. Let’s turn you into a Cuckoo expert before your next meal.
Pre-Use Setup Essentials

Unboxing and First Inspection
Remove every scrap of packaging film—including that nearly invisible sticker inside the lid chamber. Your Cuckoo arrives with five critical accessories: the 180ml rice cup (non-negotiable for accurate ratios), non-scratch spatula, stainless steel steam plate, condensation collector, and user manual. Run your finger along the inner pot’s non-stick coating; any imperfections mean immediate exchange since this surface contacts your food daily. Wash all removable parts in warm soapy water to eliminate factory residues before first use.
Inner Pot Alignment Check
The inner pot must sit completely flush against the heating plate—no wobbling allowed. Those water level markings are calibrated to the included 180ml cup, not standard kitchen measures. Critical step: After washing, invert the pot for 30 seconds to drain all moisture from the exterior. Any water droplets here cause steam burns and disrupt sensor readings. Always dry the pot thoroughly before insertion to prevent electrical hazards.
Power Positioning Rules
Place your Cuckoo on heat-resistant countertops with 6+ inches clearance around all sides. That steam vent requires unobstructed airflow—cabinets directly above cause condensation damage. Plug directly into a wall outlet using only the provided cord; extension cords risk voltage drops that trigger error codes. Never position near sinks or stovetops where splashes could contact electrical components.
Perfect Rice Measurement
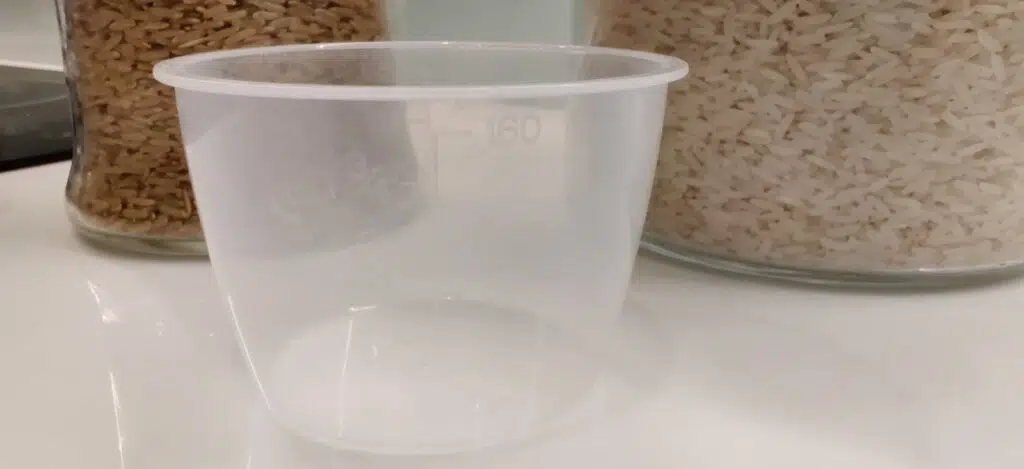
Master the 180ml Cup
Your kitchen measuring cups lie. The included 180ml cup is your new standard—every marking on the inner pot references this exact volume. Level measurements by scraping a straight edge across the cup’s rim; rounded scoops throw off ratios. Serving reality check: 1 cup uncooked rice yields 2 generous servings, 2 cups serve 4 adults, and 3 cups make 6 side-dish portions. Never exceed the max line (varies by model—typically 6-10 cups).
Rice Washing Technique
Wash rice in a separate bowl—never directly in the inner pot to protect its non-stick coating. Cover with cold water, swirl gently for 15 seconds, then pour off cloudy starch water. Repeat 2-3 times until water runs mostly clear. Pro tip: For sushi rice, stop after the second rinse—slightly cloudy water enhances stickiness. Always drain washed rice completely before transferring to the pot.
Water Ratio Mastery
Precision ratios transform good rice into perfect rice:
– White rice: 1:1 ratio (1 cup water per cup rice)
– Brown rice: 1:1.25 (extra 25% water for bran hydration)
– Sushi rice: 1:1.1 (slightly more for ideal stickiness)
– Basmati/Jasmine: 1:1 (these varieties need less moisture)
– Glutinous: 1:0.9 (firmer texture for desserts)
Control Panel Navigation

Display Decoded
Your LCD screen tells the complete story—selected function, cooking countdown, and safety indicators. The Menu button cycles through rice types; each selection automatically adjusts temperature, pressure, and duration. Key buttons explained:
– Pressure/Turbo: Cuts cooking time 25-30% (ideal for white rice)
– Keep Warm: Maintains 140-150°F up to 24 hours
– Timer: Delays cooking up to 12 hours (e.g., set at 8 AM for 6 PM dinner)
– Cancel: Emergency stop for error code resets
Function Selection Flow
Press Menu until your rice type appears—”Glutinous” for white rice, “Brown” for whole grain, “GABA” for enzyme-activated brown rice. Confirm with Start/Cook; the display shows exact cooking time. Pressure vs conventional: Beginners start with conventional mode; pressure cooking rewards experienced users with stickier results in less time. Always close the lid until it audibly clicks to prevent error codes.
Step-by-Step Cooking Process
Basic White Rice Method
- Measure rice using the 180ml cup (max 6 cups)
- Wash in separate bowl until water runs clear
- Transfer to inner pot, add water to matching line
- Wipe pot exterior dry—critical for safety
- Close lid until it clicks securely
- Select “Glutinous” function
- Press Pressure button for faster cooking
- Hit Start—display counts down automatically
- Natural pressure release occurs (steam valve drops when safe)
Total time: 18 minutes with pressure mode
Brown Rice Perfection
Brown rice demands patience—45-55 minutes total. Soak for 30 minutes (optional but recommended) to soften the bran layer. Select “Brown Rice” function; the cooker automatically extends cooking time. Never open early—brown rice needs that final 15-20 minute steam rest. Results: tender grains with nutty flavor every time.
GABA Brown Rice Activation
This 2-3 hour cycle boosts nutritional value by activating enzymes. Select “GABA” mode—the cooker maintains 104°F for enzyme activation before cooking. Benefits: 150% more gamma-aminobutyric acid and softer texture than regular brown rice. Ideal for health-focused meals.
Advanced Functions Explained

Beyond Rice Cooking
Your Cuckoo doubles as multiple appliances:
– Steam mode: Place vegetables or fish on included plate (20 minutes)
– Soup function: Slow-cook broths at controlled temperatures
– Bread proofing: Maintains 82-86°F for perfect dough rising
– Porridge setting: Creates creamy steel-cut oats in 30 minutes
Timer Magic
Want fresh rice at 6 PM? At 8 AM, load ingredients and set 10-hour delay. The cooker calculates automatically—just ensure rice stays submerged in water. Warning: Never use timer for brown rice—it requires soaking time the timer can’t accommodate.
Keep Warm Mastery
Automatically activates post-cooking. Quality peaks within 12 hours, remains acceptable for 24. For large batches, stir gently after cooking to redistribute moisture. Avoid opening the lid frequently—this drops internal temperature and dries out rice.
Cleaning Made Simple
Daily 5-Minute Routine
After cooking, unplug and cool 30-45 minutes. Remove inner pot for soapy water cleaning—never use abrasive scrubbers. Critical step: Wipe the heating plate with a damp cloth; stray rice grains cause burnt flavors in the next batch. Empty the condensation collector—it fills faster than expected.
Replacement Signals
Replace the sealing ring every 12-18 months or when odors persist after cleaning. Inner pot replacement becomes necessary when non-stick coating shows significant scratches affecting food release. Steam vent caps should be replaced if cracked or leaking steam.
Troubleshooting Common Issues
Rice Quality Fixes
- Too wet: Reduce water 2-3 tablespoons next batch
- Too dry: Increase water slightly or check pot seating
- Burnt bottom: Clean heating plate thoroughly and ensure pot sits flush
- Undercooked center: Verify water ratios and proper lid closure
Error Code Solutions
- E01: Lid not sealed—open and reclose firmly
- E02: Temperature sensor hiccup—unplug 30 minutes, restart
- E03: Overheating—remove food debris from heating plate
- E04: Pressure system—check vent cap installation
Safety Protocols
Pressure Release Rules
Never force the lid open—wait for the pressure indicator to drop completely. Keep face and hands away from steam vents during release. When opening, angle the lid away from your body to avoid steam burns. The cooker automatically locks during pressure buildup—never tamper with safety mechanisms.
Optimization Hacks
Weeknight Efficiency
Pre-measure rice and water the night before, storing separately in the refrigerator. Use timer function for fresh rice at dinner time. Leftover rice reheats perfectly with 1-2 tablespoons water per cup using the reheat function. Freeze portions in meal-sized bags for up to 3 months.
Specialty Grain Guide
- Quinoa: “White” function, 1:1.5 ratio, 25 minutes
- Steel-cut oats: “Porridge” function, 1:3 ratio, 30 minutes
- Lentils: “Multi-cook” high pressure, 1:2 ratio, 15 minutes
- Wild rice: “Mixed” function, 1:2 ratio, 65 minutes
Your Cuckoo rice cooker rewards precision—measure correctly, clean religiously, and trust the programmed functions. Start with basic white rice today, then graduate to GABA brown rice activation this weekend. Perfect rice isn’t just possible—it’s guaranteed when you know how to use cuckoo rice cooker properly. Within days, you’ll instinctively adjust ratios for different grains, and that timer function will become your meal-planning secret weapon. The path to flawless rice begins with your first perfectly cooked batch.


